Remote Access VPN
The Remote Access VPN feature in the Cloud Management Portal enables users to securely connect to their isolated network using encrypted VPN tunnels over the internet. This functionality is essential for remote administrators, developers, or IT teams who need access to virtual machines (VMs) and services within a private cloud network.
This guide walks you through the steps required to enable, configure, and connect to a Remote Access VPN using the default Source NAT Public IP associated with your isolated network.
What is Remote Access VPN?
Remote Access VPN (Virtual Private Network) is a secure method that allows individual users (typically employees, developers, or administrators) to connect to a private cloud or on-premise network over the internet as if they were physically present inside that network.
When using a Remote Access VPN, the user's computer (client) forms an encrypted tunnel to the cloud or enterprise network (VPN server), allowing access to internal resources—like virtual machines (VMs), databases, or internal applications—without directly exposing them to the public internet.
Why is Remote Access VPN Used?
Remote Access VPN is commonly used for:
-
Secure remote access: Enables work-from-anywhere connectivity without compromising security.
-
Encrypted communication: Protects data in transit between the user’s device and the internal network.
-
Access control: Allows the organization to manage who can access the internal network and under what conditions.
-
Resource privacy: Internal resources remain unreachable from the public internet unless accessed via VPN.
How Remote Access VPN Works
1. VPN Server Setup
- In a cloud environment , the VPN server is usually tied to a Source NAT public IP address. Once VPN is enabled on this IP, it acts as the gateway for all VPN connections.
2. VPN Protocols
Remote VPN typically uses a protocol stack like:
-
L2TP (Layer 2 Tunneling Protocol): Encapsulates user data.
-
IPsec (Internet Protocol Security): Encrypts the data, ensuring privacy and security.
Together, L2TP over IPsec is a common combination for secure VPN tunnels.
3. User Authentication
Before a connection is established, the user must provide:
-
VPN Username and Password
-
Pre-Shared Key (PSK): A secret key shared between the client and server for IPsec encryption
Authentication ensures that only authorized users can connect to the private network.
4. Establishing the Tunnel
Once credentials are validated:
-
A secure encrypted tunnel is established between the user’s device and the VPN server.
-
The user’s IP address is replaced by a virtual IP address inside the private network (or traffic is routed via the Source NAT IP).
5. Accessing Internal Resources
Through this tunnel, the user can:
-
RDP/SSH into virtual machines
-
Connect to internal apps or databases
-
Use private APIs
As if they were on the same subnet or VLAN as the internal services.
6. Traffic Flow
All traffic (or selected traffic depending on the VPN configuration) is:
-
Encrypted on the user’s device
-
Sent through the public internet
-
Decrypted at the cloud VPN gateway
-
Forwarded to internal destinations
Prerequisites
-
The network must have a default Source NAT IP, automatically assigned during network creation.
-
Remote Access VPN is supported only on Source NAT IPs, not on Static NAT IPs.
-
Ensure firewall rules are configured properly to allow VPN traffic (UDP 500 and UDP 4500).
1. Accessing the Basic Network Section :
-
Log in to your Cloud Management Portal using your authorized credentials.
-
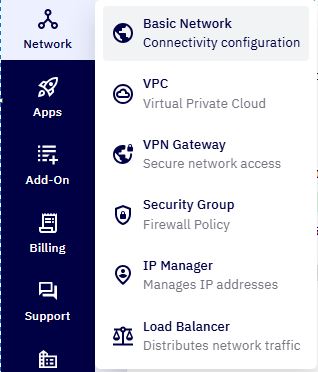
From the left navigation pane, go to:
Network → Basic Network
- You will see a list of all existing networks associated with your cloud account.
2. Select the Target Network :
- Identify the isolated network where you want to enable Remote Access VPN, and click on its name to open the configuration page.
3. Choose the Source NAT IP :
-
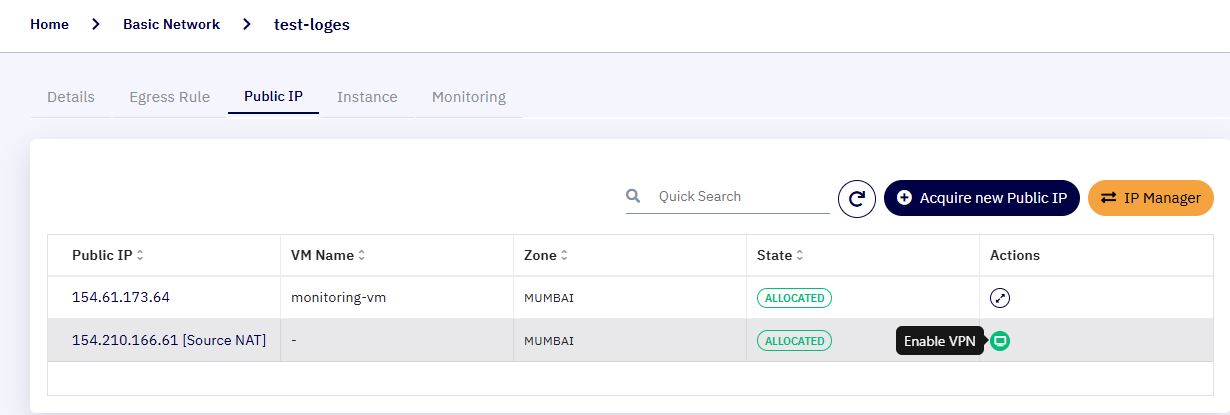
Click the Public IP tab. You will see all public IP addresses attached to this network.
-
Locate the default Source NAT IP (typically the first IP acquired with the network).
Note: Remote Access VPN can only be enabled on this Source NAT IP.
4. Enable Remote VPN :
- In the Actions column for this IP, click Enable VPN.
-
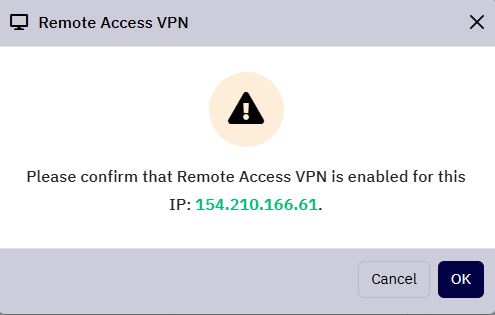
A confirmation popup appears:
"Please confirm that Remote Access VPN is enabled for this IP:<Source NAT IP>?" -
Click OK to proceed or Cancel to abort.
5. View VPN Configuration Details :
-
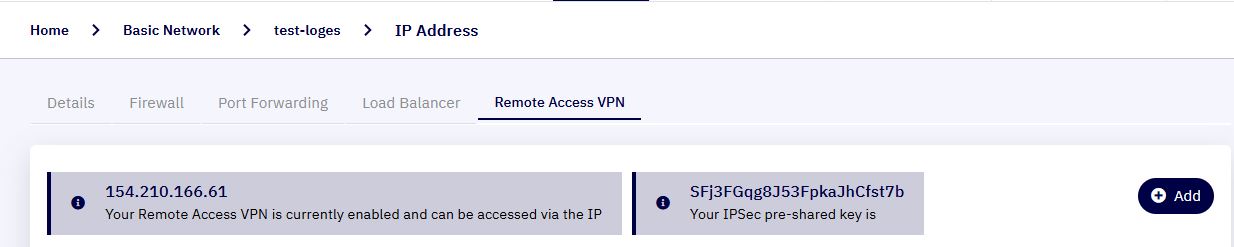
After enabling VPN, You will be redirected to the Remote Access VPN configuration page. If not, click the Source NAT IP again, then select the Remote Access VPN tab.
-
Here, you’ll find the Pre-Shared Key (PSK) automatically generated for this VPN connection.
Note: Make a note of the Pre-Shared Key — it will be required during client setup.
6. Create VPN Users :
-
In the Remote Access VPN tab, click the Add button.
-
In the popup window, enter Username and Password
-
Click OK to create the user.
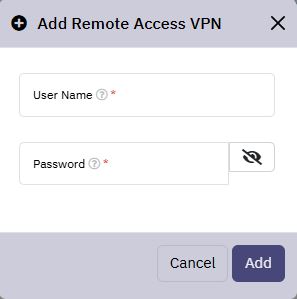
- The user will now appear in the VPN user list.
Connecting to the VPN from a Client Machine
Required Information:
-
Server Address: The public IP shown after enabling VPN (your Source NAT IP)
-
Username / Password: Set while creating the VPN user
-
Pre-Shared Key: Shown during VPN setup
Windows 8, 10, and 11 :
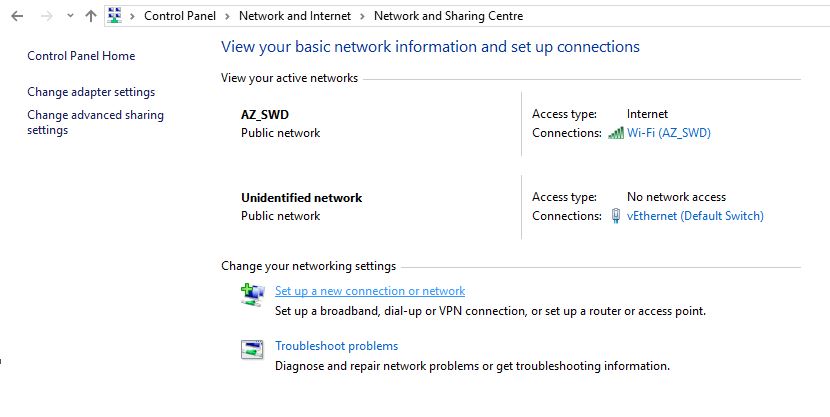
1. Accessing Network Center :
-
Login into your windows client machine.
-
Go to:
Control Panel > Network and Sharing Center > Set up a new connection or network
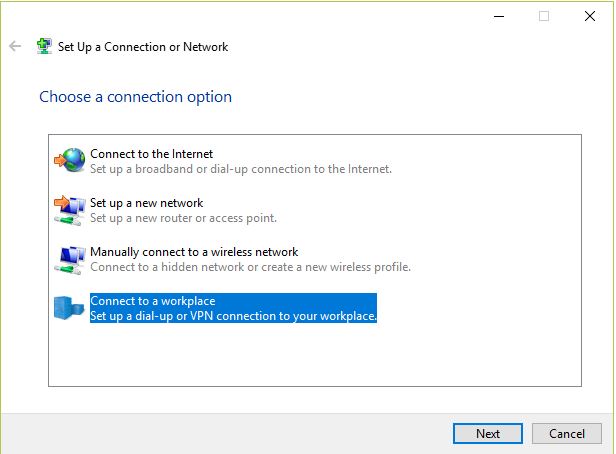
2. Creating VPN Connection :
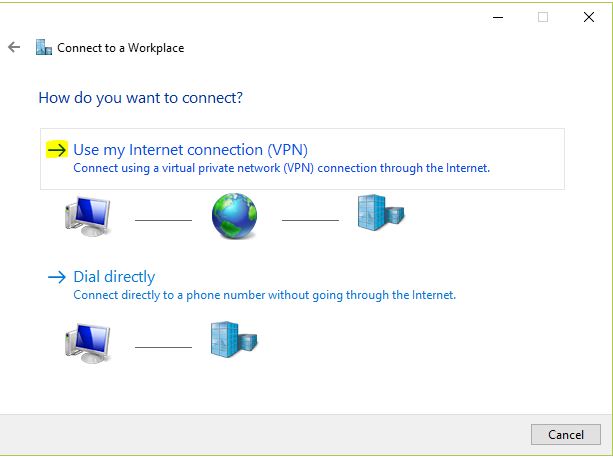
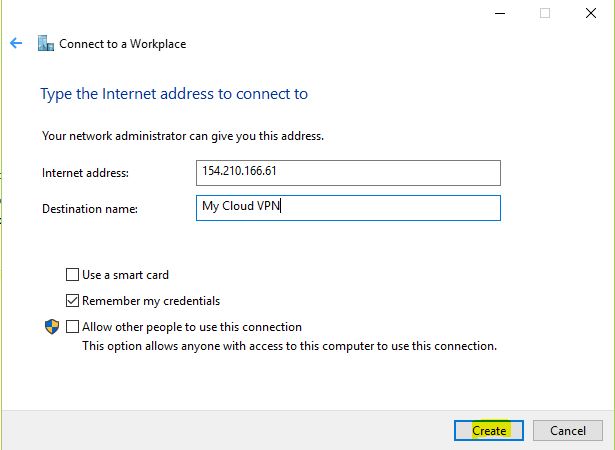
- Connect to a workplace > Use my Internet connection (VPN)
-
Enter the following:
-
Internet Address: Source NAT Public IP (e.g.,
203.0.113.12) -
Destination Name: (Any label, e.g., “My Cloud VPN”)
-
Click Create
-
3. Configure VPN Connection :
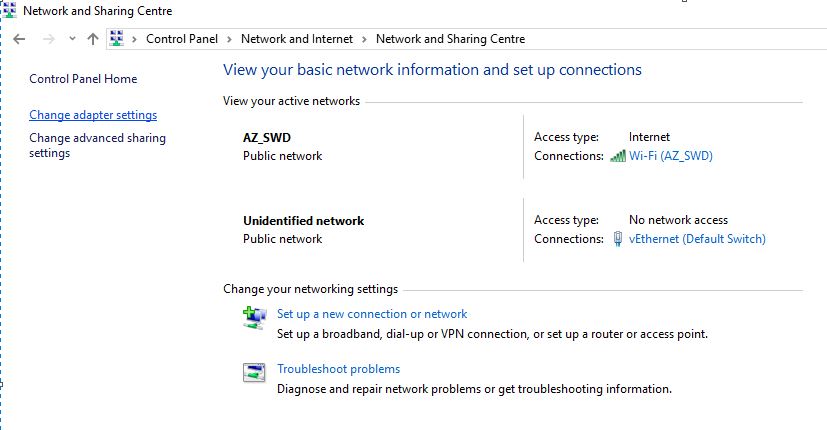
- Navigate to:
Network and Sharing Center > Change adapter settings
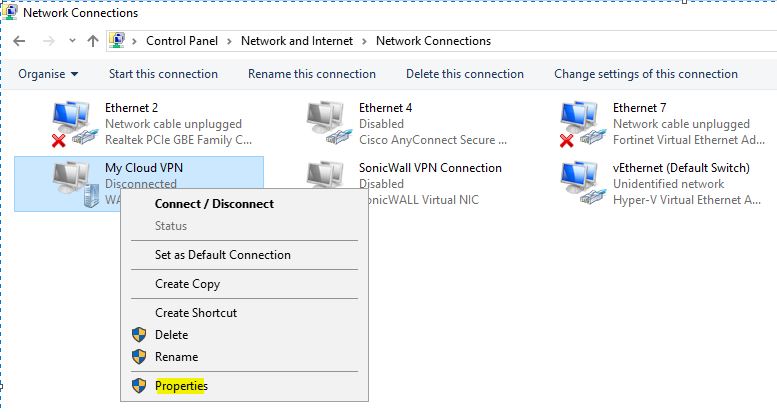
- Right-click the new VPN connection → Select Properties
-
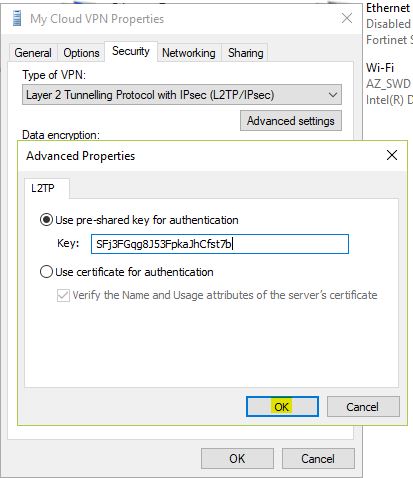
Go to the Security tab and configure:
-
Type of VPN:
L2TP/IPsec -
Data encryption:
Require encryption (disconnect if server declines) -
Authentication: Select
Allow these protocols, and checkMicrosoft CHAP Version 2 (MS-CHAP v2)
-

-
Click Advanced Settings, then:
-
Under the L2TP tab, choose
Use pre-shared key for authentication -
Enter the Pre-Shared Key noted earlier
-
Click OK to close
-
4. Connect the Remote VPN :
- Save all settings and initiate the VPN connection
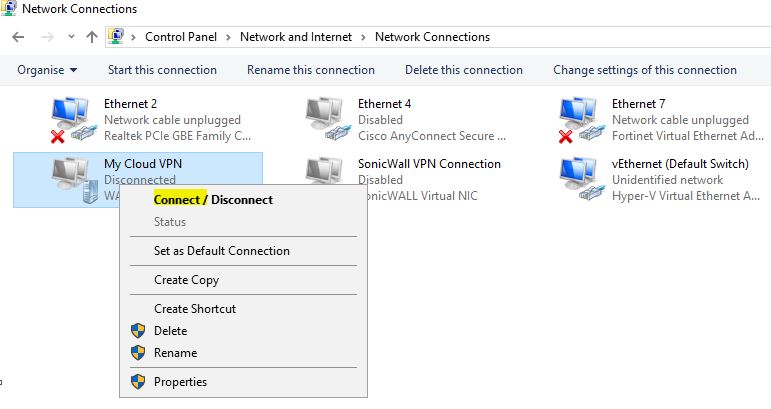

- When prompted, enter the VPN username and password you created earlier.
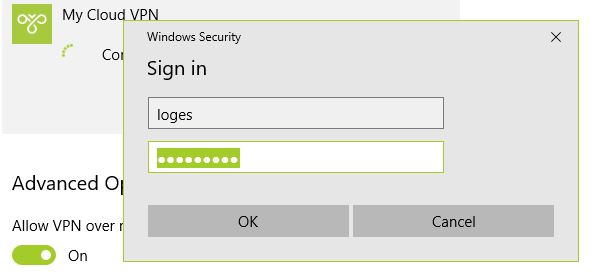
- Once validated, the VPN connection will be established.
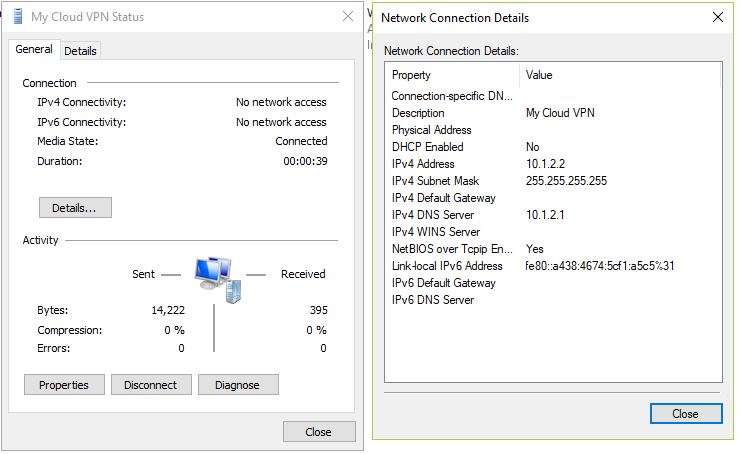
5. Access Internal Resources :
-
Once Connected, You can use Remote Desktop (RDP), SSH, or any internal tools to access VMs using their private (internal) IP addresses.
-
This is ideal for administrative operations, monitoring, debugging, or deployment tasks within the private cloud network.
For Linux Environment :
1. Install L2TP VPN Client Modules :
-
Ensure that your Linux system has support for L2TP VPN connections.
-
On Debian/Ubuntu-based systems :
sudo apt update
sudo apt install network-manager-l2tp-gnome -
On RHEL/CentOS/Fedora systems :
sudo dnf install NetworkManager-l2tp-gnome
-
-
sudo systemctl restart NetworkManager
2. Open Network Settings :
-
Go to System Settings.
-
Navigate to Network.
-
Scroll down to VPN, and click the + (Add) button to create a new VPN connection.
3. Choose VPN Type :
In the popup window:
- Select Layer 2 Tunneling Protocol (L2TP) as the VPN type.
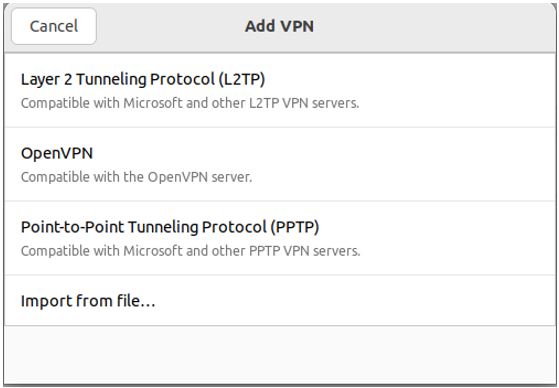
- Click Create or Add to continue.
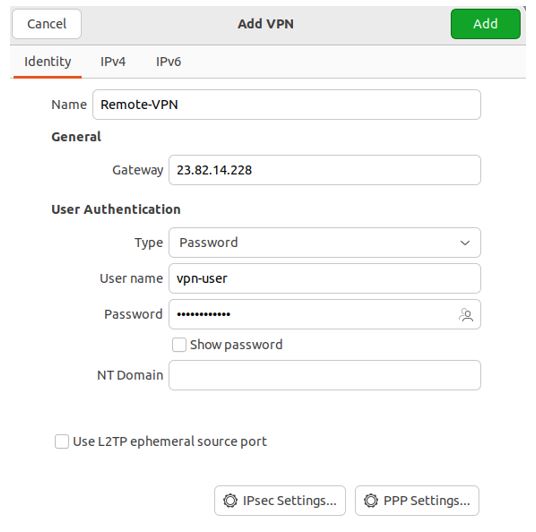
4. Configure Basic VPN Details :
In the new VPN configuration window, provide the following:
-
Gateway: Enter the Public IP address (Source NAT IP with VPN enabled).
-
Username: Enter your VPN account username.
-
Password: Enter your VPN account password.
5. Configure IPsec Pre-Shared Key :
-
Click on the IPsec Settings button.
-
In the dialog:
-
Enable the checkbox: "Use IPsec tunnel to L2TP host".
-
In the Pre-shared Key field, paste or type the key provided during VPN setup.
-
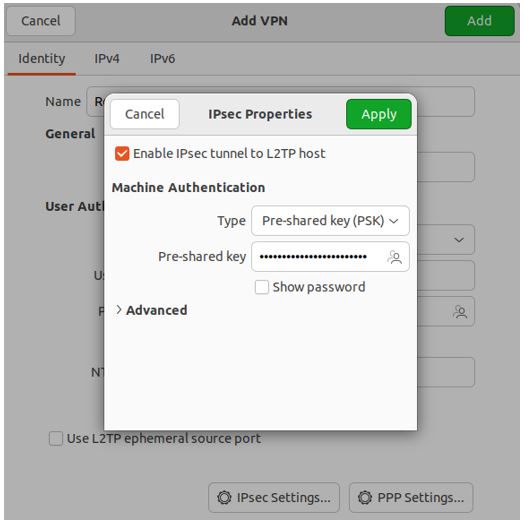
- Click OK to save IPsec settings.
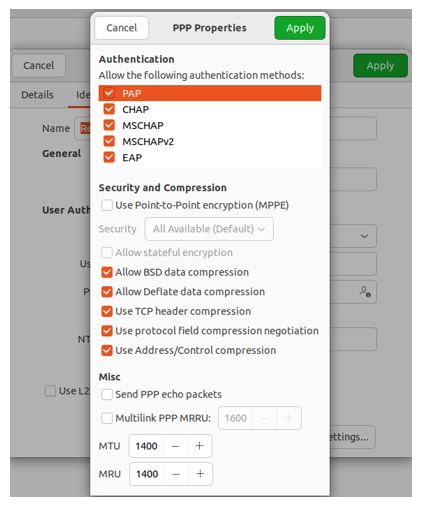
6. Verify PPP Settings :
-
Click on PPP Settings.
-
Ensure the following options are enabled:
-
Use Point-to-Point encryption (MPPE)
-
Allow BSD data compression
-
Allow Deflate data compression
-
Use TCP header compression
-
-
Click OK to save.
7. Save and Connect :
-
Click Add or Save to finish creating the VPN profile.
-
Back in the Network Settings window, your VPN connection should now appear in the list.
-
Toggle the VPN switch or click Connect to initiate the VPN connection.
8. Validate the VPN Connection :
Once connected:

-
Open a terminal and test access to your VPC instances by pinging their private/internal IP addresses.
-
If successful, you now have a secure tunnel into your cloud network and can access internal services as if you were on the same local network.
Additional Information
| S. No | Feature | Description |
|---|---|---|
| 1 | Security | VPN traffic is encrypted using IPsec, ensuring safe transmission over the internet. |
| 2 | One VPN per network | Only one Remote Access VPN can be enabled per isolated network (via the Source NAT IP). |
| 3 | User Management | You can add multiple VPN users for shared access, each with unique credentials. |
| 4 | Protocol Support | L2TP over IPsec is the supported connection method. |
| 5 | Client Compatibility | Supported on Windows, macOS, Linux, and most mobile operating systems with VPN support. |