Load Balancer
The Load Balancer feature in the Cloud Management Portal allows users to distribute incoming traffic across multiple virtual machines (VMs) within an isolated network. This ensures high availability and efficient utilization of resources by balancing client requests across backend services.
This section provides detailed instructions on how to access and configure load balancing rules using the Source NAT public IP address assigned to your network.
What is a Load Balancer ?
A load balancer enables the distribution of incoming network or application traffic across multiple VMs within the same network. It is typically associated with a Source NAT public IP and works by defining a rule to route traffic to selected backend instances based on the configured algorithm and port settings.
Note: Load balancing is only supported on Source NAT public IPs. If a public IP is configured as Static NAT, load balancer options will be unavailable.
Use Cases for Load Balancing :
-
Distribute web traffic across a pool of web servers.
-
Enhance availability of services by reducing the load on individual instances.
-
Automatically route traffic away from unavailable or overloaded VMs.
1. Accessing the Basic Network Section :
-
Log in to your Cloud Management Portal using your authorized credentials.
-
From the left navigation pane, go to:
Network → Basic Network

- You will see a list of all existing networks associated with your cloud account.
2. Select a Network :
-
Identify the network where you want to configure the load balancer.
-
Click on the network name to open the configuration page.
3. Access the Public IP Configuration :
-
On the network details page, click on the Public IP tab.
-
This section displays all public IP addresses assigned to the selected network.
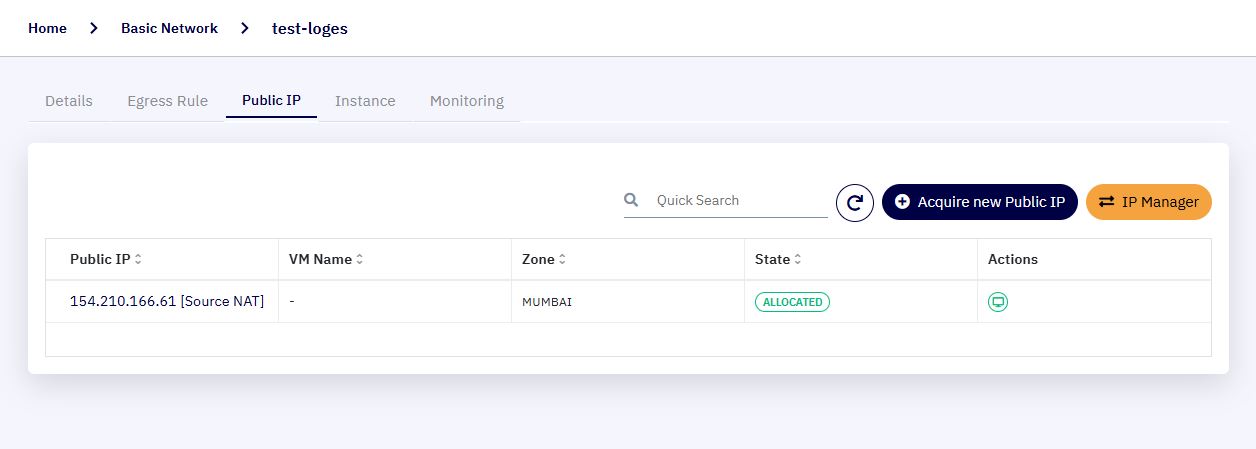
Note: You must select a Source NAT IP. Load balancer functionality is not available for Static NAT IPs.
4. Open the Load Balancer Tab :
-
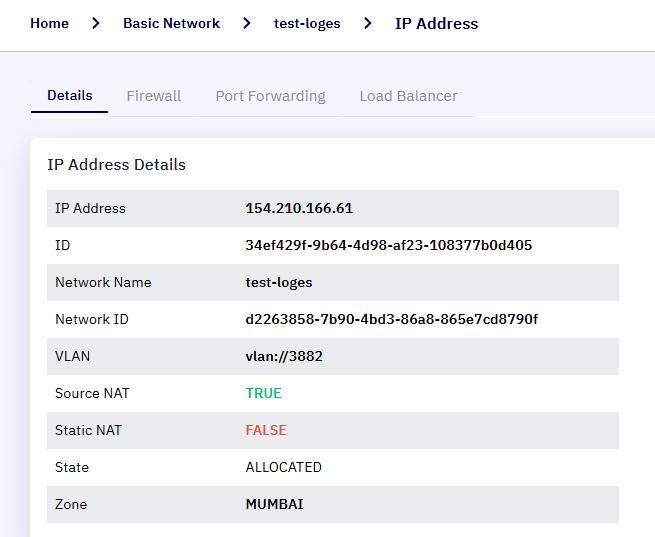
Click on the Source NAT IP you want to use for load balancing.
-
This will open the IP Configuration page.
-
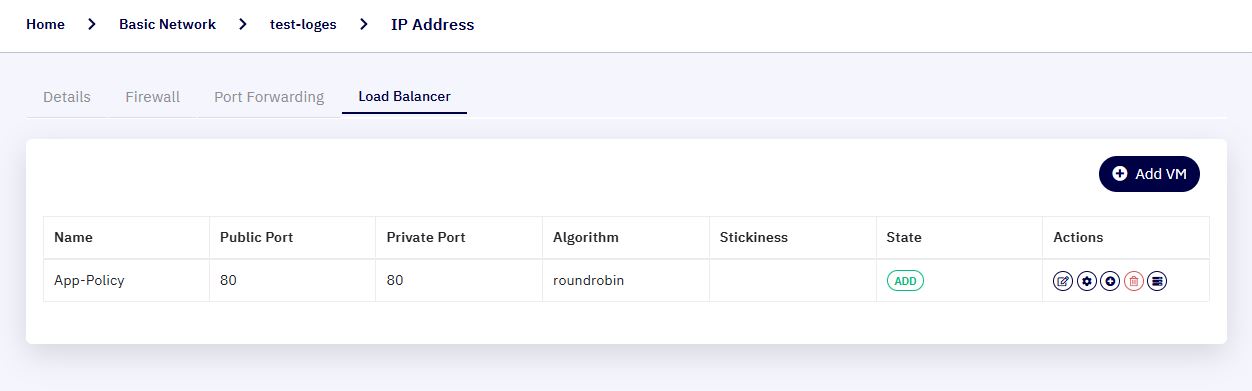
Click on the Load Balancer tab to view or manage existing load balancer rules.
5. Add a Load Balancer Rule :
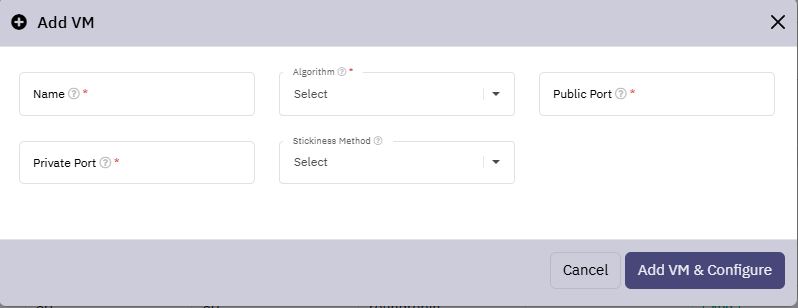
- Click the "Add VM" button to initiate the setup process.
-
A popup window will appear prompting you to provide the following configuration details:
-
Load Balancer Name : A descriptive name to identify the load balancer rule.
-
Algorithm : The method used to distribute traffic:
- Round Robin – Distributes requests sequentially.
- Least Connection – Routes traffic to the VM with the fewest active connections.
- Source – Directs requests from the same client IP to the same VM.
-
Public Port : The port on the Source NAT public IP that will receive external requests (e.g., 80 for HTTP).
-
Private Port : The internal port on the VM that will handle the traffic (e.g., 8080).
-
Stickiness Method : (optional) - Session persistence options (if required):
- None – No persistence.
- Source-based – Uses client IP to maintain session affinity.
- App Cookie – Based on application-defined cookie.
- LB Cookie – Based on a cookie set by the load balancer.
-
-
Once all required fields are filled, click "Add VM & Configure" to proceed.
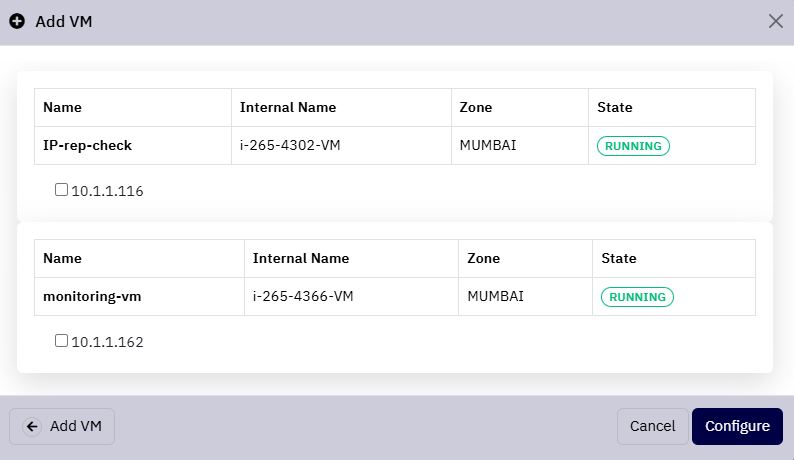
6. Select Virtual Machines :
-
After submitting the rule, you will be directed to a list of virtual machines in the selected network.
-
Choose the VM(s) to which this rule should apply by selecting them.
-
Click the "Configure" button to finalize the rule setup.
7. Managing Load Balancer Rules :
-
Once a rule is created, it will appear in the Load Balancer list under the selected Source NAT IP.
-
View Details: Review rule name, algorithm, port settings, and associated VMs.
-
Delete Rule: If the rule is no longer required, click the Delete icon under the Actions section to remove it.