Assigning a VM to a Source NAT IP
In a cloud-managed isolated network, a Source NAT IP acts as a shared public IP that allows multiple virtual machines (VMs) to access external networks (e.g., the internet) and be reachable from outside when properly configured.
This section walks you through the steps required to assign a VM to a Source NAT public IP using port forwarding, allowing external clients to connect to specific services (such as RDP or SSH) hosted on your VMs.
Key Concepts
-
Source NAT IP: A shared public IP address that enables outbound internet access and can be used to expose specific ports of multiple VMs to external clients.
-
Port Forwarding: A technique used to forward requests from a specific port on the public IP to a designated port on a VM’s private IP.
-
Firewall Rules: Ensure that the required ports are open and accessible to the desired source CIDRs (e.g., the internet).
1. Accessing the Basic Network Section :
-
Log in to your Cloud Management Portal using your authorized credentials.
-
From the left navigation pane, go to:
Network → Basic Network
- You will see a list of all existing networks associated with your cloud account.
2. Select the Desired Network :
-
Identify the network to which the VM is attached and where the Source NAT IP is available.
-
Click on the network name to open the Network Configuration Page.
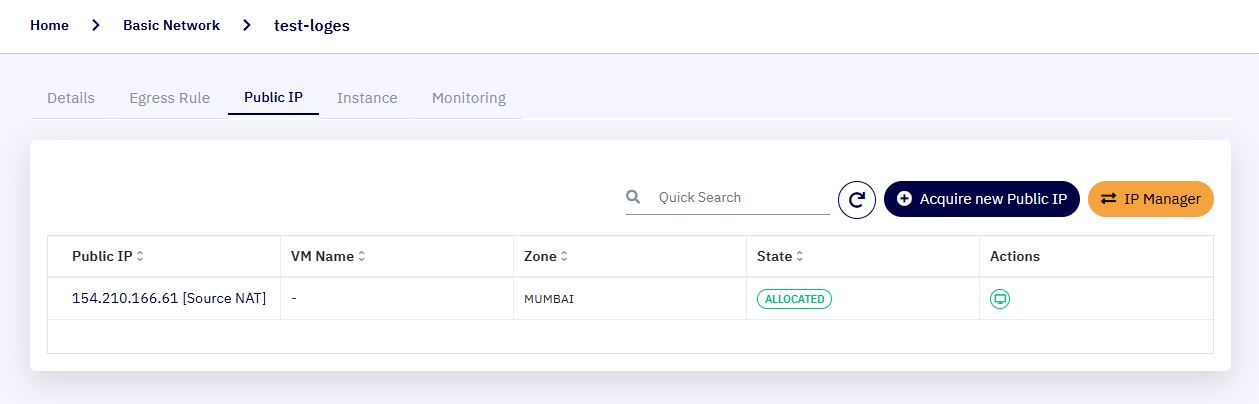
3. Access the Public IP Configuration :
-
In the network configuration page, navigate to the Public IP tab.
-
This section displays all public IPs that have been acquired under the selected network.
4. Choose the Source NAT IP :
-
Identify the Source NAT IP (typically labeled as such).
-
Click on the Source NAT IP address to open its IP Configuration Page.
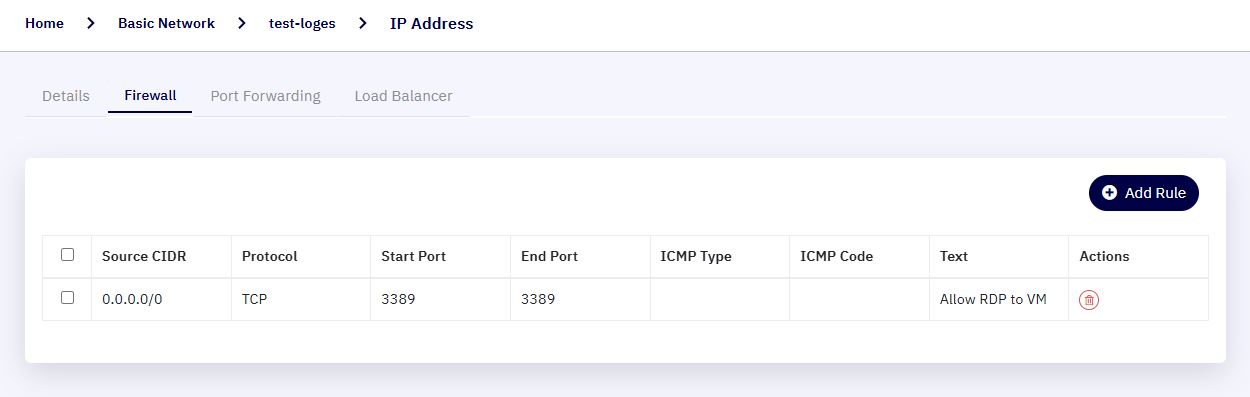
5. Validate Firewall Rules :
-
Before assigning a VM to a Source NAT IP, you must ensure the appropriate firewall rule is in place.
-
Navigate to the Firewall tab under the IP Configuration Page.
-
Click Add Rule and enter the following:
-
Source CIDR :
0.0.0.0/0(to allow access from all public IPs) -
Protocol : TCP
-
Start Port : 3389
-
End Port : 3389
-
Description : Allow RDP to VM
-
-
-
Click Add Rule to save the firewall configuration.
Note: Best Practice: Restrict Source CIDR to known IP ranges for enhanced security.
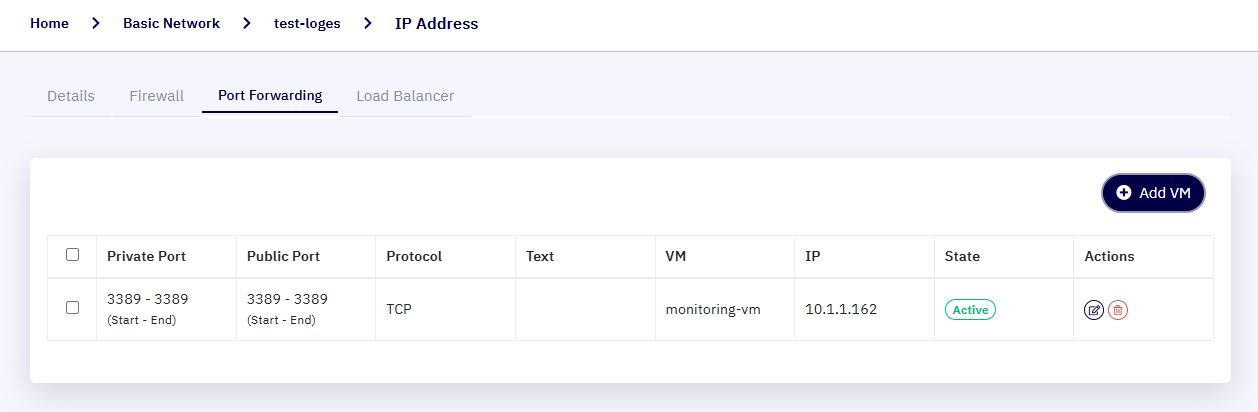
6. Configure Port Forwarding :
-
Navigate to the Port Forwarding tab under the same Source NAT IP configuration.
-
Click on Add VM.
-
In the popup form, enter the following:
-
Private Start Port : 3389
-
Private End Port : 3389
-
Public Start Port : 3389
-
Public End Port : 3389
-
Protocol : TCP
-
Description : RDP access for monitoring-vm
-
-
Click Add VM & Configure.
-
From the list of VMs displayed, select the appropriate VM (e.g.,
monitoring-vm) and click Configure.
7. Test Connectivity :
-
Use a Remote Desktop Client (RDP) to connect to the Source NAT public IP on port
3389. -
You should now be able to access the selected VM externally using the assigned port.
Using Source NAT IP with Multiple VMs
- The Source NAT IP is a shared IP. You can configure multiple VMs under the same IP by mapping different public ports to different VMs:
| S. No | Public Port | VM | Private Port |
|---|---|---|---|
| 1 | 3389 | monitoring-vm | 3389 |
| 2 | 22 | ip-rep-check | 22 |
- This is particularly useful when public IP resources are limited and cost-sensitive, as the Source NAT IP allows multi-VM access over distinct ports.