Resize Volume
The Cloud Management Portal provides users with the capability to resize both root and data volumes of virtual machines. This section outlines the steps required to successfully perform volume resizing and apply changes within your virtual environment.
Resizing a Root Volume
1. Login to the Portal :
- Access your cloud management portal with your credentials.
2. Navigate to Volumes :
- Go to:
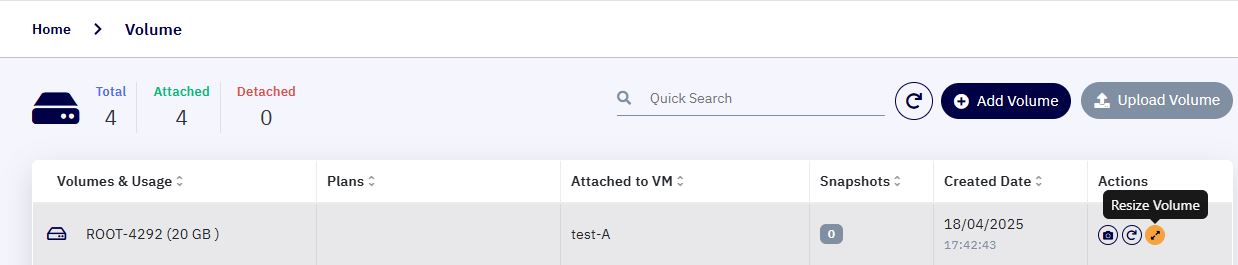
Compute > Volume. This page displays all available disks associated with your account.

3. Select the Root Disk :
- Locate the root disk you wish to resize. Click the Resize button under the Actions section.
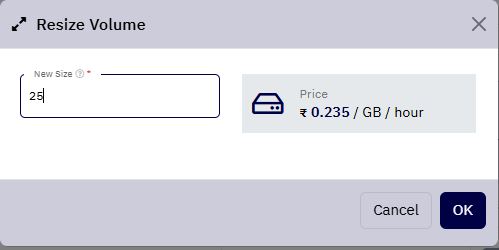
4. Specify the New Size :
-
Enter a size greater than the current size. Note: decreasing the size of the root disk is not supported.
Example: If your current root disk size is 40 GB, enter a value greater than 40 GB (e.g., 45 GB).
5. View Cost Estimate :
- The portal will display cost estimates per GB to help you make an informed decision.
6. Confirm Resize :
- Review your inputs and click OK to initiate the resizing process.
7. Post-Resize Behavior :
-
Upon rebooting the VM, the system will automatically expand the root partition.
-
If you prefer not to reboot, manual resizing of the disk within the VM will be required.
8. Verify Resize :
- Login to your VM and confirm that the new disk size has been reflected in your partitions.

Resizing a Data Volume
1. Login to the Portal :
- Access your cloud management portal.
2. Navigate to Volumes :
- Go to:
Compute > Volumeto view available volumes.
3. Select the Data Disk :
- Find the data disk to be resized and click the Resize button under the Actions section.

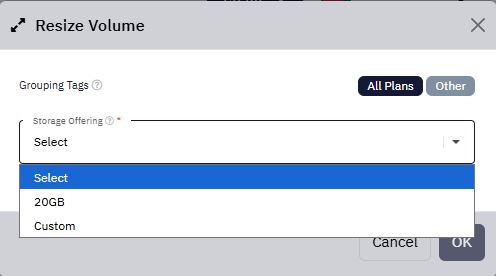
4. Choose Storage Offering :
- If storage offerings are available, choose one. Otherwise, select Custom.
5. Enter the New Size :
- Specify a size larger than the current volume.
Example: If the current disk is 10 GB, enter 15 GB.
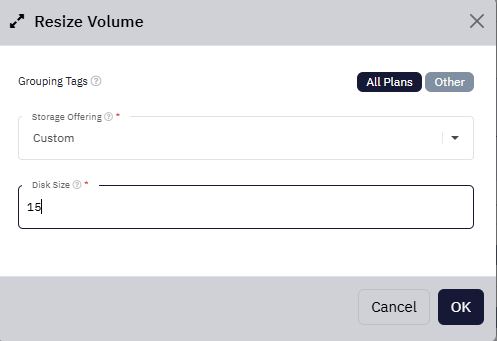
6. View Cost Estimate :
- Check the cost per GB for the new size.
7. Confirm Resize :
- Review and click OK to start the resizing process.
8. Resize Within VM :
- After the resize is complete, you’ll need to manually extend the volume inside your VM.

Manual Volume Extension (Windows)
If you're using a Windows VM:
1. Access Disk Management :
-
Login to your VM.
-
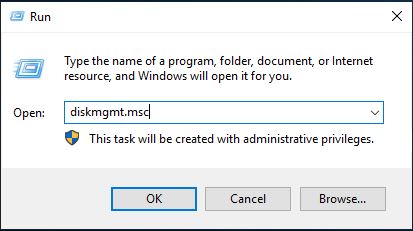
Open Run and type
diskmgmt.mscto open the Disk Management console.
2. Identify Unallocated Space :
- You’ll see the new size as unallocated.

3. Extend the Volume :
-
Right-click on the
C:drive (or any target volume). -
Click Extend Volume.

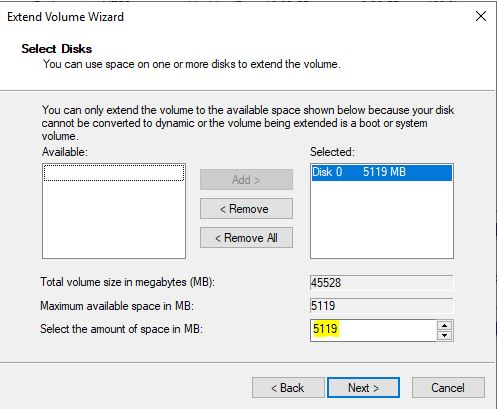
4. Complete the Wizard :
-
Follow the steps in the wizard:
- Click Next, specify the size to extend, and then click Finish.
5. Volume Ready :
- Your drive will now reflect the increased size.

Manual Volume Extension (Linux)
If you're using a Linux VM:
1. Identify the Unmounted Disk :
-
Connect to your Linux VM via SSH:
ssh root@<your-vm-ip> -
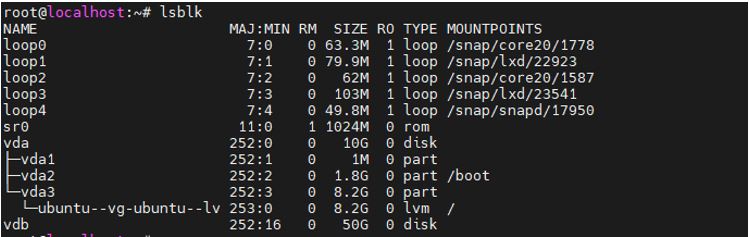
Use the
lsblkcommand to list all available block devices:lsblk

-
Identify the new unmounted disk (typically
/dev/vdbif it's the first additional disk):-
It should have no mount point listed.
-
It should be of the expected size as provisioned in the Cloud Management Portal.
-
2. Create a New Partition :
-
Start the partitioning tool for the new disk
fdisk /dev/vdbInside the
fdiskutility, use the following sequence of options:Command Description nCreate a new partition pMake it a primary partition tChange partition type (Optional if using LVM) 8e(Optional) Use this for Linux LVM setups wWrite changes and exit
- Once complete, the new partition will be available as
/dev/vdb1.
3. Format the Partition :
-
Format the new partition with the ext4 file system
mkfs.ext4 /dev/vdb1
4. Create a Mount Point and Mount the Partition :
-
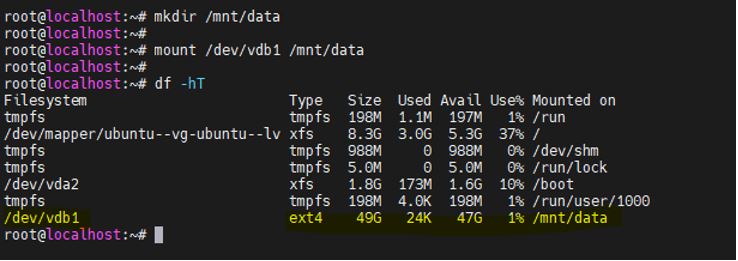
Create a directory to serve as the mount point
mkdir /mnt/data -
Mount the partition to the new directory.
mount /dev/vdb1 /mnt/data -
Verify the partition is successfully mounted.
df -hT
5. Make the Mount Persistent (Add to fstab)
To ensure the partition remains mounted after reboot, update the /etc/fstab file.
-
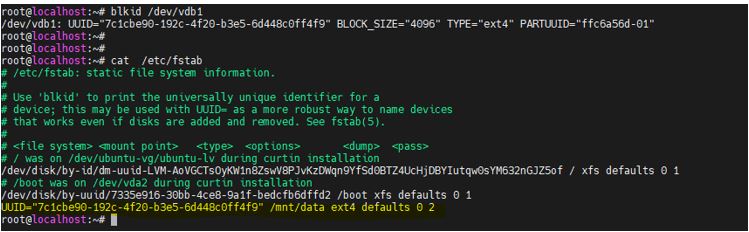
Retrieve the UUID of the partition
blkid /dev/vdb1Example output:
/dev/vdb1: UUID="d9f41fd4-12f7-4e82-b9d3-5a1234567890" TYPE="ext4" -
Open the fstab file in an editor
nano /etc/fstab -
Add the following line at the bottom of the file
UUID=d9f41fd4-12f7-4e82-b9d3-5a1234567890 /mnt/data ext4 defaults 0 2Note: Replace the UUID with the one obtained from your
blkidoutput.
- Save and close the file.
6. Verify Configuration and Reboot :
-
Test the configuration for errors
sudo mount -a -
If no errors are returned, the configuration is valid.
-
Reboot the VM
sudo reboot -
After reboot, confirm that the disk has been automatically mounted.
df -h
Important Notes
-
Resizing a volume is only supported for increasing the size.
-
For root volumes, rebooting is optional but recommended for automatic extension.
-
Always ensure that you’ve backed up critical data before modifying disk configurations.