Add Volume
This section provides a comprehensive guide on how to create and manage block storage volumes in the Cloud Management Portal. These volumes can be used as persistent storage for virtual machines (VMs), supporting both root and additional data disks.
1. Access the Volume Management Section :
-
Log in to your Cloud Management Portal.
-
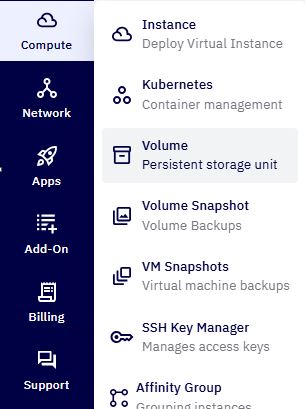
From the left navigation menu, go to Compute > Volume.
-
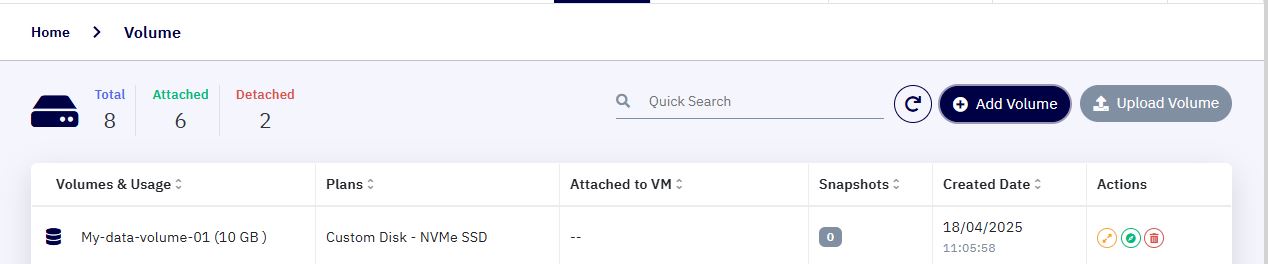
This section displays a list of all volumes created under your account.
2. Initiate Volume Creation :
-
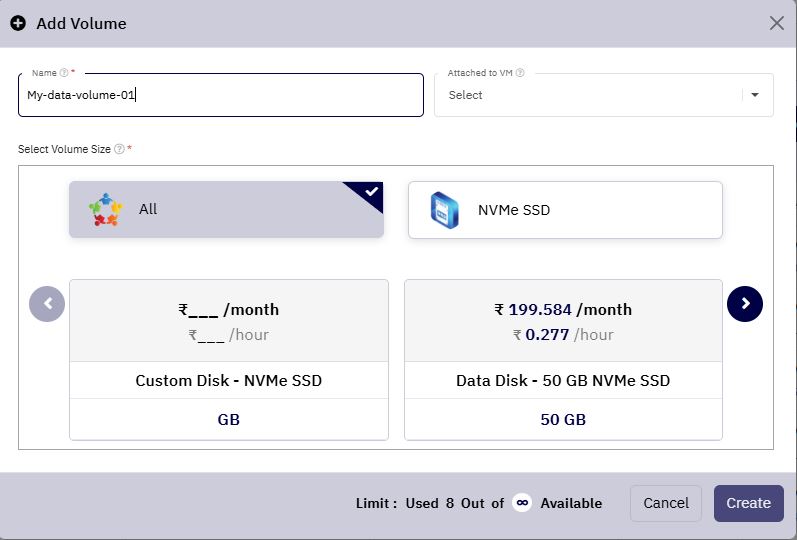
Click on the Add Volume button located at the top-right corner of the volume page.
-
This will launch a popup window with configuration options for the new volume.

3. Configure Volume Settings :
In the volume creation form, provide the following details:
-
Volume Name:
Enter a unique and identifiable name for the volume. This helps you recognize it later during attachment or management. -
Attach to VM (Optional):
If desired, select a VM from the dropdown to which the volume should be attached upon creation.Note: This step is optional. You can also create a standalone volume and attach it to a VM at a later time.
-
Volume Size:
Choose the desired size for the volume from the available Storage Offerings. Each offering may vary in performance and pricing. Select the one that meets your workload requirements.
4. Check Available Quota :
- The popup will also display your current volume quota status—ensuring you have enough remaining allocation to create the requested volume size.
5. Review and Create :
-
Double-check all configuration settings entered.
-
Once confirmed, click the Create button to initiate volume provisioning.
6. Confirmation :
- Upon successful creation, the newly created volume will appear in the volume list with its associated details such as size, status, and attachment state.