What's New
In the provided below document, StackBill CMP users can explore the most recent release in StackBill CMP.
Stackbill's Native Helpdesk

In the dynamic landscape of the public cloud service industry, customer support plays a pivotal role in nurturing a strong customer-provider relationship. Acknowledging the significance of a robust helpdesk, Stackbill CMP has introduced its own integrated helpdesk, empowering cloud tenants to seamlessly communicate with their cloud providers through the user portal.
The StackBill helpdesk acts as a bridge, connecting tenants cloud requirements with the expertise of cloud admins, who are dedicated to understanding and delivering effective solutions promptly and efficiently.
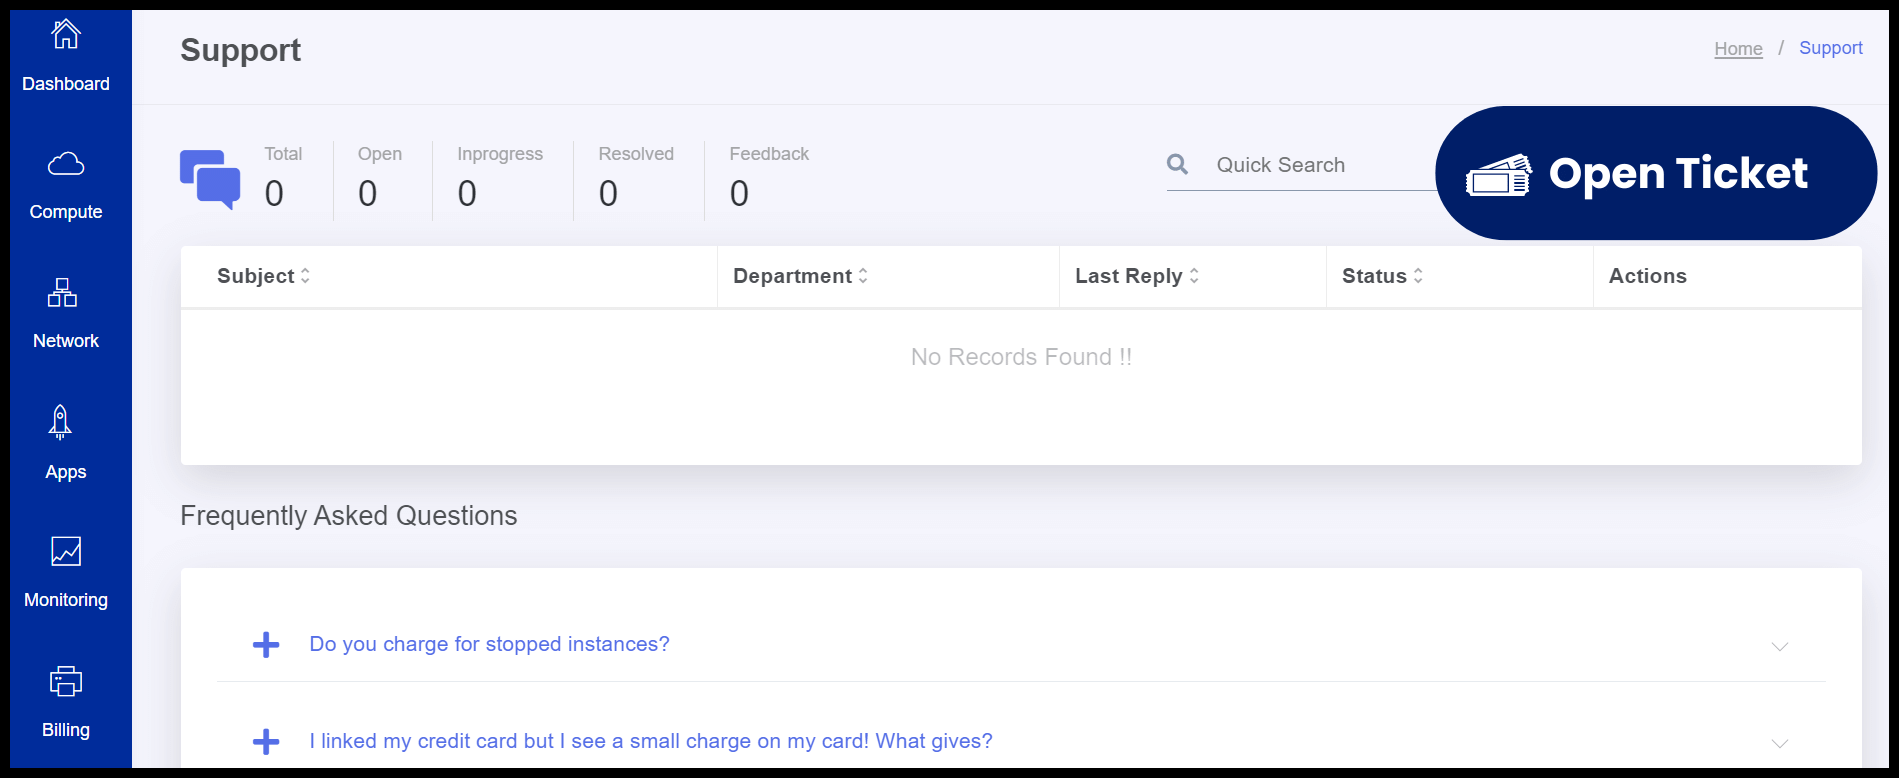
Through the helpdesk, tenants can effortlessly raise support issues with the cloud provider and even attach relevant documents and screenshots to expedite problem resolution. Moreover, tenants can stay updated with email notifications when the support team responds to their requests.
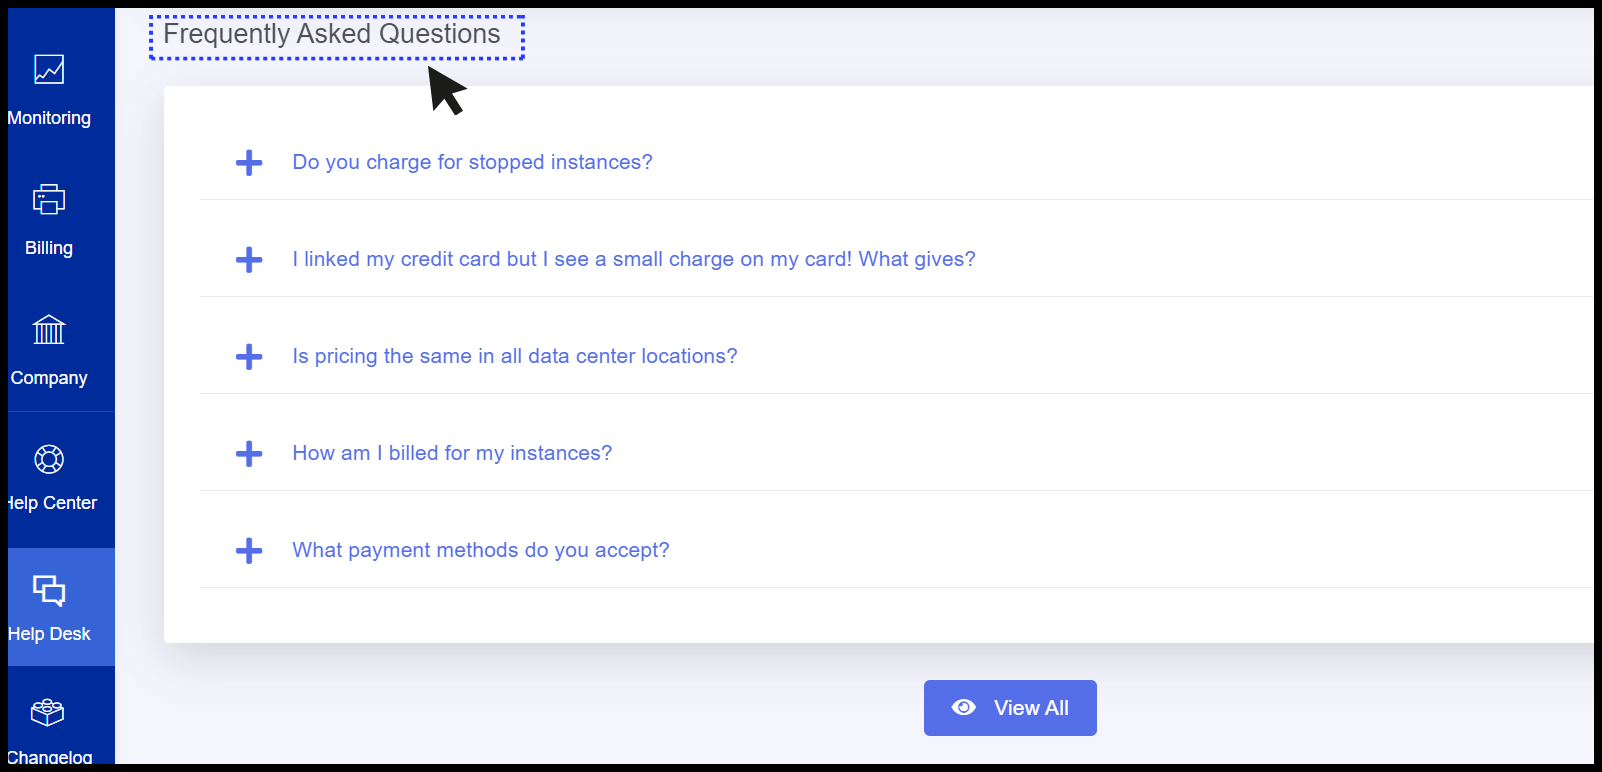
Taking self-help to the next level, tenants can also leverage the Knowledgebase and FAQs to resolve common issues independently before seeking further assistance from the customer support team. This approach enables tenants to address basic problems on their own and reach out to support only when necessary, fostering a more streamlined support process.
With Stackbill's Integrated Helpdesk, the public cloud service experience becomes more user-friendly and customer-oriented, leading to enhanced satisfaction and efficient problem-solving.
Features of StackBill Native Helpdesk:
- Add support Agents and assign roles
- Track response time, resolution time and support agents performance
- Generate monthly reports to analyze the service health.
- Email notifications for support team and tenants
- Supports attachments in different format with the support request
- Escalate the support requests internally
Configure customized Sliders in StackBill User panel login page.
Below is a guide to setting up customized sliders on StackBill login page.
- Using the credentials, log in to the admin panel
- An option called Configuration can be found at the left side of the panel. Click on it to view the drop-down menu.
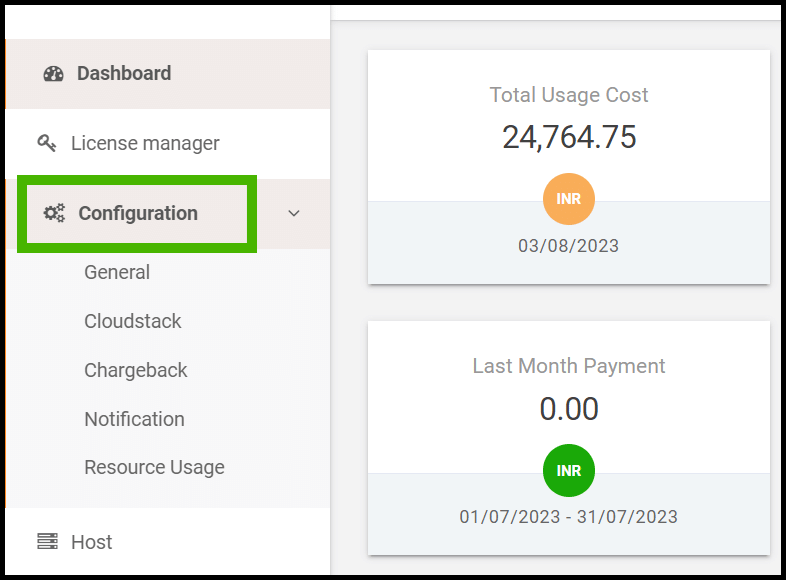
- From the drop down select on the General option.
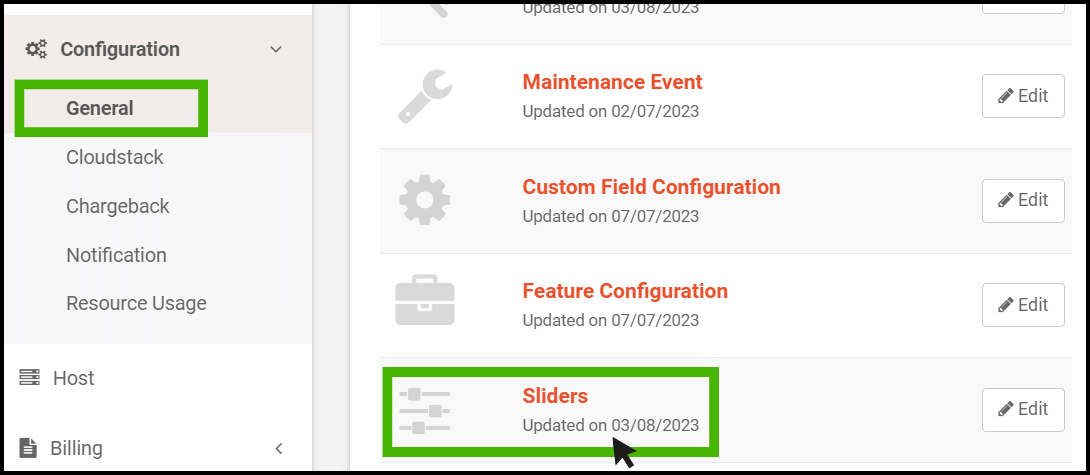
- General configurations screens appears.
- Click on the Sliders option.
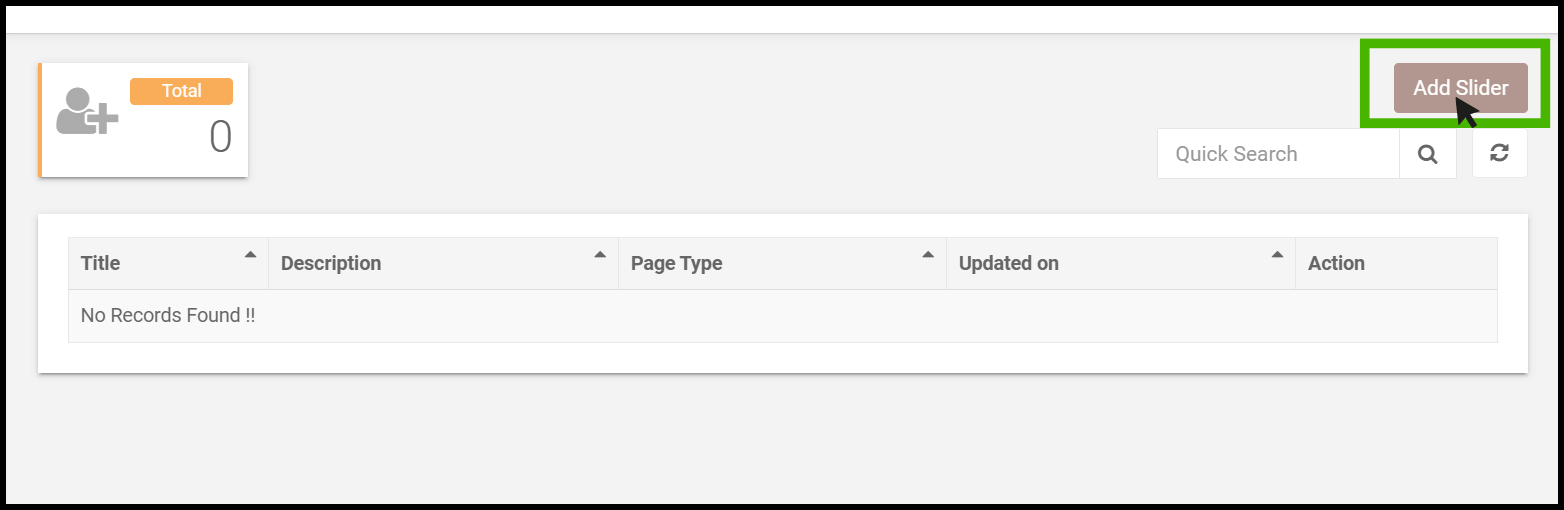
- The Slider option appears on the screen. Click on the Add Slider option on the right side of the panel.
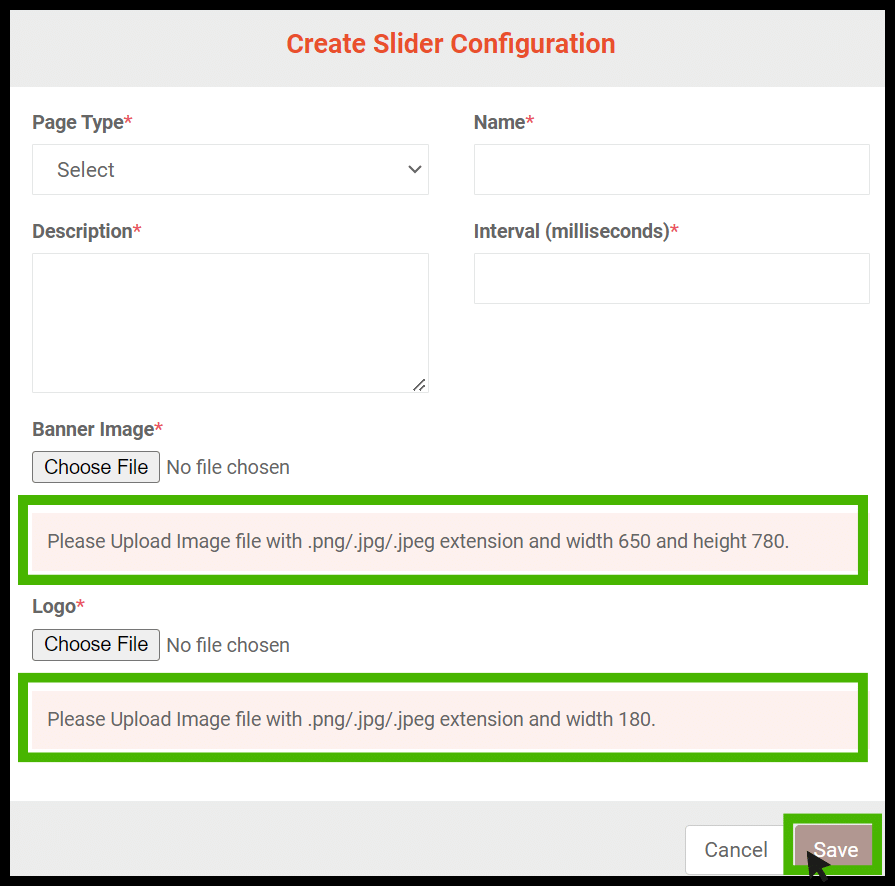
- Page Type - Select the Page Type
Note: As per the current release user can configure customized slide only on the login page.
- Name - Specify a name in the name box.
- Description - Specify a description on the description box.
- Interval - Set the interval in milliseconds (i.e., how many seconds the slide should move).
- Attach the sIides and logo as per your requirement within the specified dimension mentioned.
- Finally, Click on Save button.
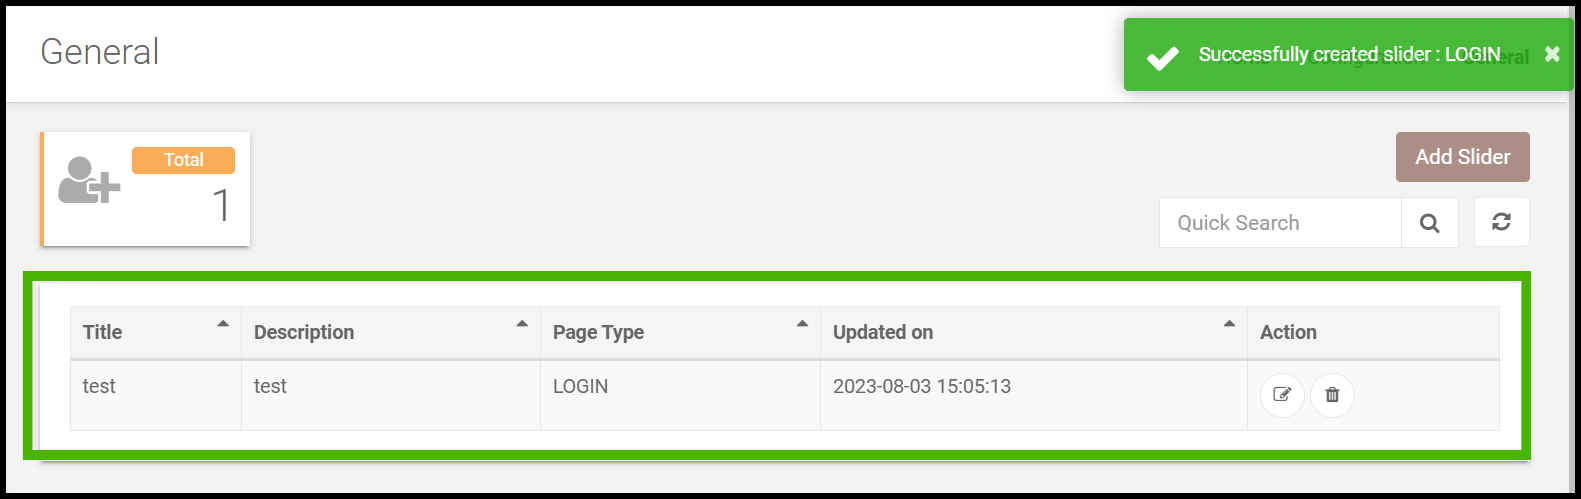
- Another slide can be added using the same format. The new slide will appear below the existing slide.
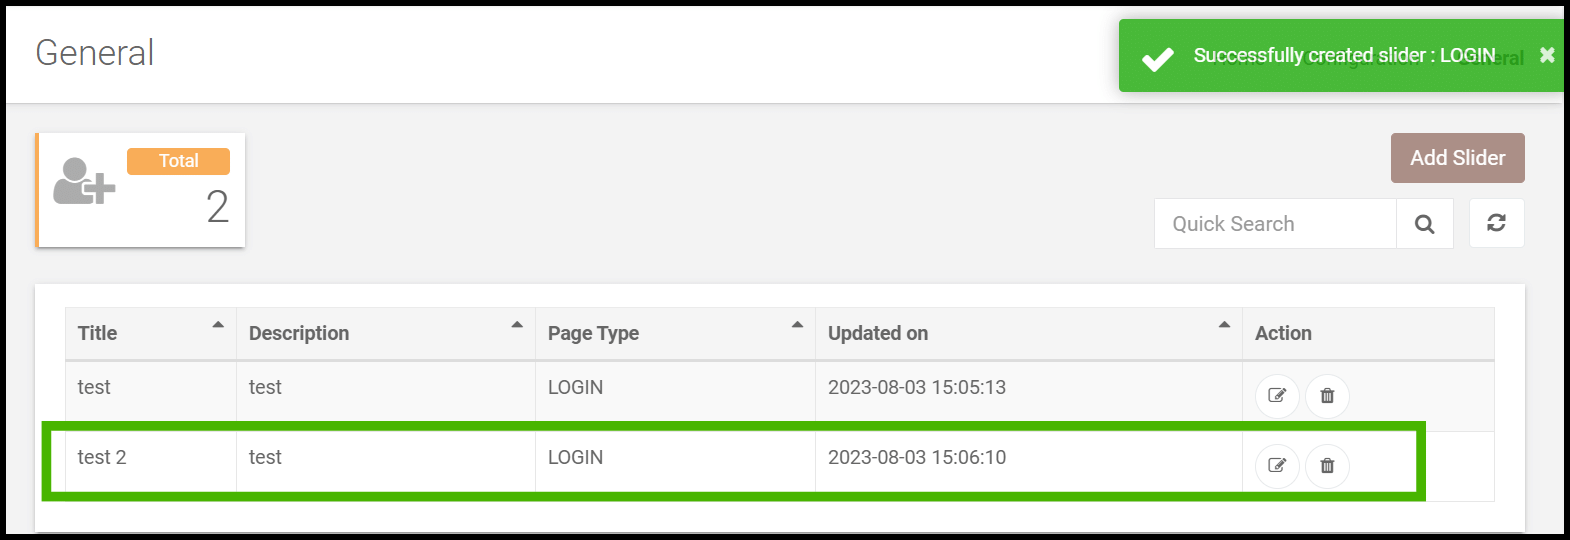
Now the custom slides has been updated successfully.
Integrate Social Media Backlinks on the User Panel Footer.

Below is a guide to setting up Social Media Backlinks on the User Panel.
- Using the credentials, log in to the admin panel
- An option called Configuration can be found at the left side of the panel. Click on it to view the drop-down menu.
From the drop down select on the General option.
From the general option click on the Organization Details option.
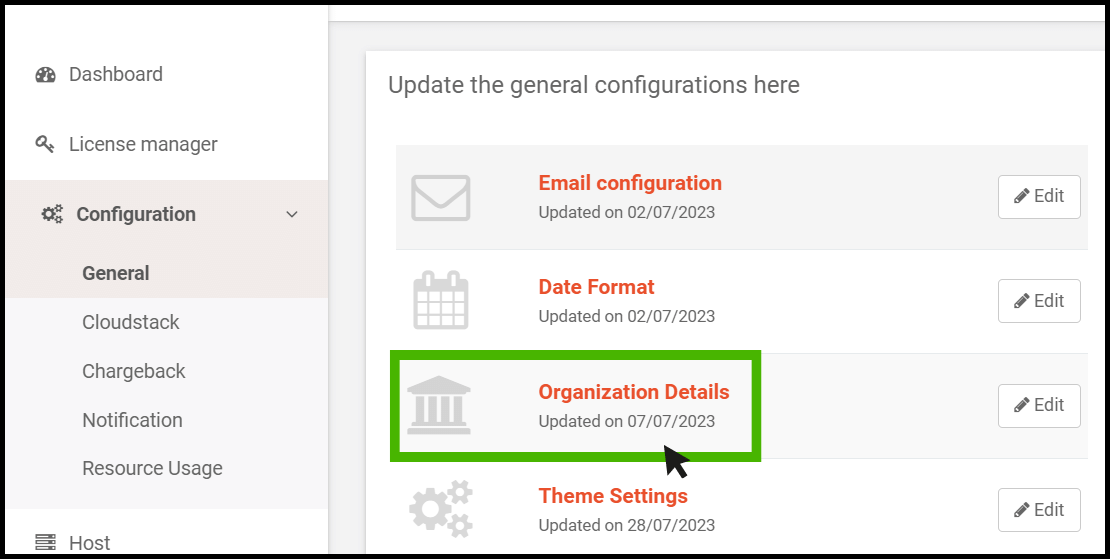
- Organization Details screens appears

- On the social media category the administrator can configure their social media backlinks which may appears on the footer of the user panel of the portal.
- Finally, Click on the update button

- Social media links have now been configured successfully and can be verified from the user panel.

Grouping Templates in StackBill CMP
Below is a guide to Grouping Templates in StackBill CMP.
- Using the credentials, log in to the admin panel
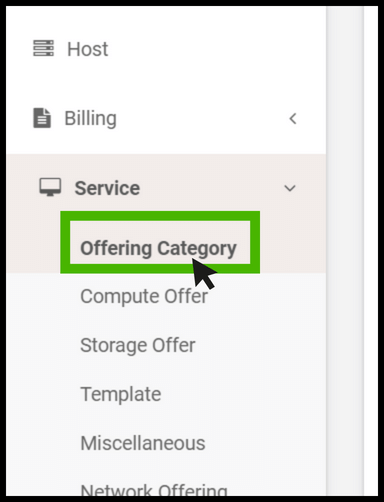
- An option called Service can be found at the left side of the panel. Click on it to view the drop-down menu.
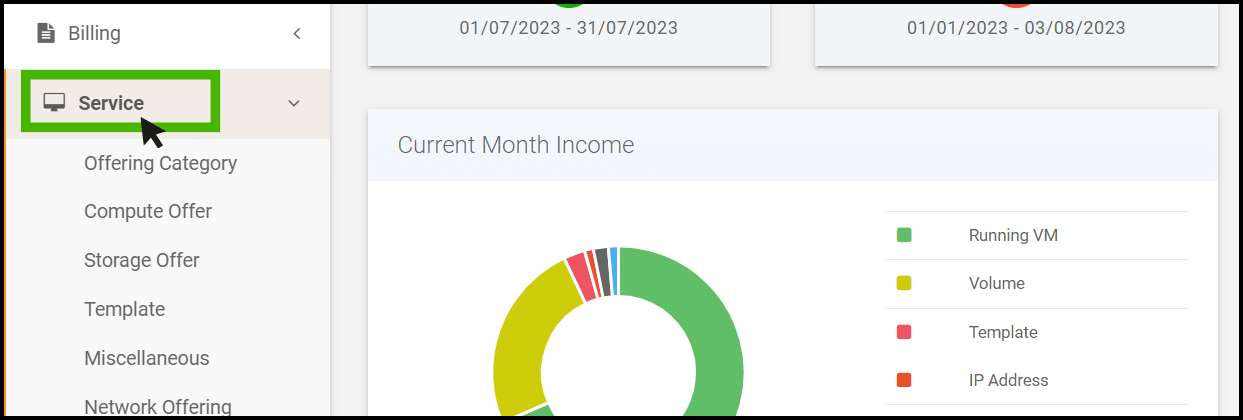
- From the drop down click on the Offering Category option.
- From the Offering Category option user can able to see a filter option. - Click on the dropdown icon to view the offering.

- From dropdown select VM Grouping option
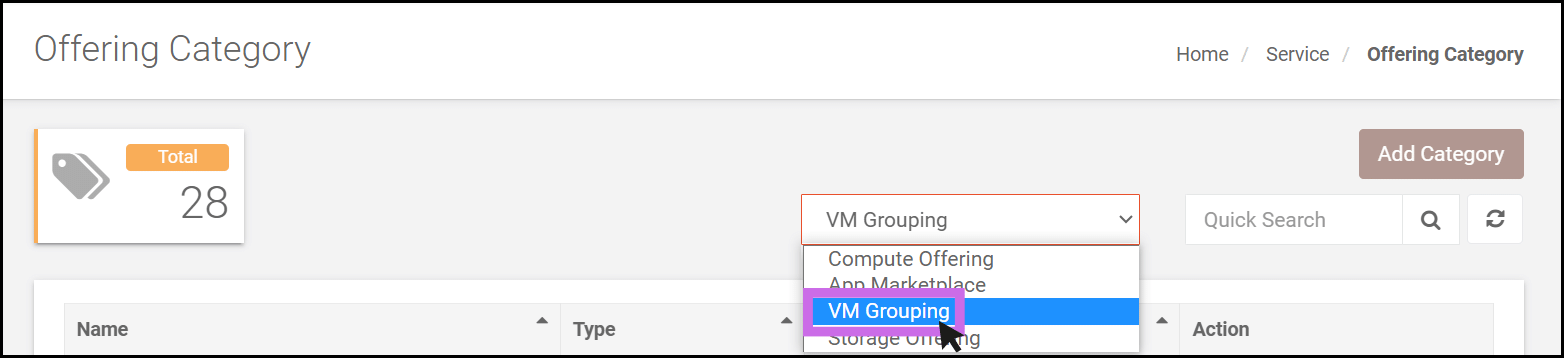
- VM Grouping screen appears.
- At right side of the panel admin can able to see a option called Add category. Click on it to create a new category.
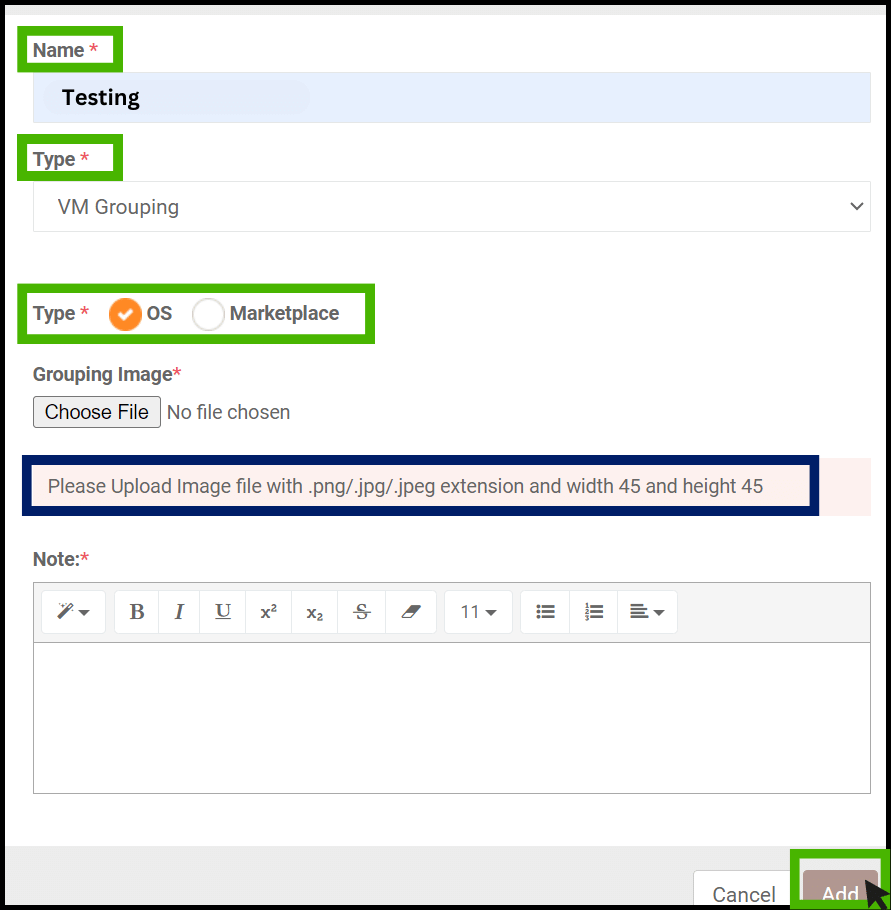
Create category screen appears
- Name - Specify a name for the category.
- Type - Select the type as VM Grouping. and select on which type the category offering should be created either in OS or marketplace. select as per the requirement, for the demonstration let select OS type.
- Upload the icon for the offerings you are creating as per the mentioned dimension.
- Notes - Specify a notes in the notes column.
- Finally, Click Add button.

- Now the offering has been created successfully.
- On the right side of the panel there is a icon called Template Grouping Configuration.

- Click on it to add OS flavors into the offering.
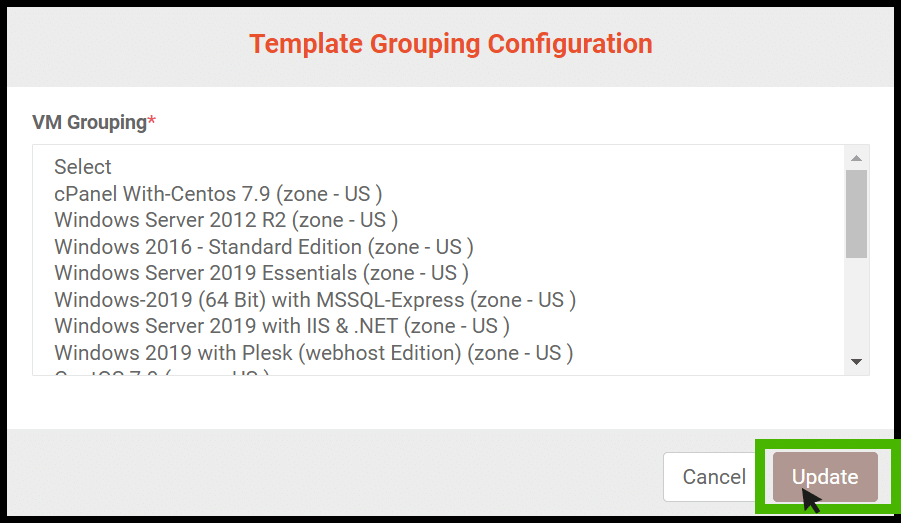
Select the OS flavors as per the requirement and click Update button.
Now the Template grouping has been added successfully.

- Login to user panel to view the template grouping
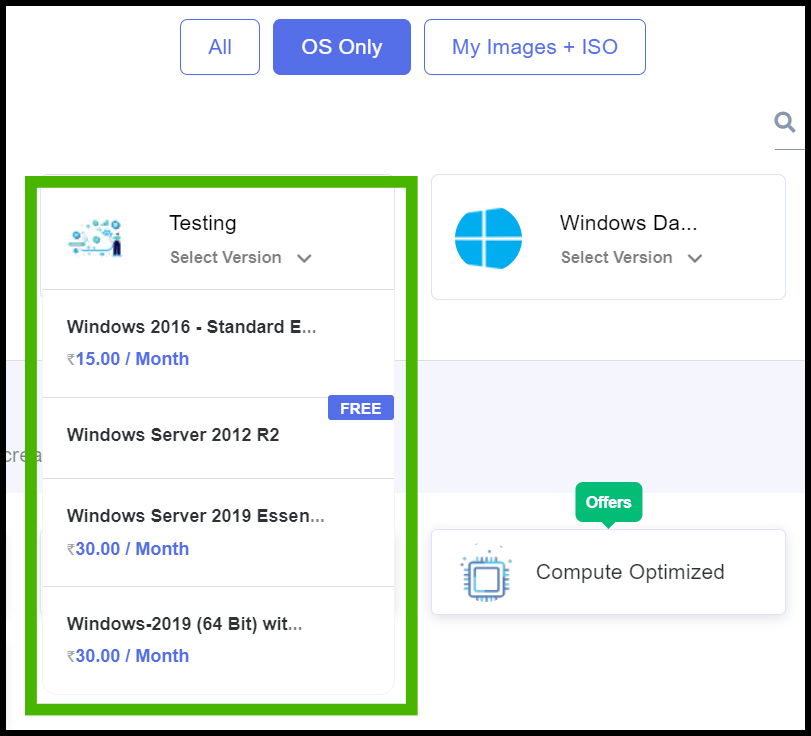
- Now the VM Grouping has been added successfully.
Sub domain support in StackBill CMP
Welcome to sub domain configuration guide.
This guide is designed to assist admin in configuring their subdomains for the user panel.
Enabling subdomain option to user panel
- Login into the admin portal using the login credentials
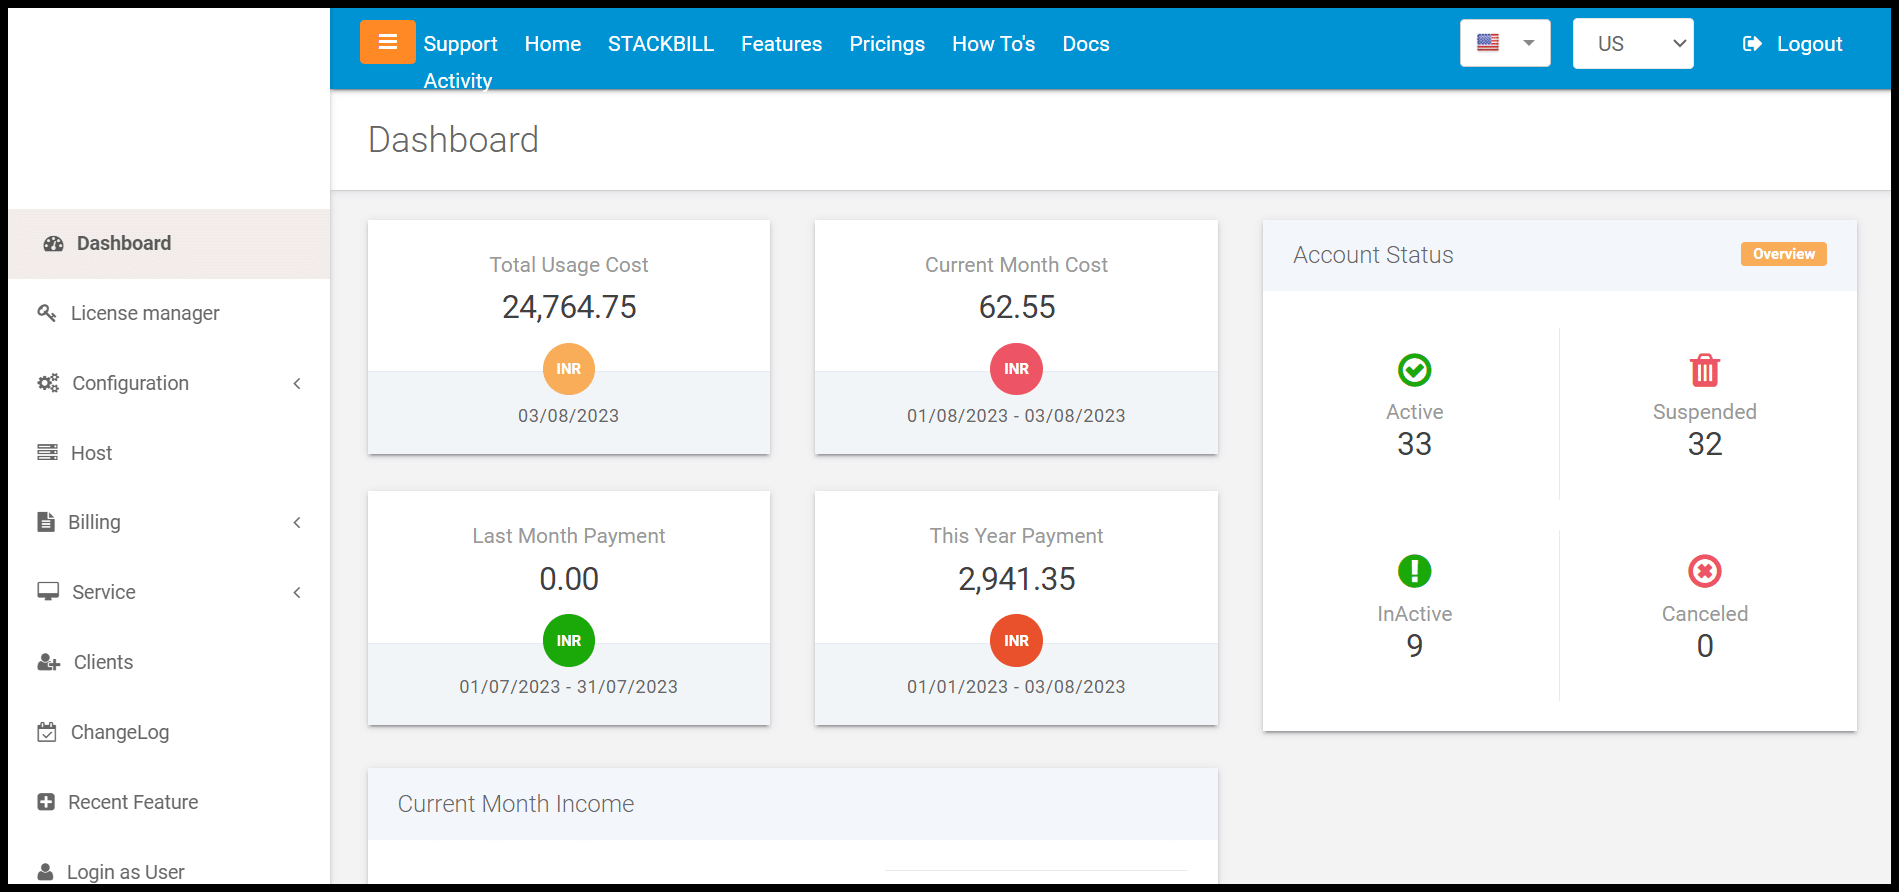
- Admin panel dashboard appears on the screen.
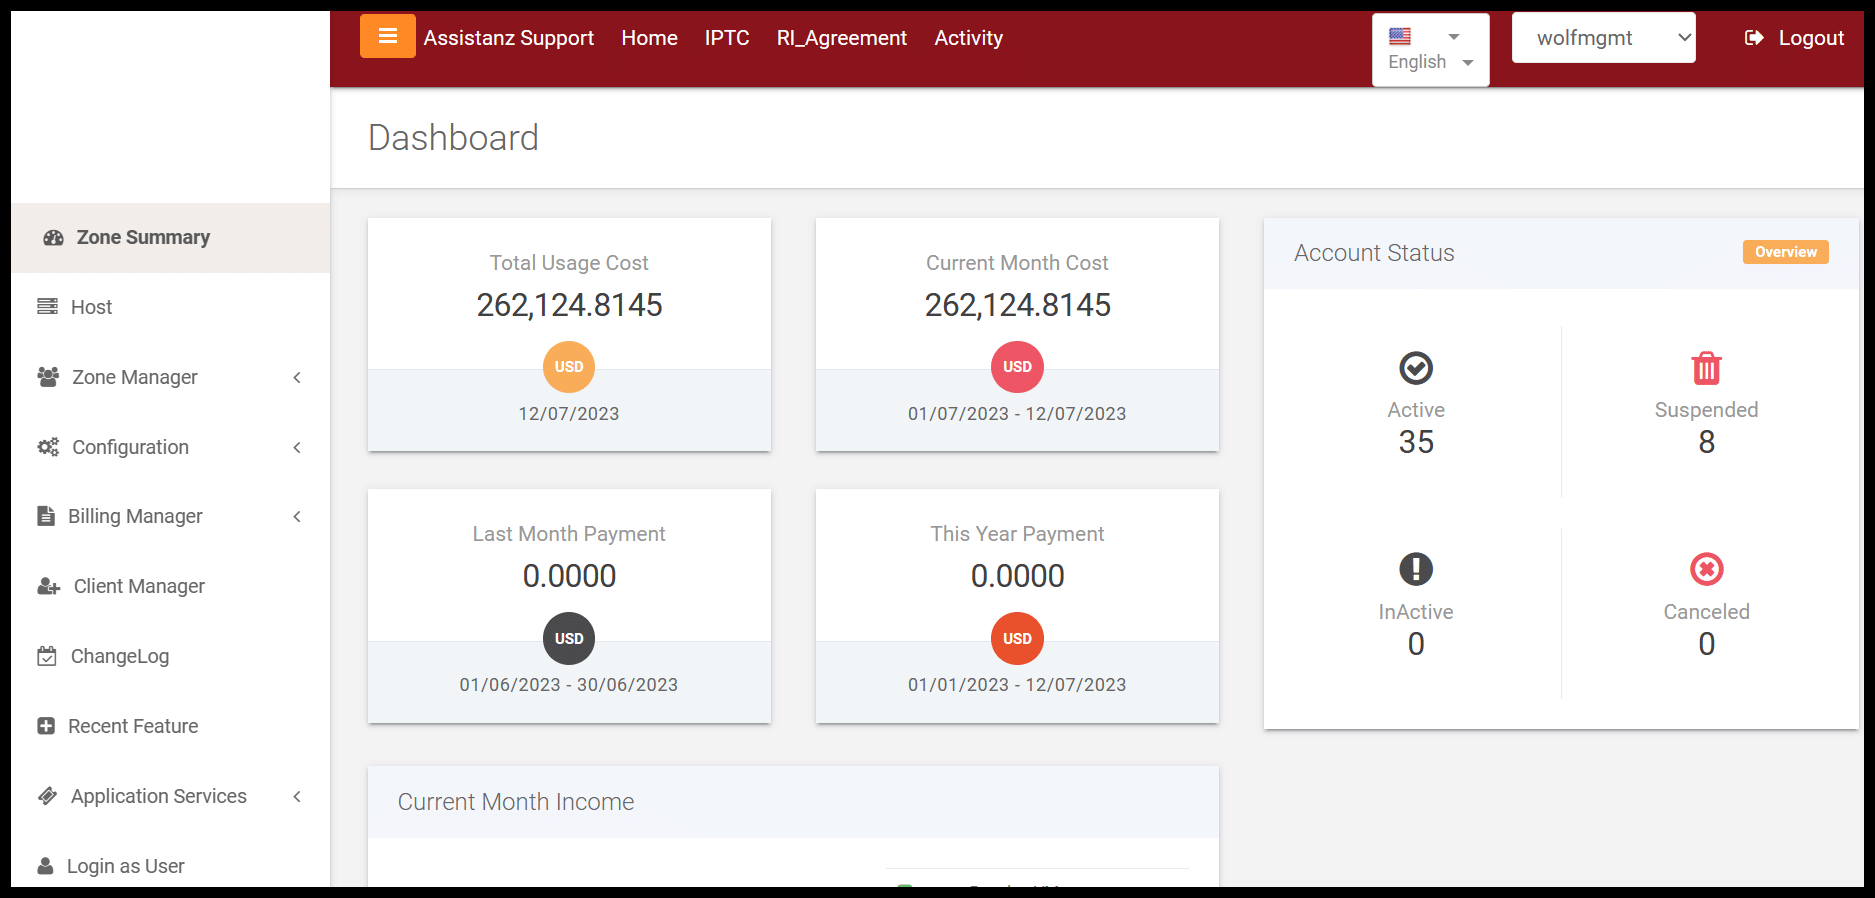
- At left side of the panel the user can be able to see an option called Configuration option, click on it to view the dropdown.
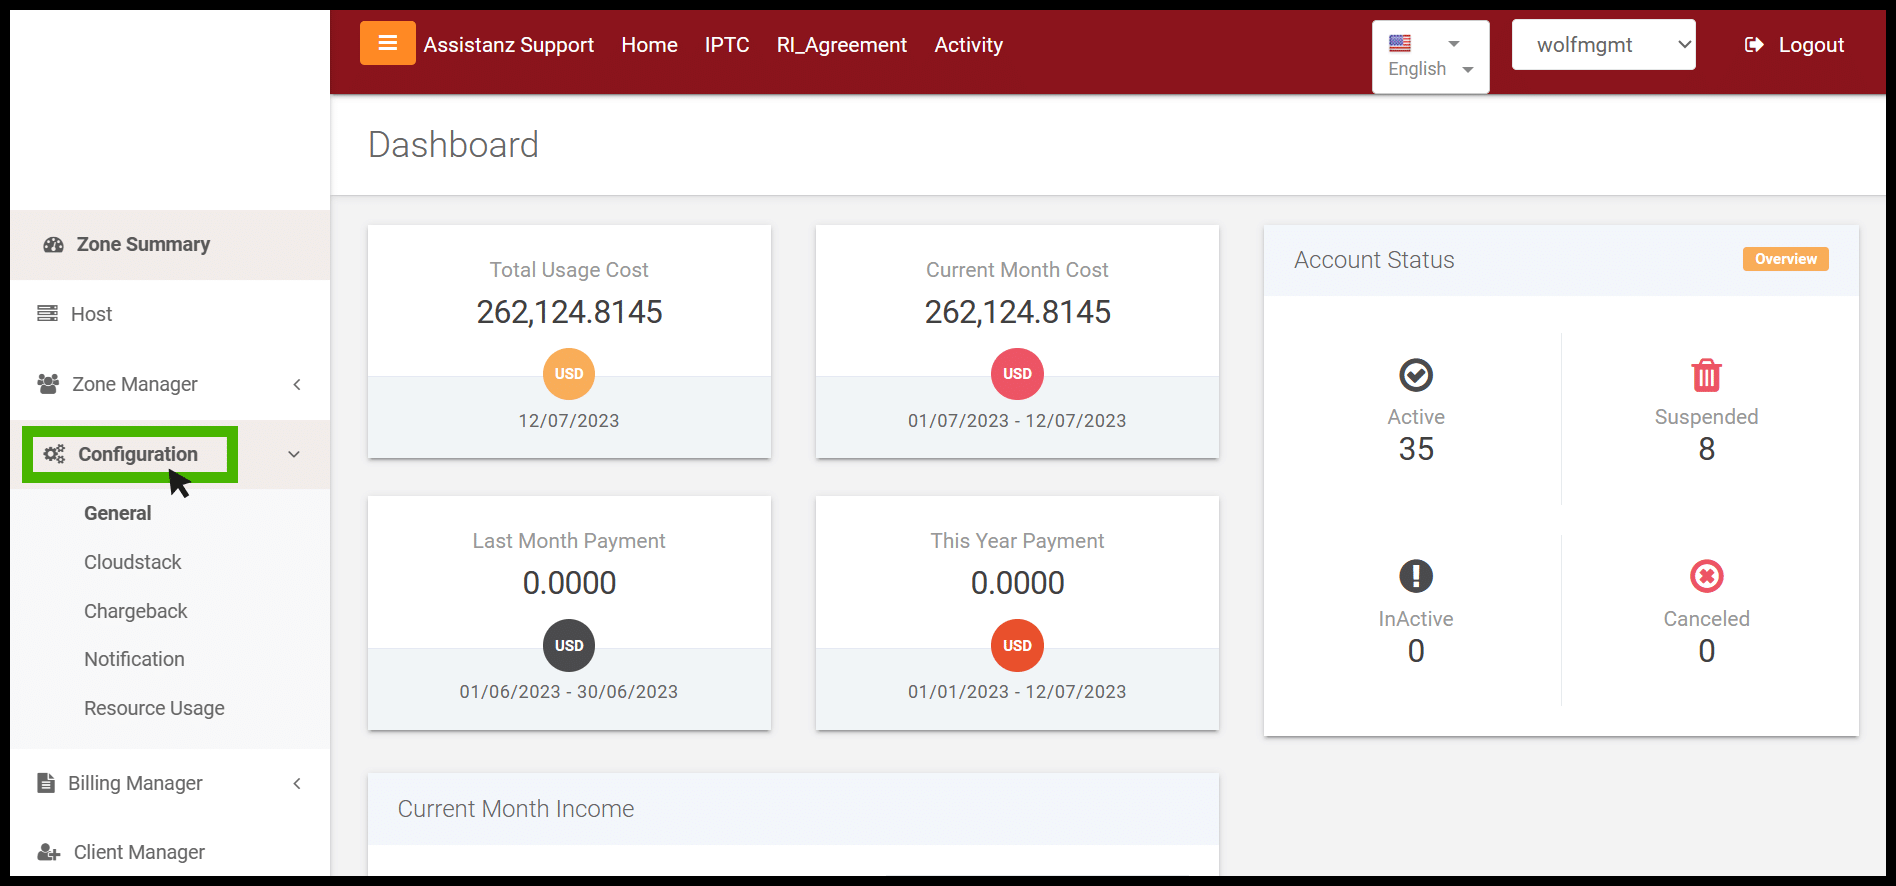
- From the dropdown, click on the general option and select feature configuration from the list.
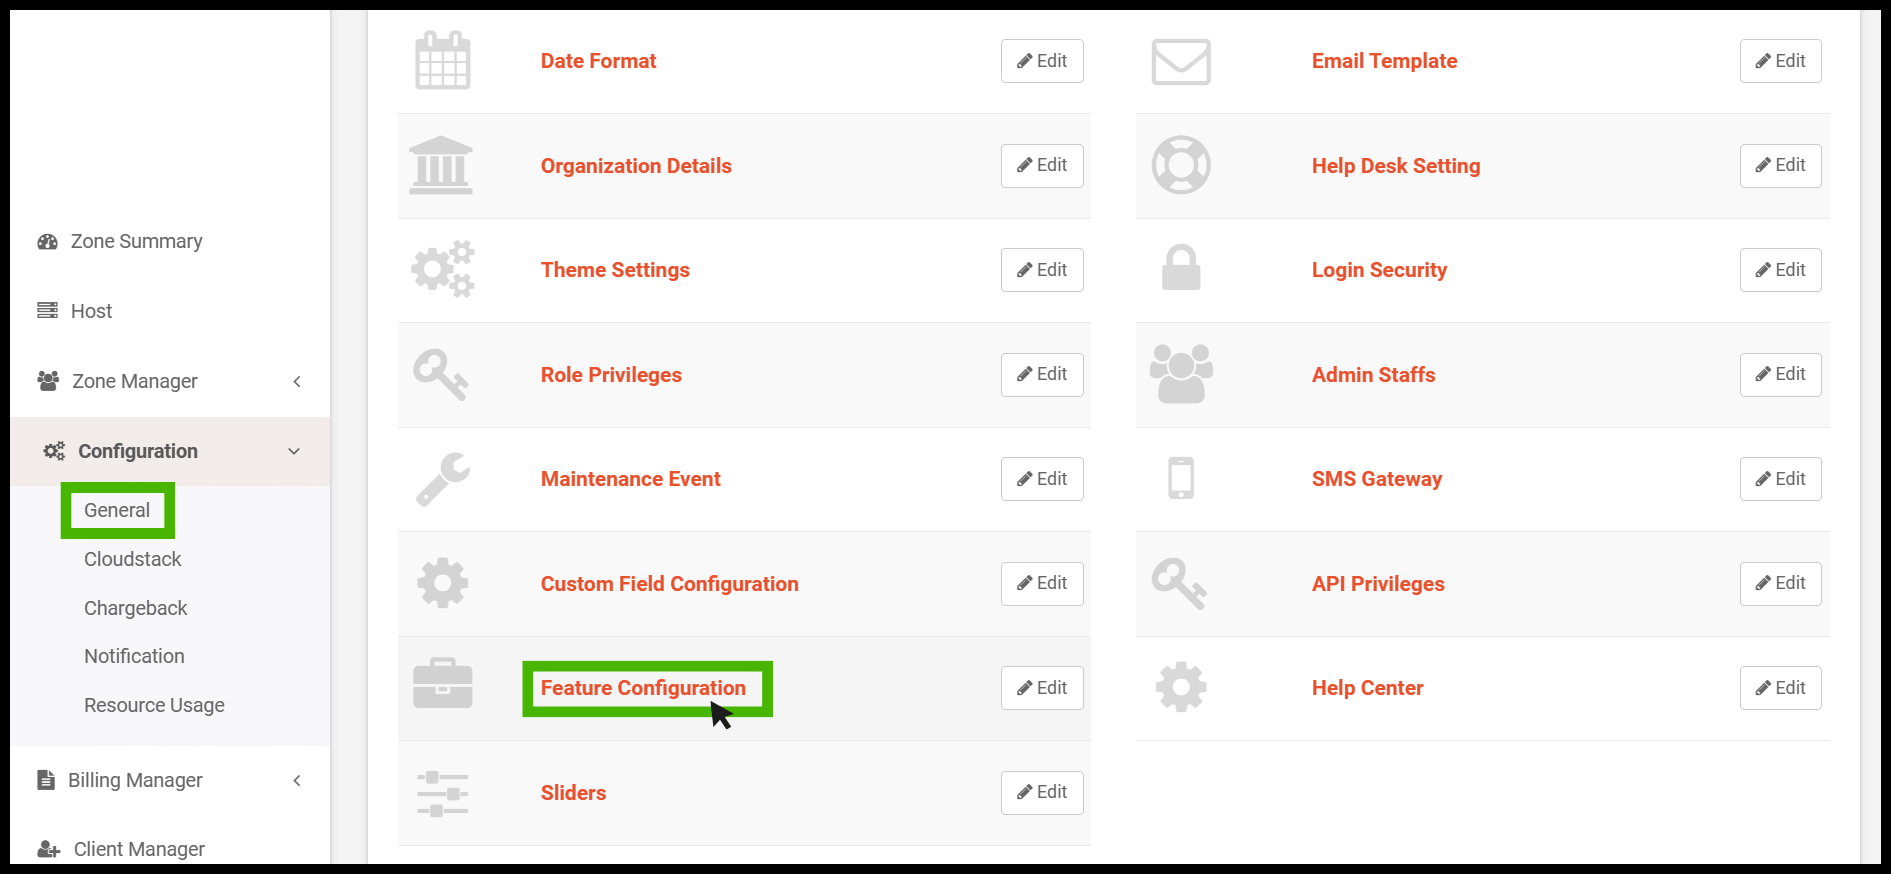
- After clicking the feature configuration at the right side of the panel, the user can see an option for quick search. On the quick search, enter the subdomain and click search.
- The subdomain option will now appear, click on it.
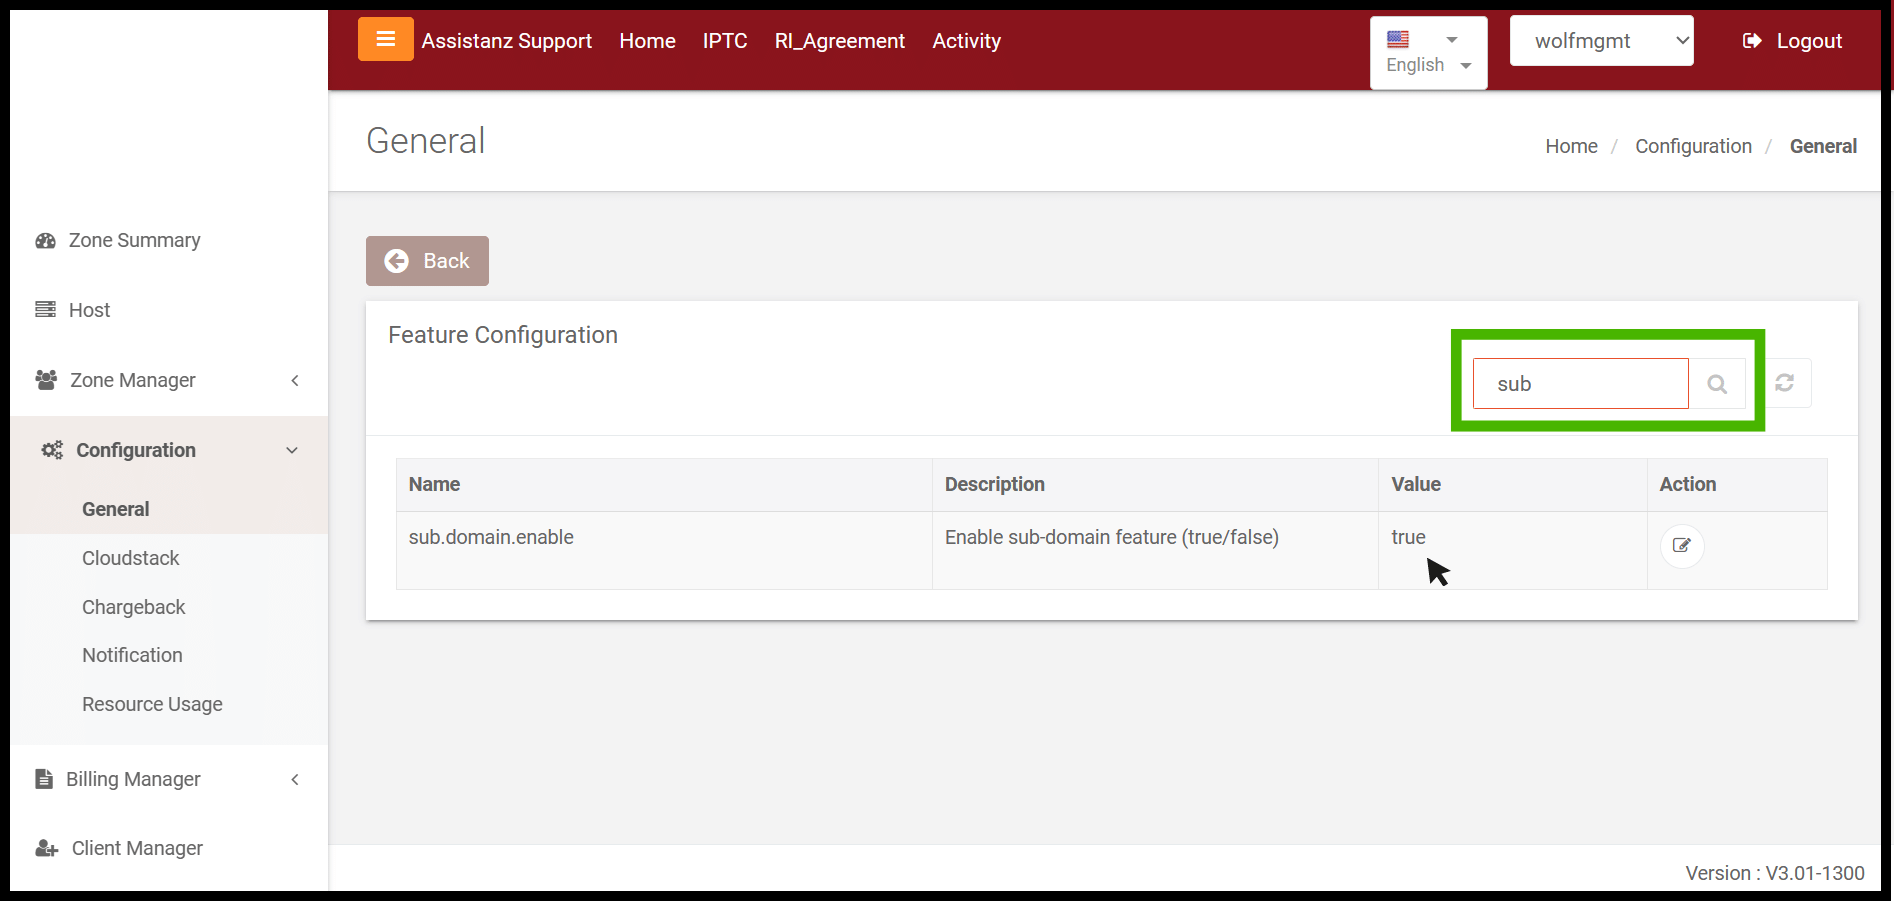
Note : The subdomain option will appear on the user panel when the Value option is true.
This guide is designed to assist users to create New Subdomain.
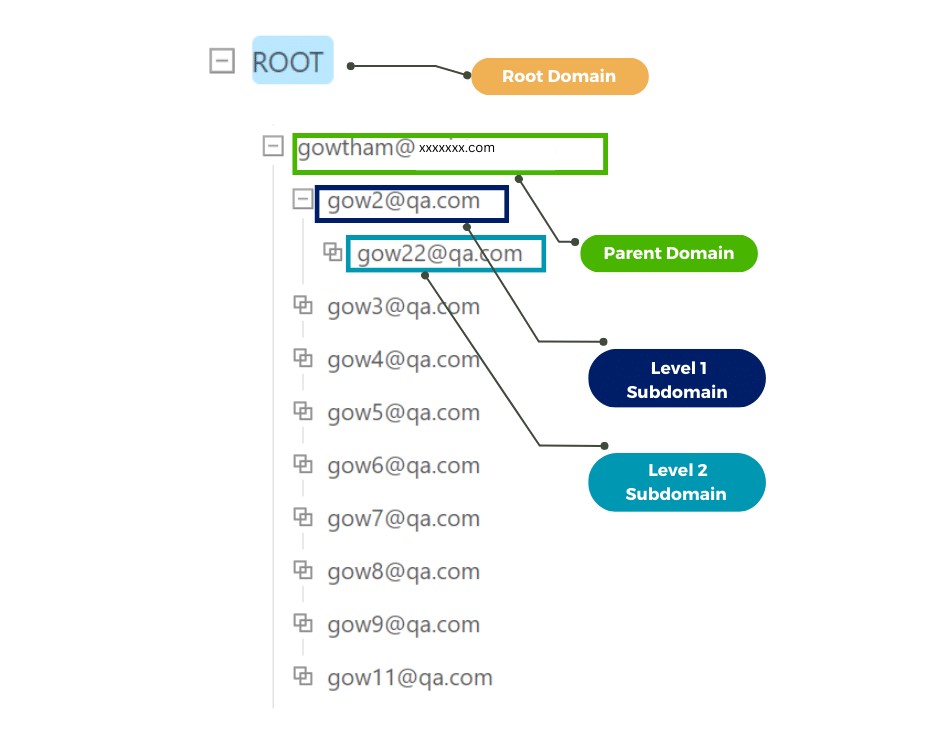
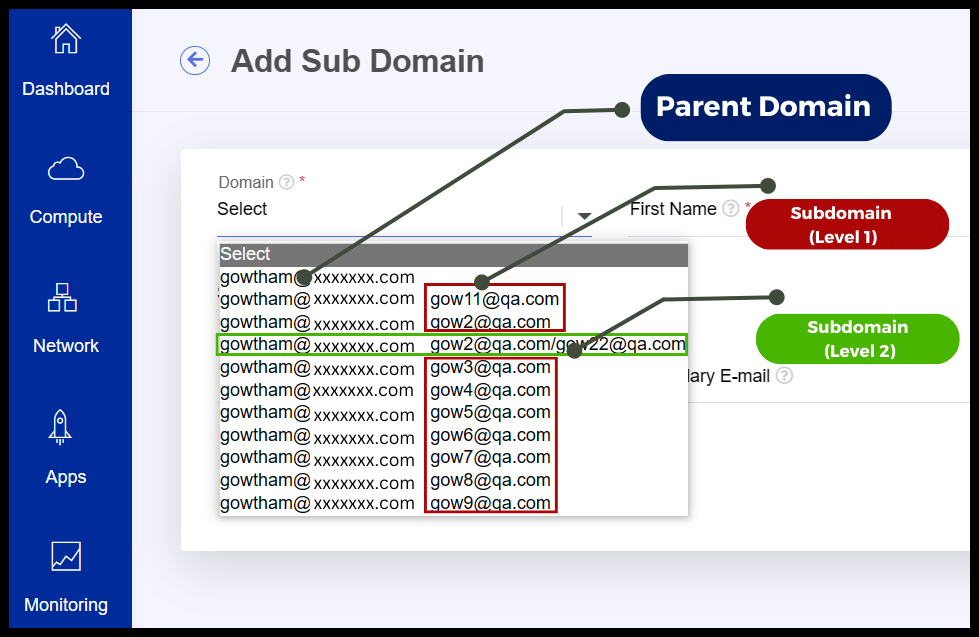
Subdomain Structure
Creating New Subdomain
- Login into the user portal using the login credentials

- User portal appears on the screen.
- On the left side of the portal user can able to see a option called Company,click on it to view the list of option.
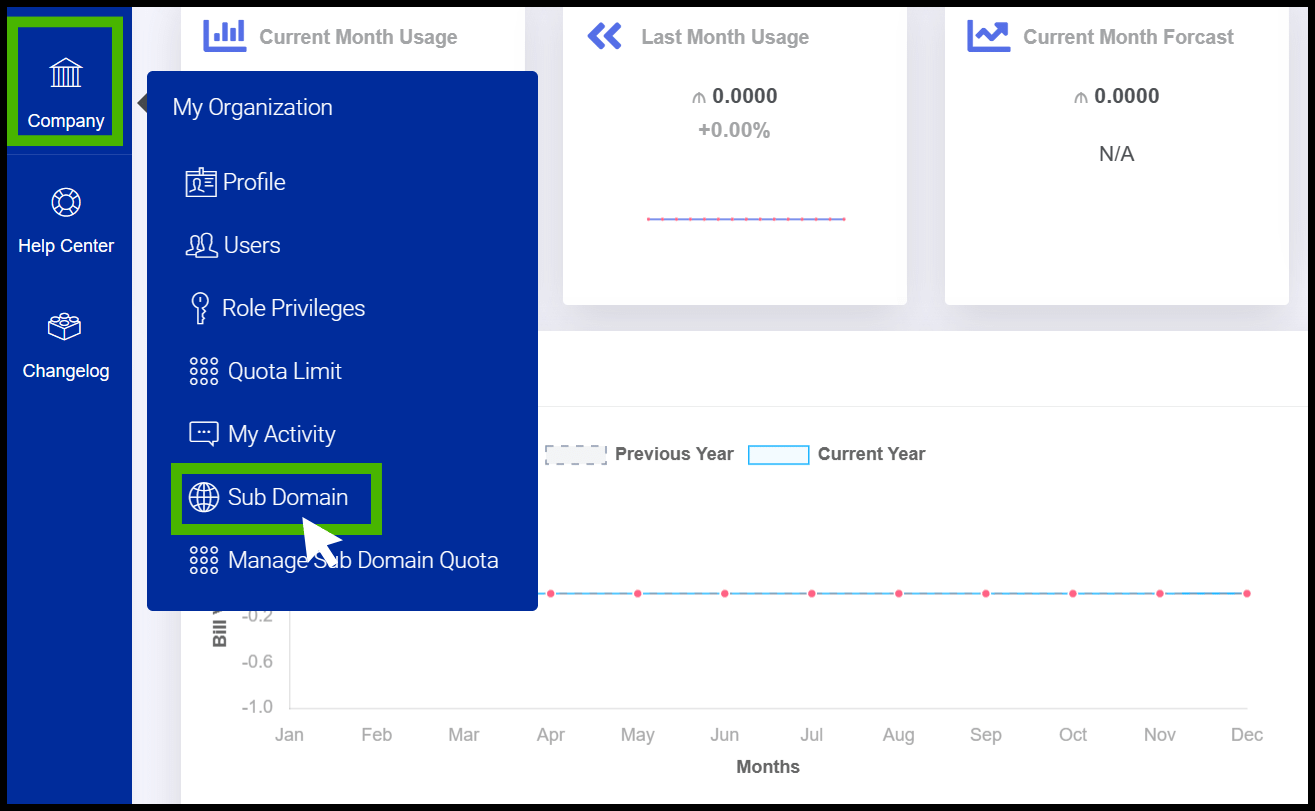
- From list select sub domain.
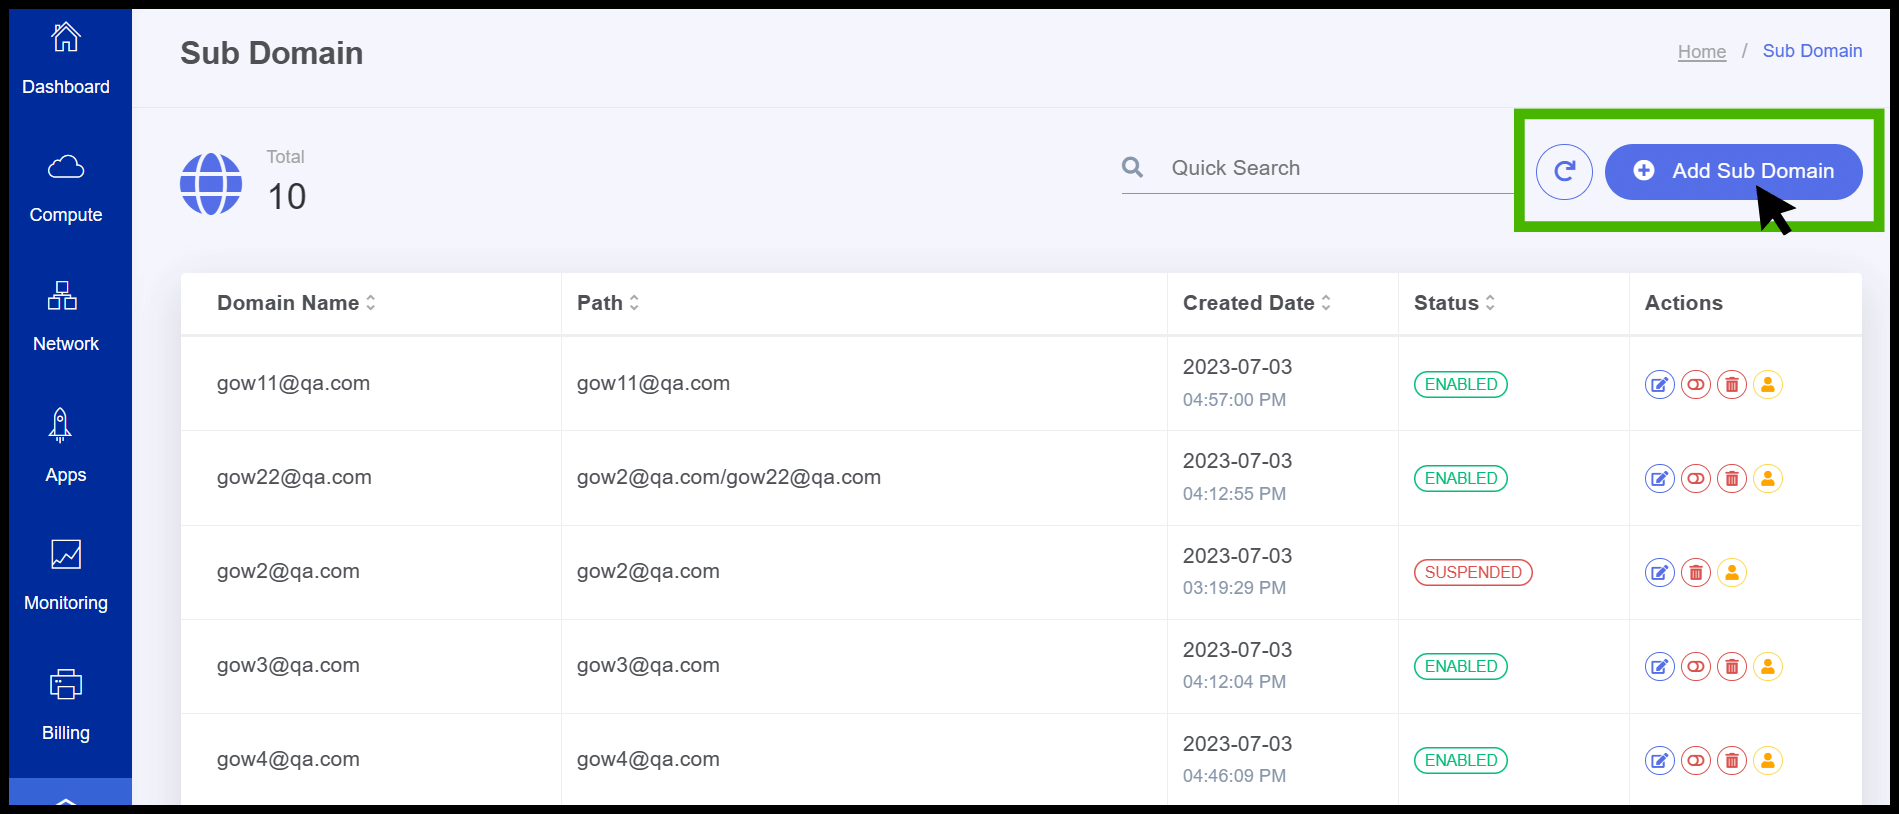
- Subdomain screen appears.
- At right side of the panel the user can able to see a option called Add subdomain option, click on it to create new subdomain.
- Fill the details on reqired field and click Add button, to create a new subdomain.
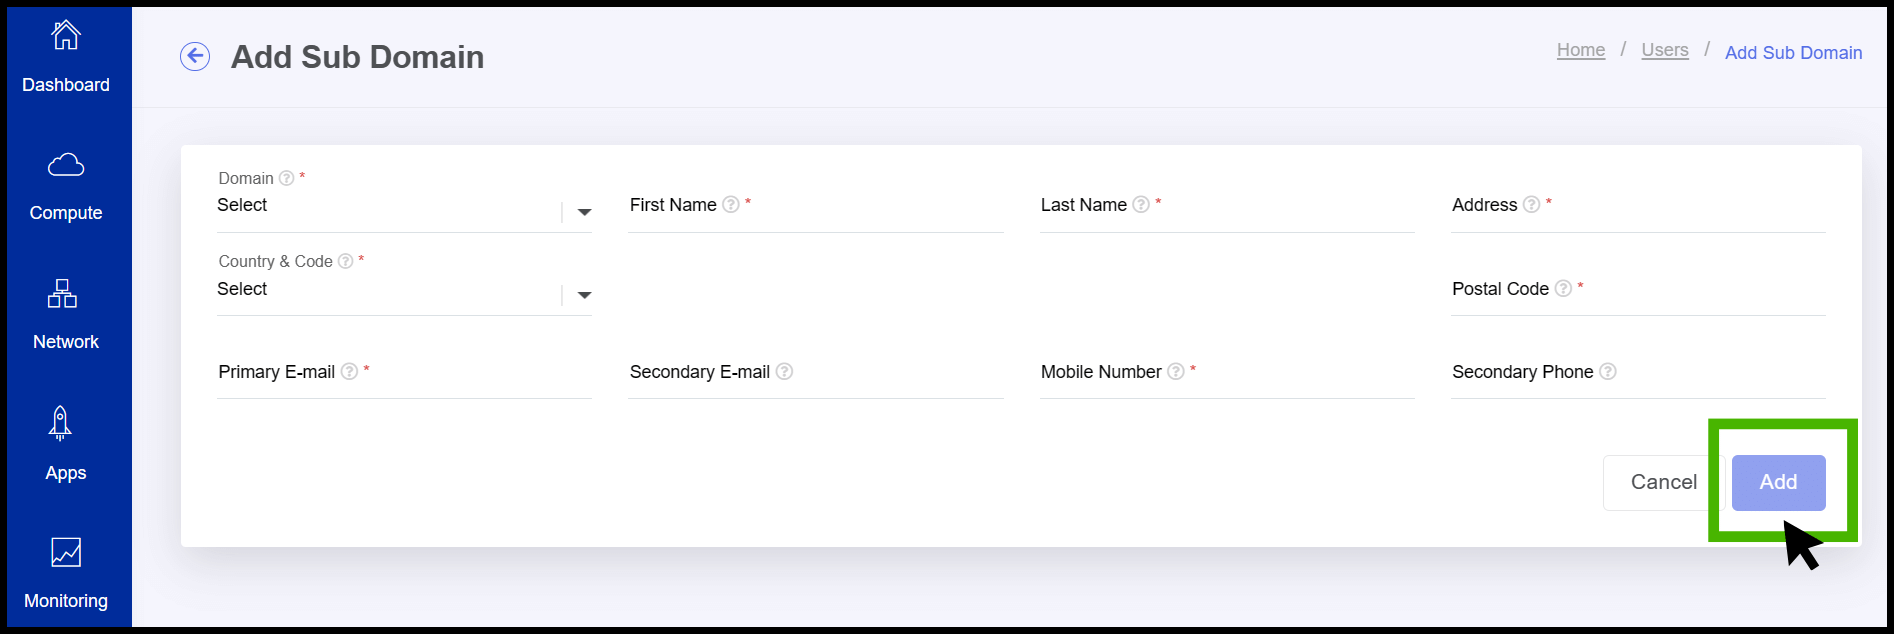
- Domain - Select the parent domain within which the new domain should be created
- Finally, click ok button.
- On the list page, the user can see the newly added subdomain.
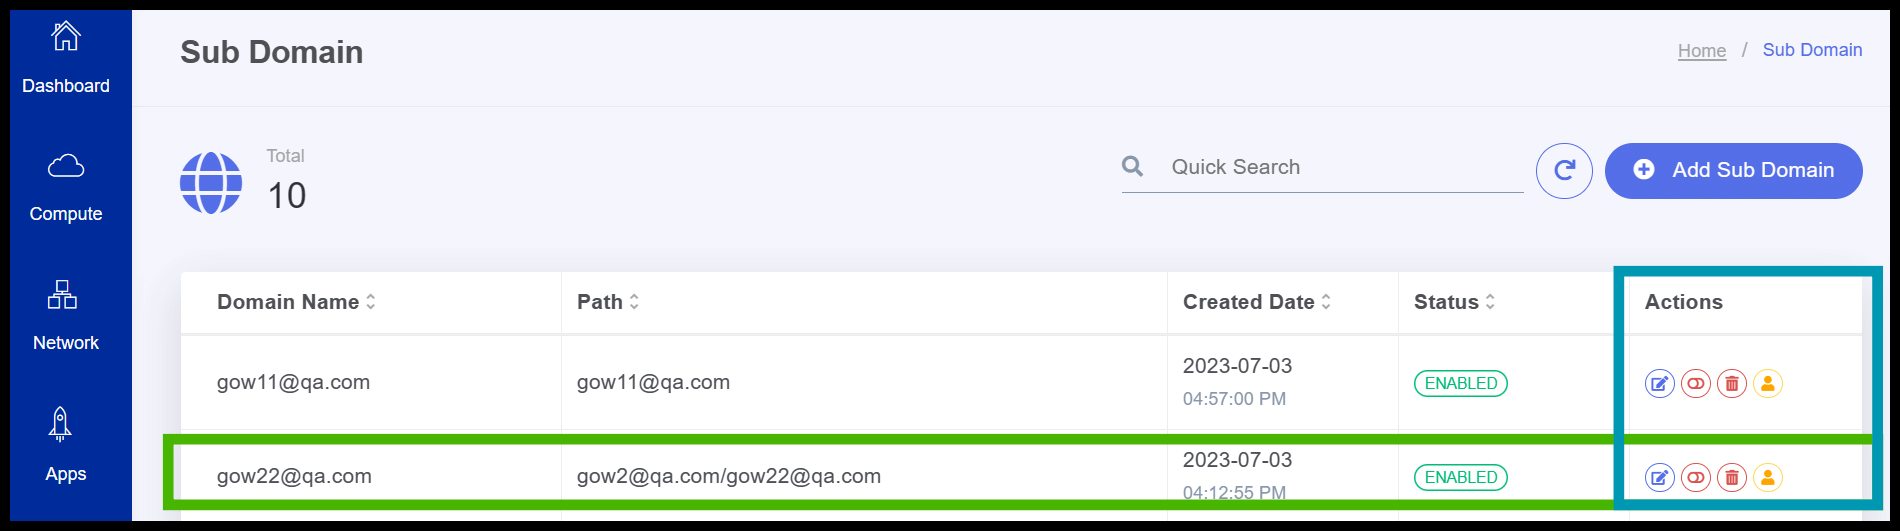
- On the right side of the panel, Under Actions, the user can edit, disable, delete, and login as a user of the subdomain.
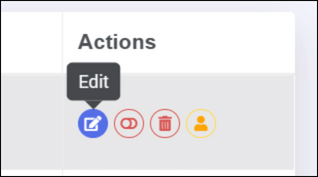
- Edit - Users or parent domain can edit the basic data like name,address,mobile number,mail id,and much more.
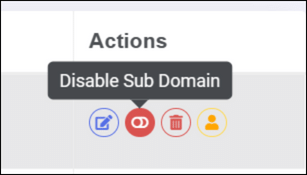
- Disable Subdomain - By using the disable option, the parent domain can disable the subdomain created below it.
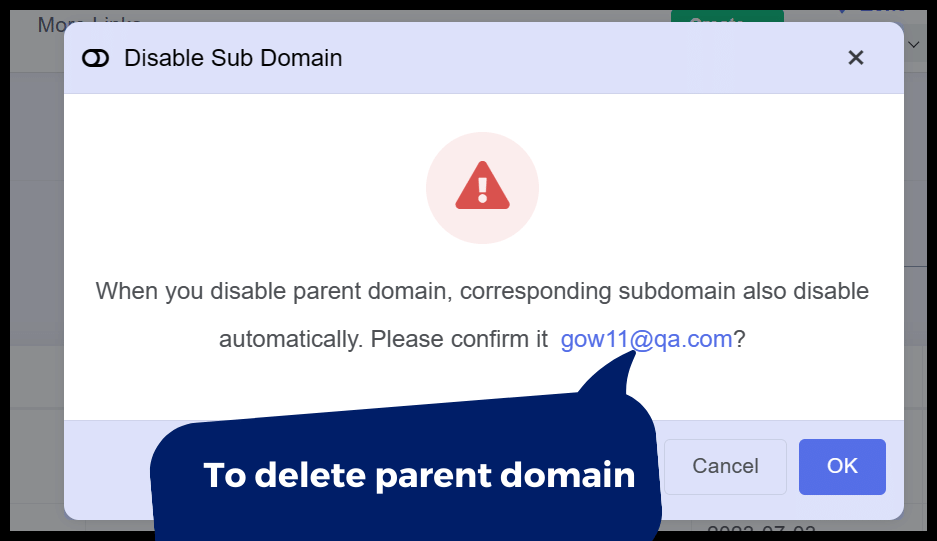
- When you click on the disable subdomain button, you will be notified as a confirmation screen with instructions. Please read them carefully and proceed accordingly.
When you disable the parent domain, corresponding subdomain also will be disable automattically.
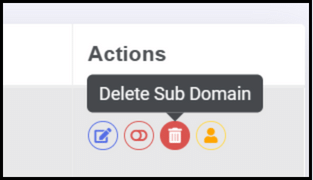
- To delete a subdomain, click the delete button in the action option.
- Once you click on the delete subdoamin option you will be notified as a confirmation screen with instructions. Please read them carefully and proceed accordingly.
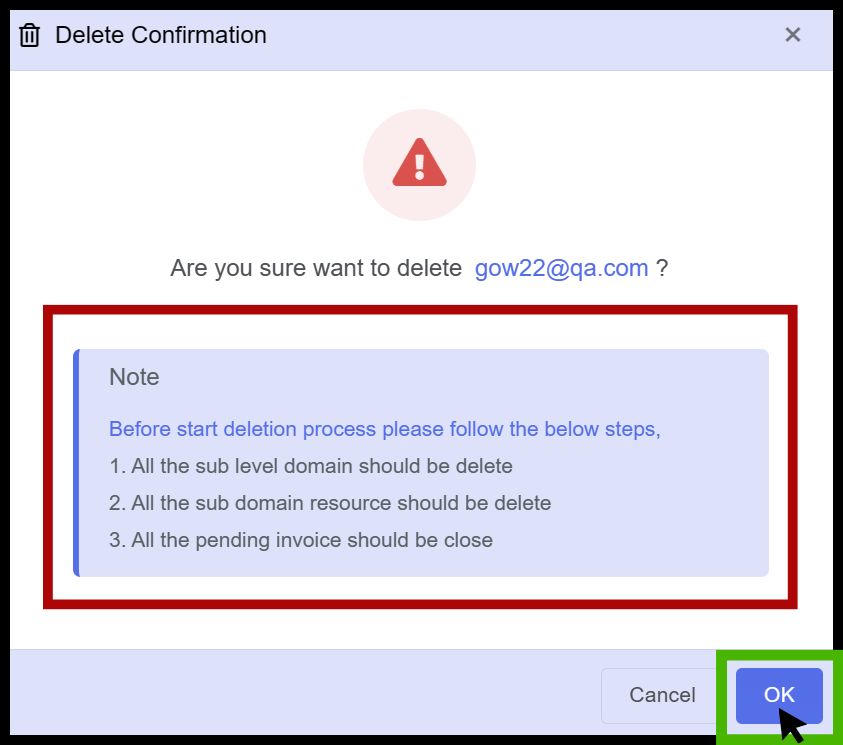
- Finally, click Ok to delete the subdomain.
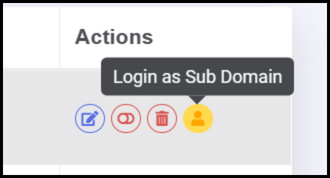
- By clicking the Login as a user button, the parent domain can login as its subdomain user.
Manage Subdomain quota
- The resources quota for parent domain is allocated by the root admin
- The reources quota for Subdomain is allocated by the parent domain
- Login into the user portal using the login credentials
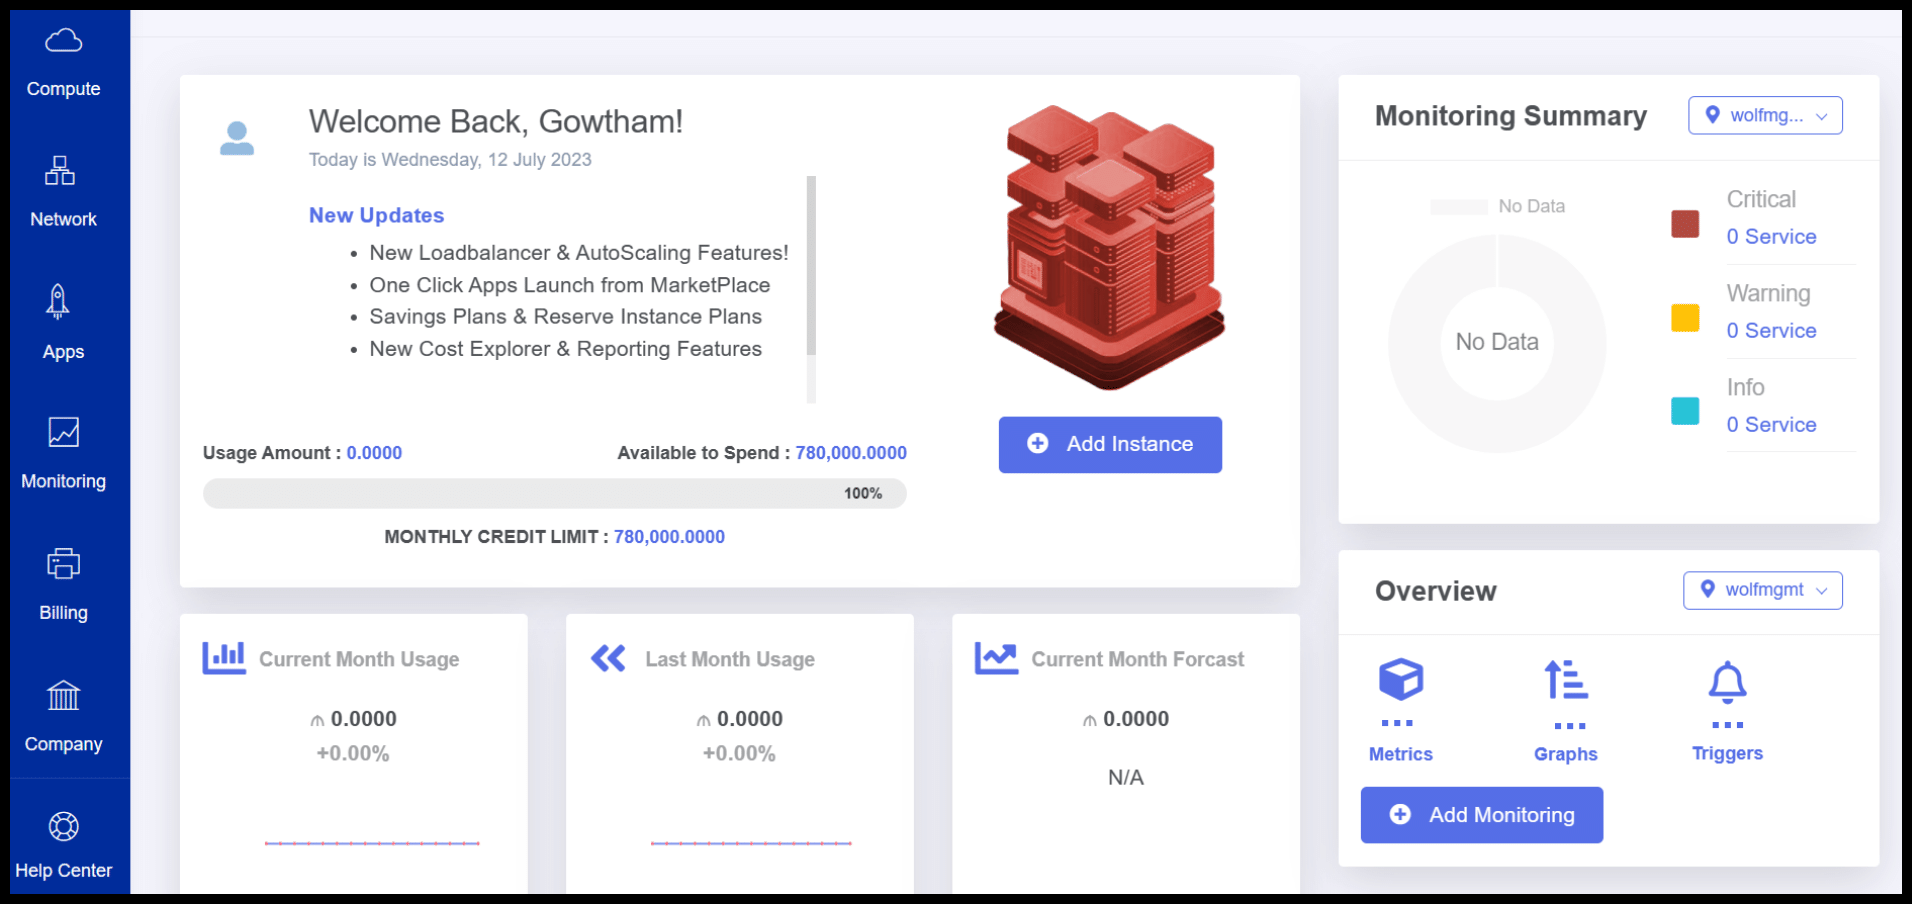
- User portal appears on the screen.
- On the left side of the portal user can able to see a option called Company,click on it to view the list of option.
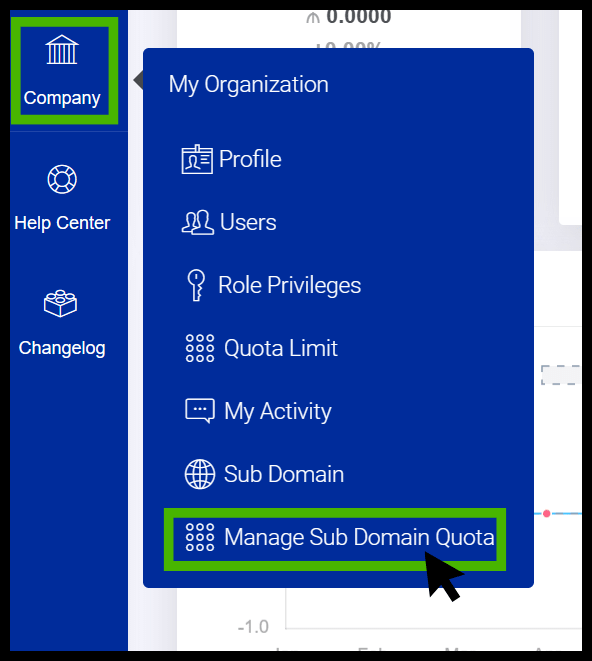
- From the dropdown select Manage Subdomain quota.
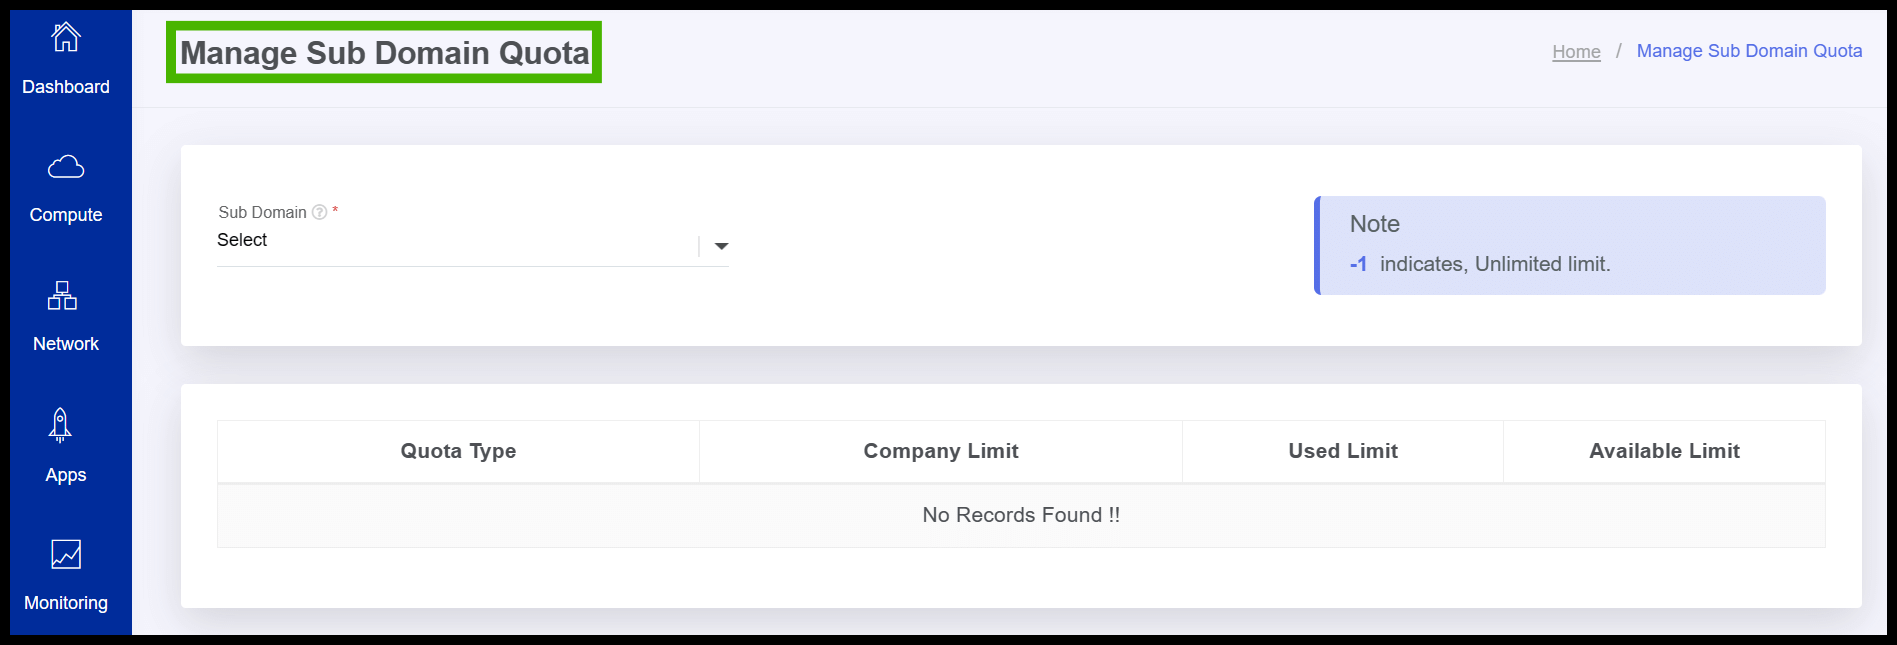
- Manage Subdomain quota screen appears.
- Click on the subdomain to view the list of subdomain from the dropdown.
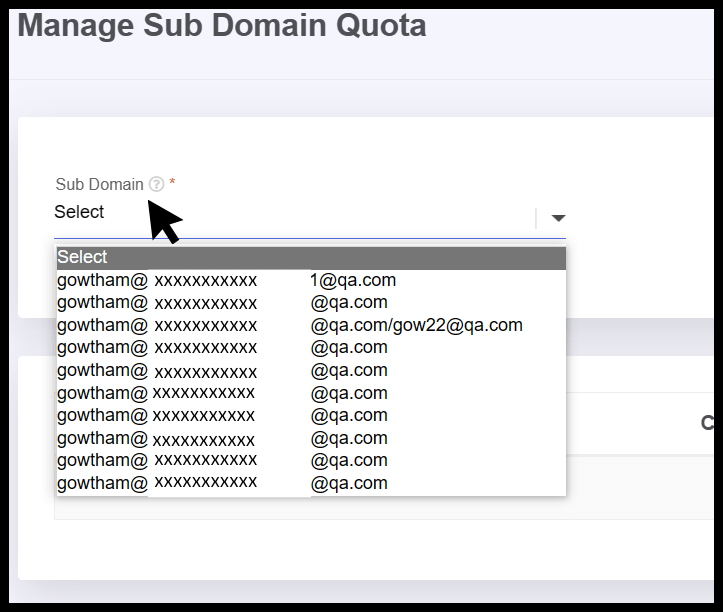
- Select the subdomain to view the resources quota.
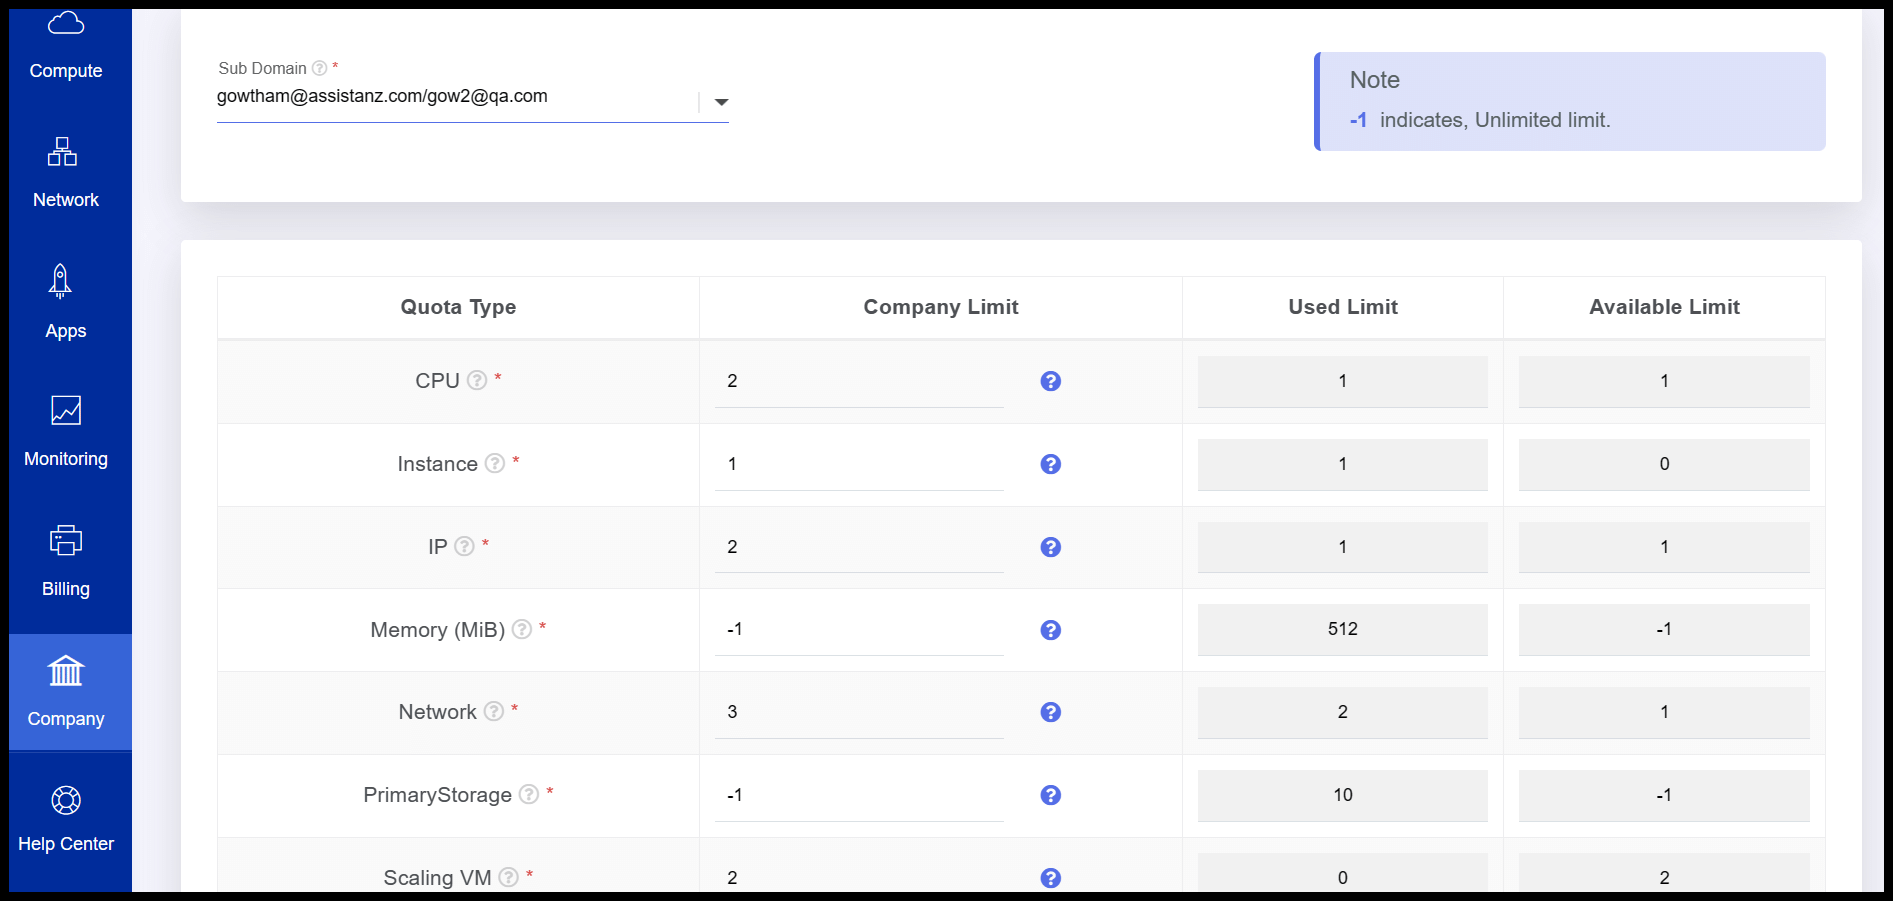
- Here the parent domain can allocate the resouces to the subdomains as per the requirement.
Subdomain Usage Summary
- Login into the user portal using the login credentials
- User portal appears on the screen.
- On the left side of the portal user can able to see a option called Billing, click on it to view the list of option.
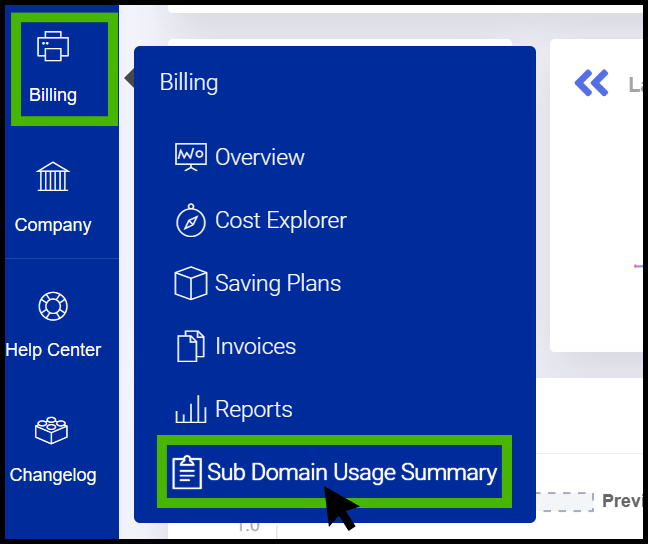
- From the dropdown select Subdomain usage summary, click on it.
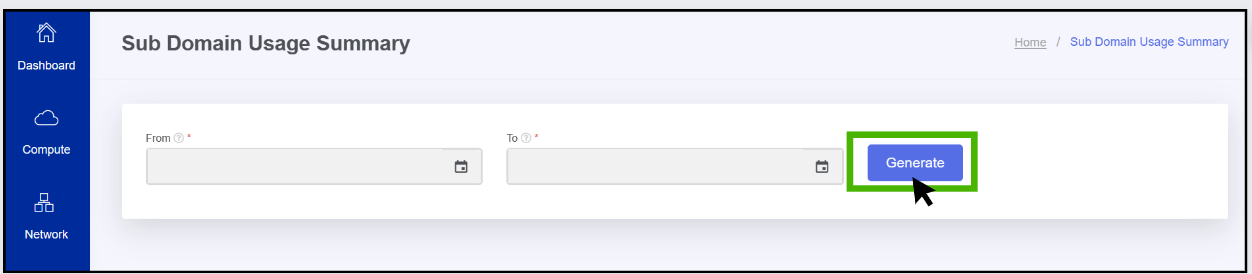
- Subdomain usage summary screen appears
- Specify a date in from and to input fields and click generate button.
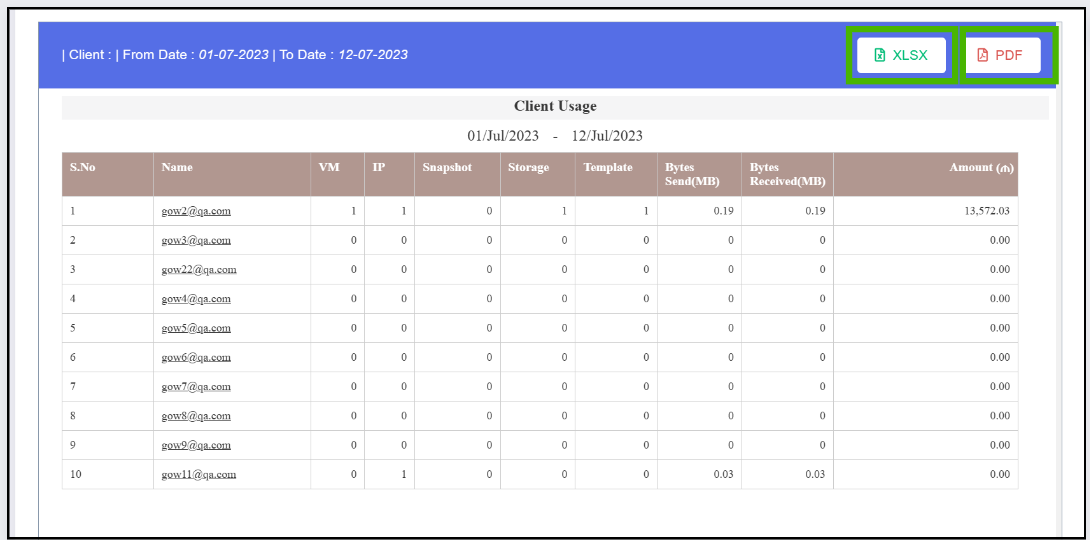
- Subdomain usage reports appear on the screen and the parent domain can download the reports as XLSX or PDF documents
Billing configuration on subdomains
- Login into the user portal using the login credentials
- User portal appears on the screen.
- On the left side of the portal user can able to see a option called Company,click on it to view the list of option.
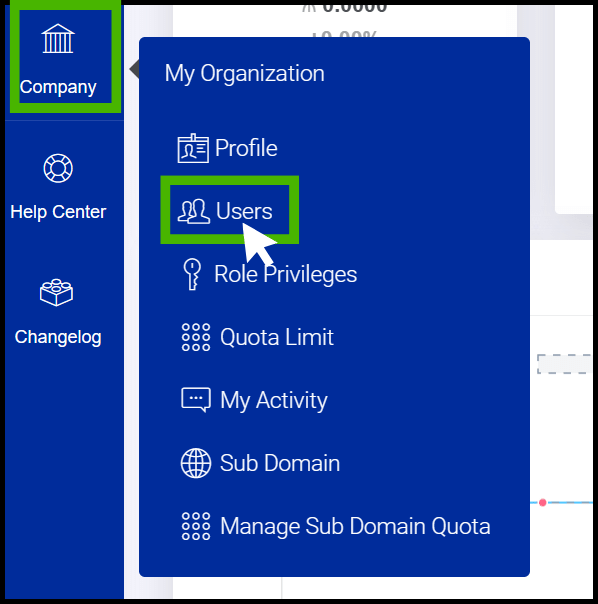
- From the dropdown click on User option.
- User screen appears.
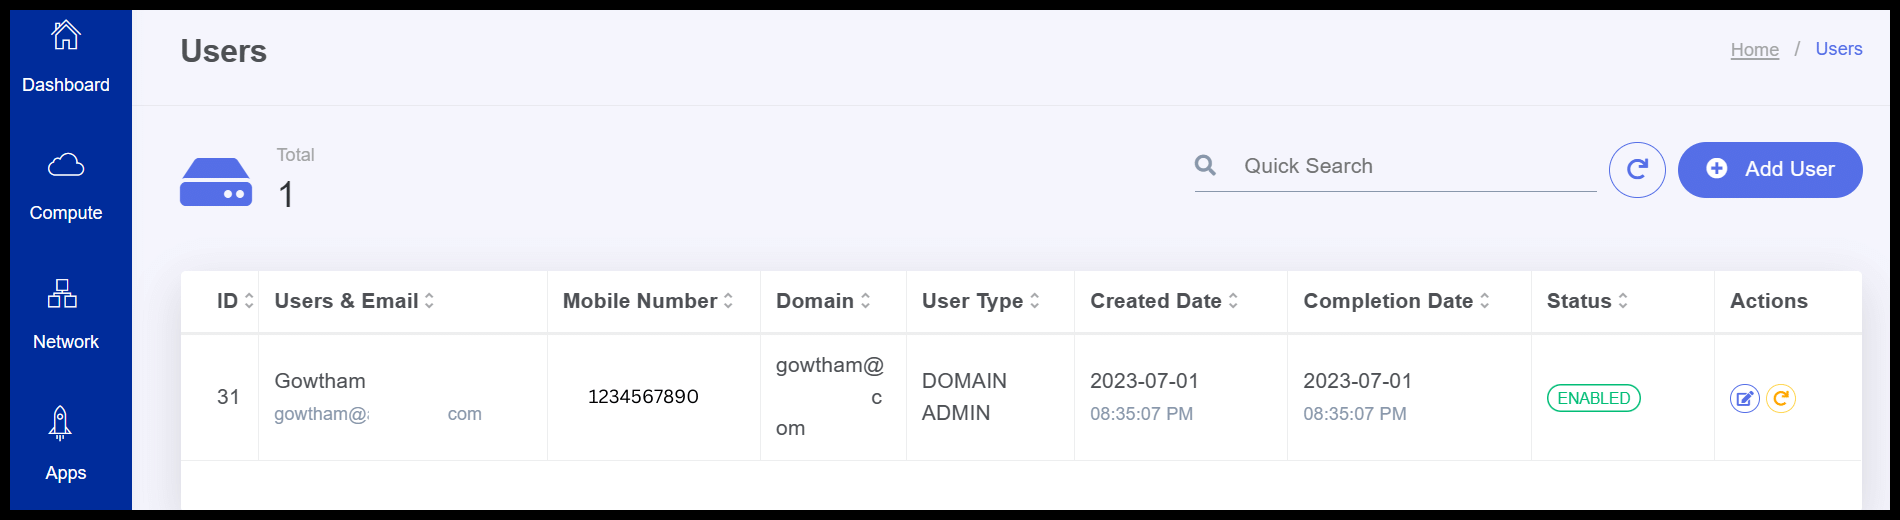
- At right side of the panel user can able to see a option to edit.
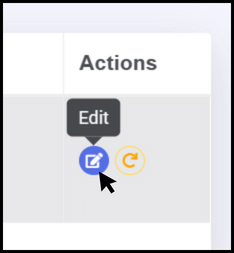
- click on the edit button on the action menu.
- Edit user screen appears.
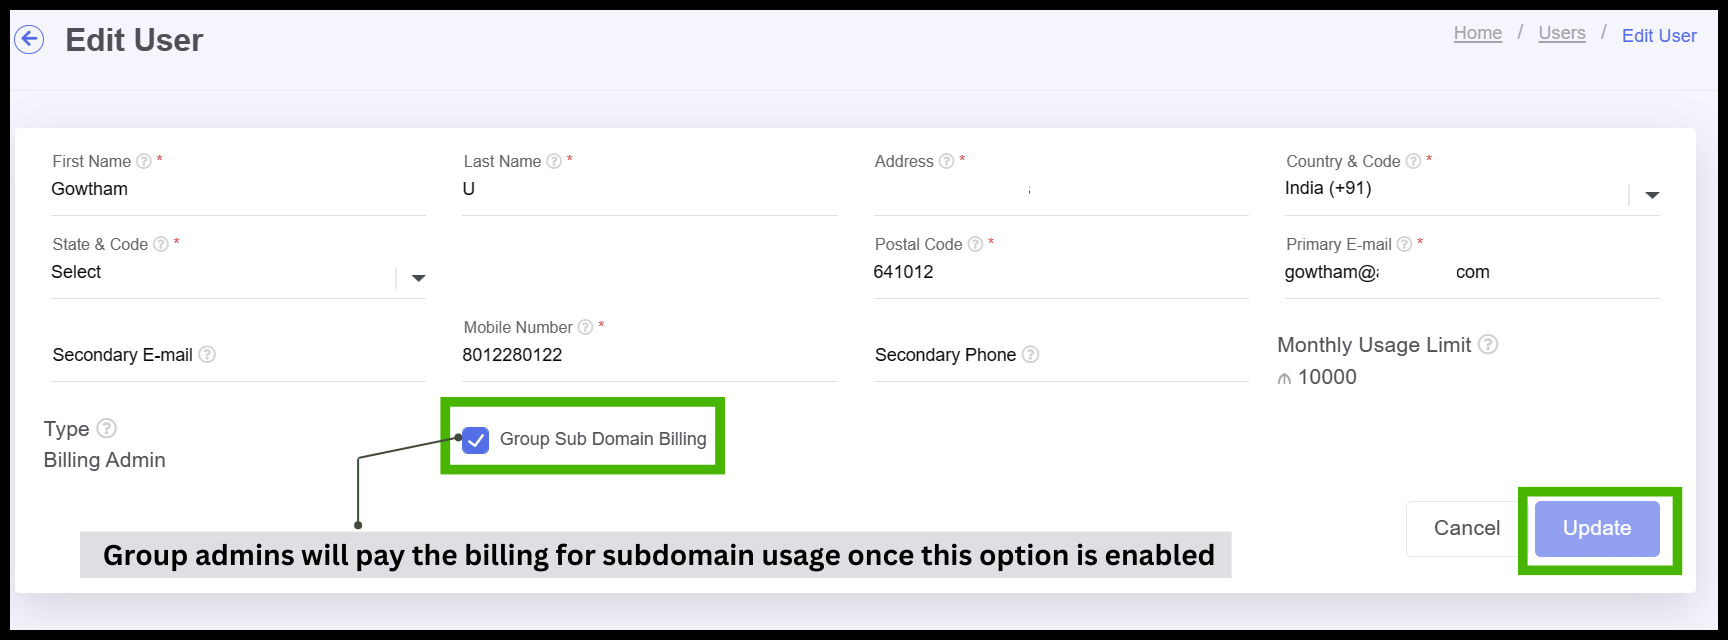
By enabling the group subdomain billing option, the parent domain can bill the root domain for subdomain billing usages.
- When the group subdomain billing option is enabled, the parent domain can pay for the usage of the entire subdomain.
- Finally, Click on update button to update the changes.
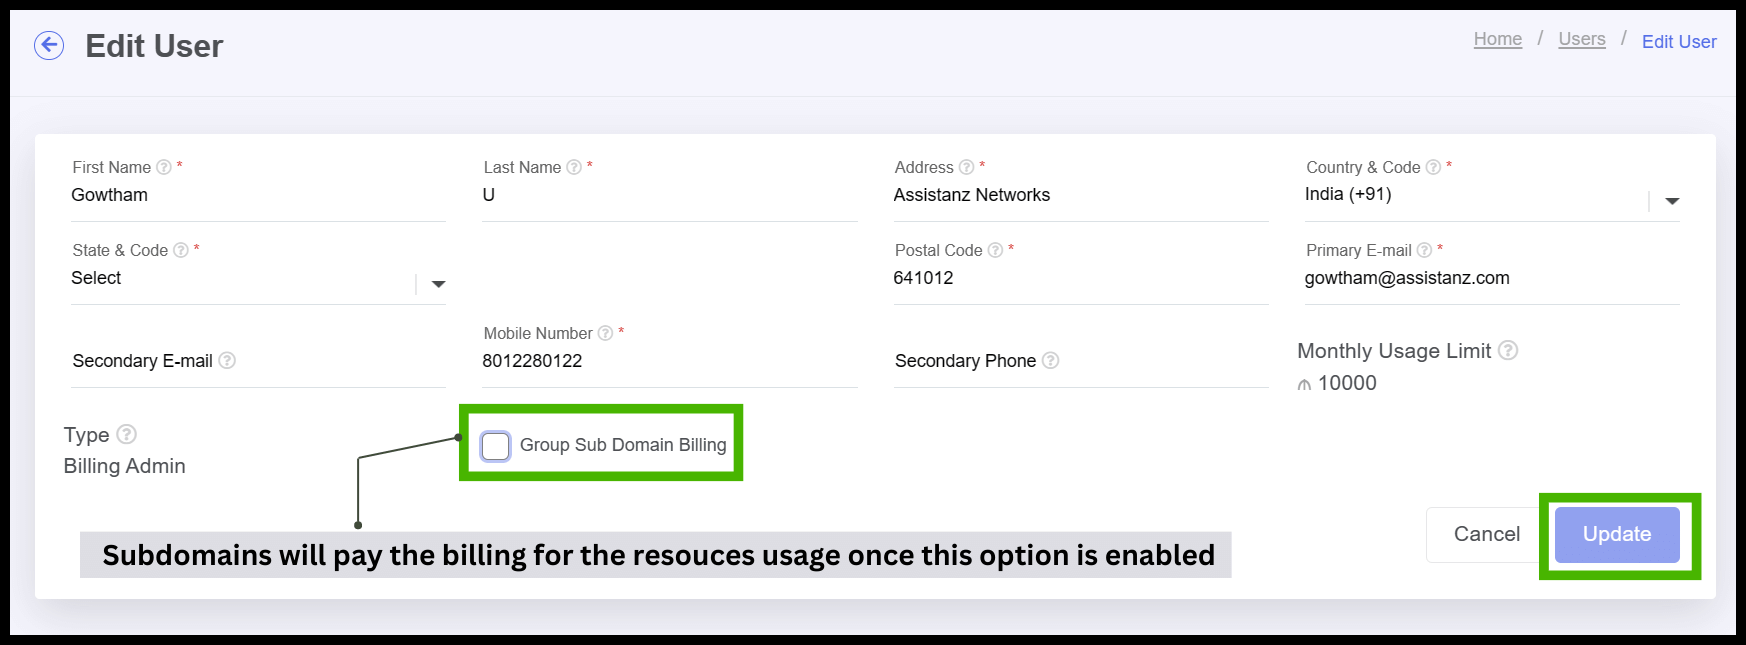
By disabling the group subdomain billing option, the subdomain can pay the billing directly to the root domain.
Admin Notification alerts.
- Using the credentials, log in to the admin panel
- An option called Configuration can be found at the left side of the panel. Click on it to view the drop-down menu.
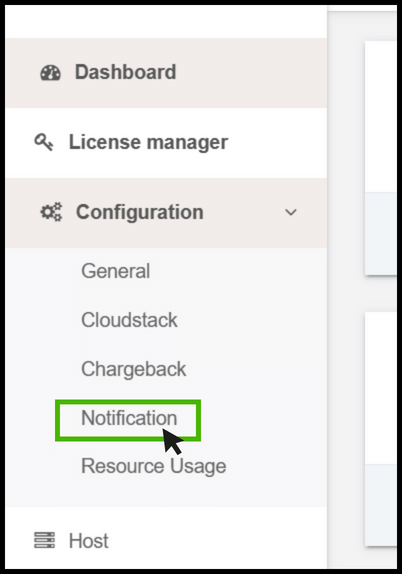
- From the dropdown click on Notification option.
- Notification screen appears.
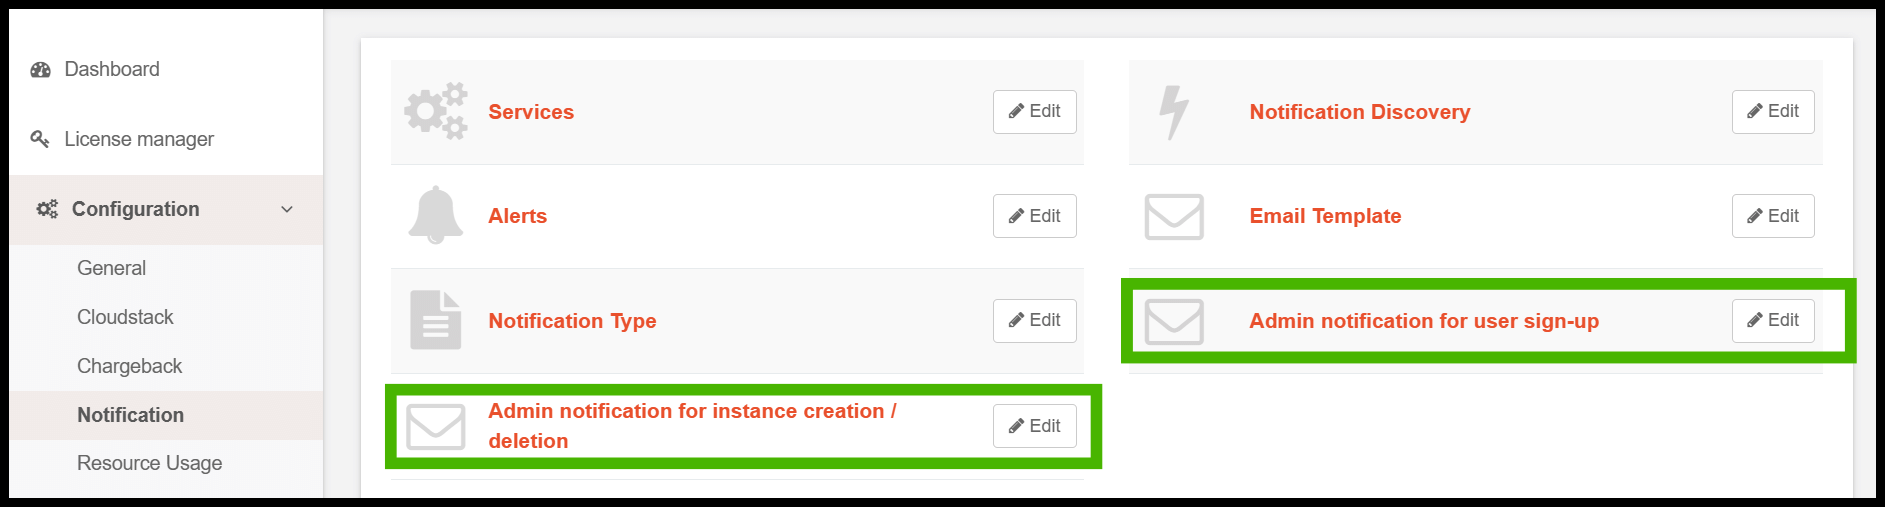
- Here is the steps to configure admin notification for instance creation / deletion.
- Click on the admin notification for instance creation / deletion option.
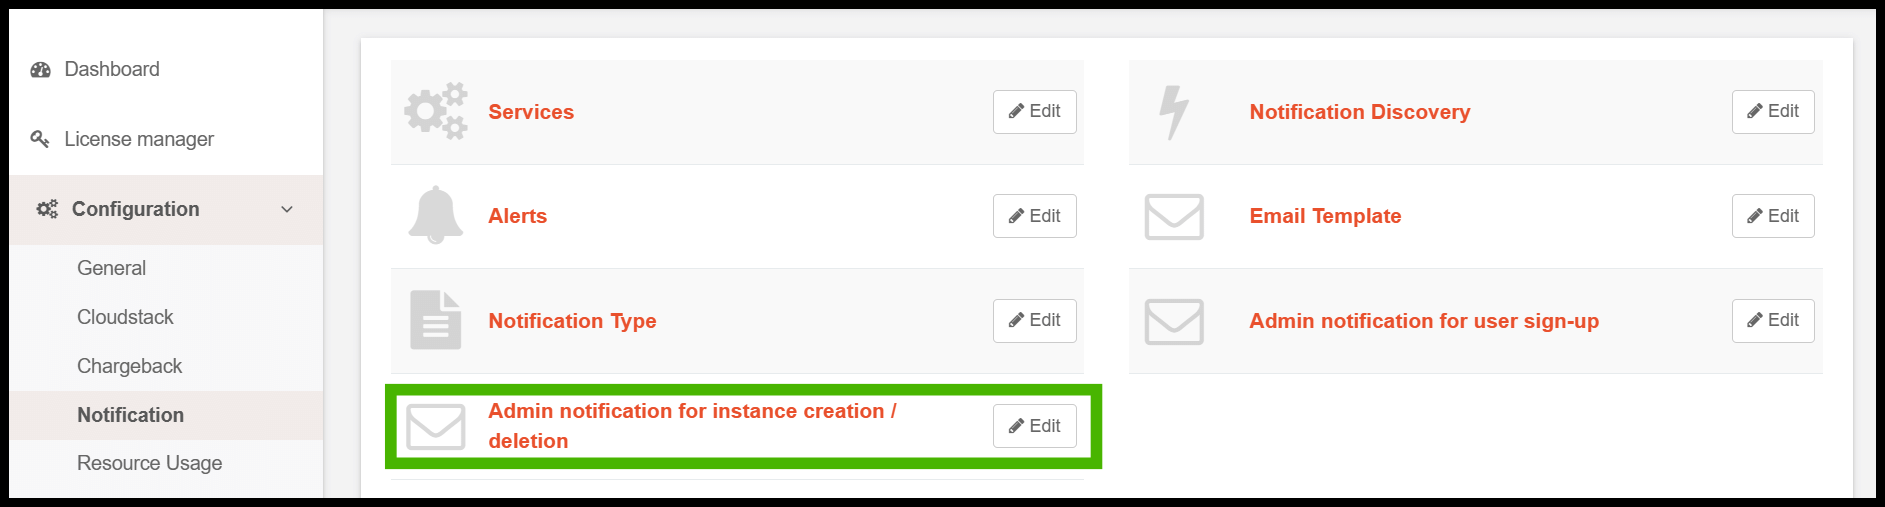
- Admin notification for instance creation / deletion option appears on the screen.
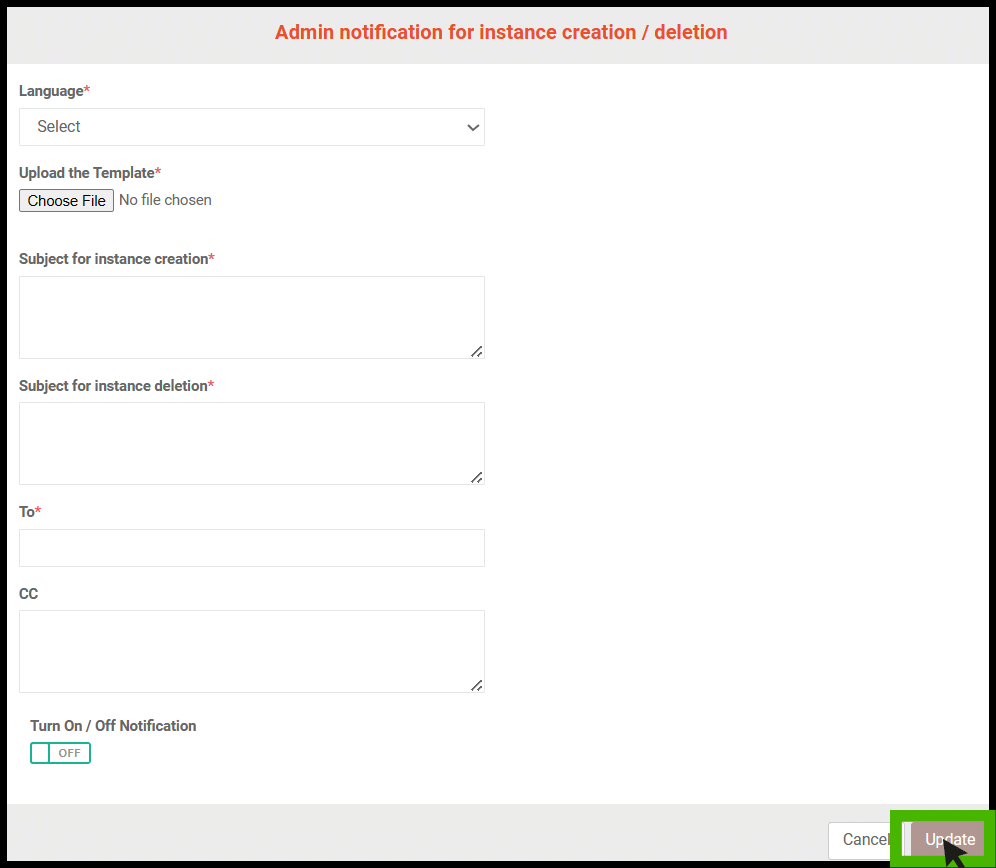
- Language - Select the language as per the requirement.
- Upload Template - Upload the email template using this option
- Subject for instance creation - Specify the subject content for instance creation mail.
- Subject for instance deletion - Specify the subject content for instance deletion mail.
- To - Specify the TO address and can add CC address in the CC field.
- Turn ON/OFF - By enabling ON button the notification will send to the concern person.By enabling Off button the notification will not send to the concern person.
- Finally, Click Update button.
- Now the configuration made successfull.
Steps to configure admin notification for new user signup.
- Click on the admin notification for for new user signup option.
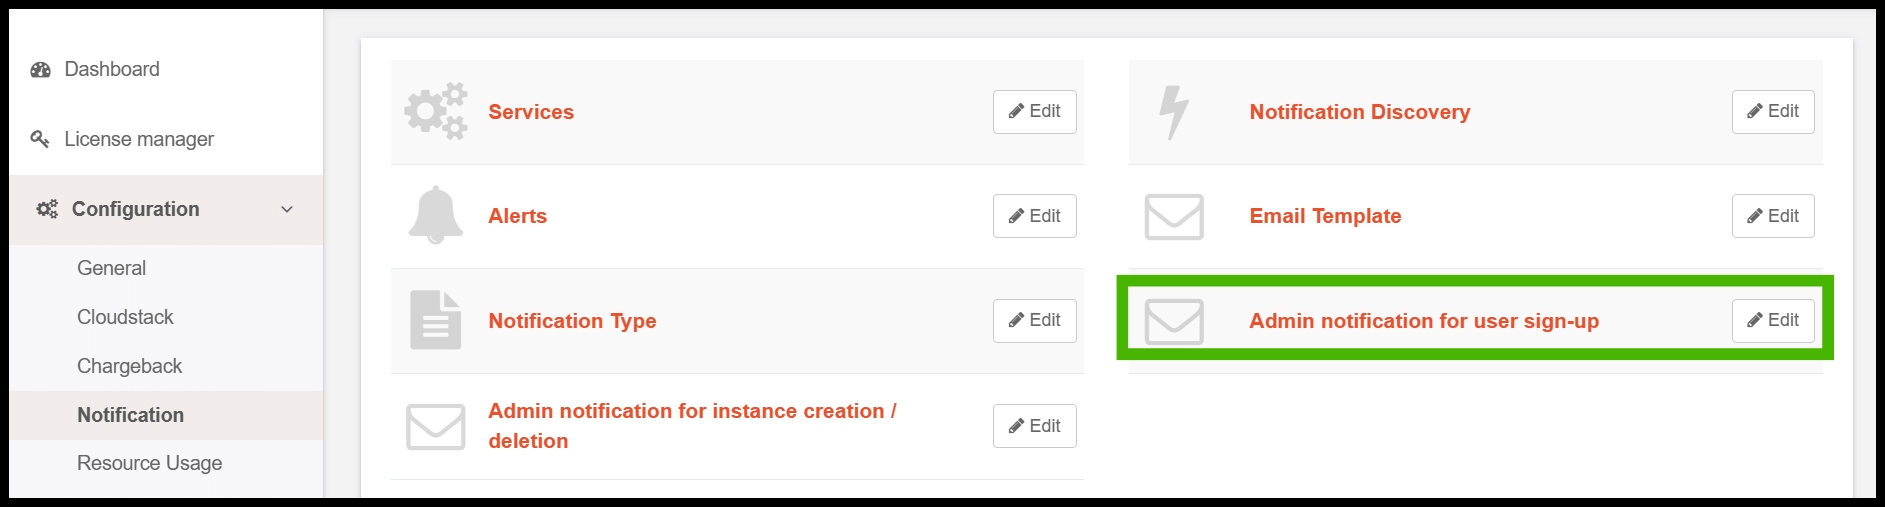
- Admin notification for new user signup screen appears.
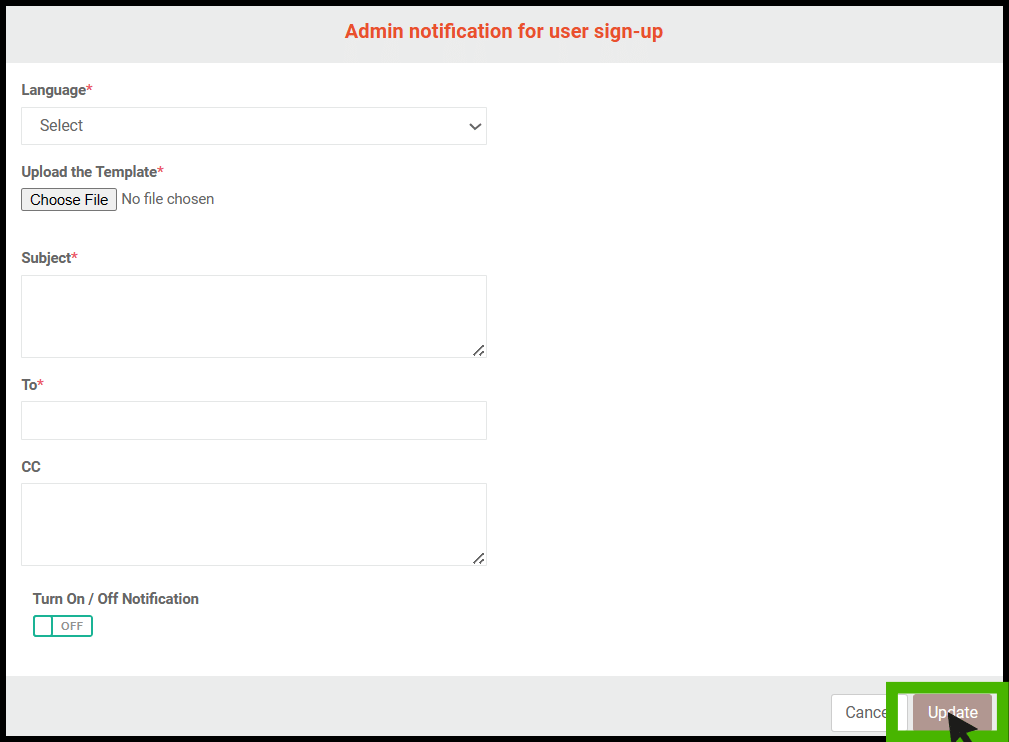
- Language - Select the language as per the requirement.
- Upload Template - Upload the email template using this option
- Subject - Specify the subject content for new account signup mail.
- To - Specify the TO address and can add CC address in the CC field.
- Turn ON/OFF - By enabling ON button the notification will send to the concern person.By enabling Off button the notification will not send to the concern person.
- Finally, Click Update button.
- Now the configuration made successfull.
Auto Configuration of Firewall rules.
- Login into user panel using your credentials.

- At left side of the panel user can able to see a option called Network. Click on it to view the dropdown.
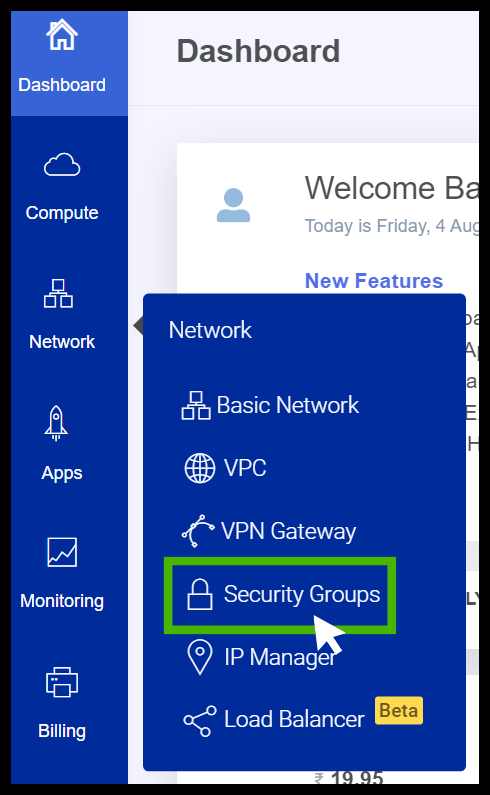
- From the dropdown select Security groups.
- Security group screen appears.At right side of the panel user can able to see a option ADD button click on it.

- Add security group screen appears.
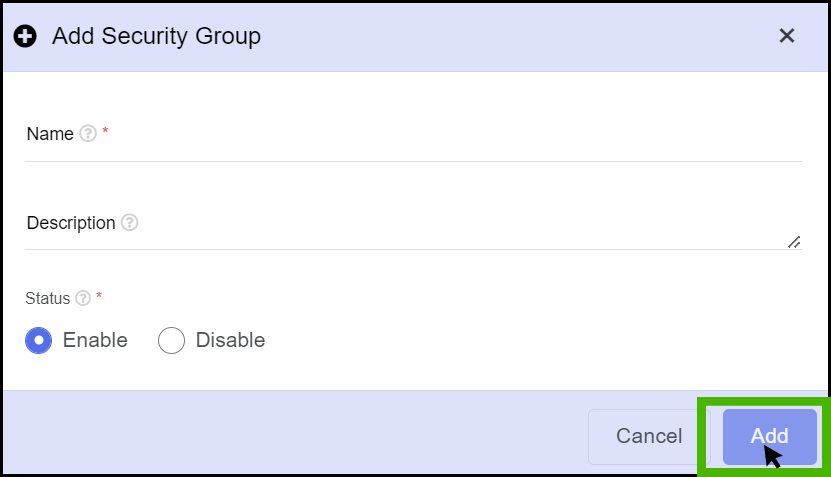
- Name - Specify a name for the security that has been creating.
- Description - Specify a short notes on description field.
- Select the status, Finally click on Add button.

- Now the security group has been created sucessfully.
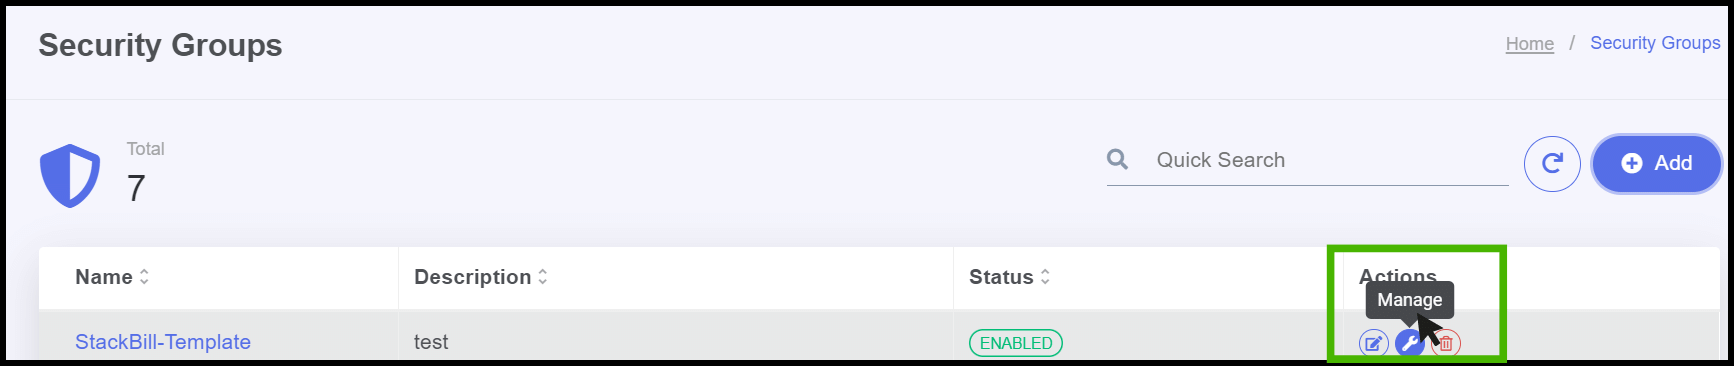
- From the Action menu on the right side of the panel, users can manage security groups by clicking on the manage icon.
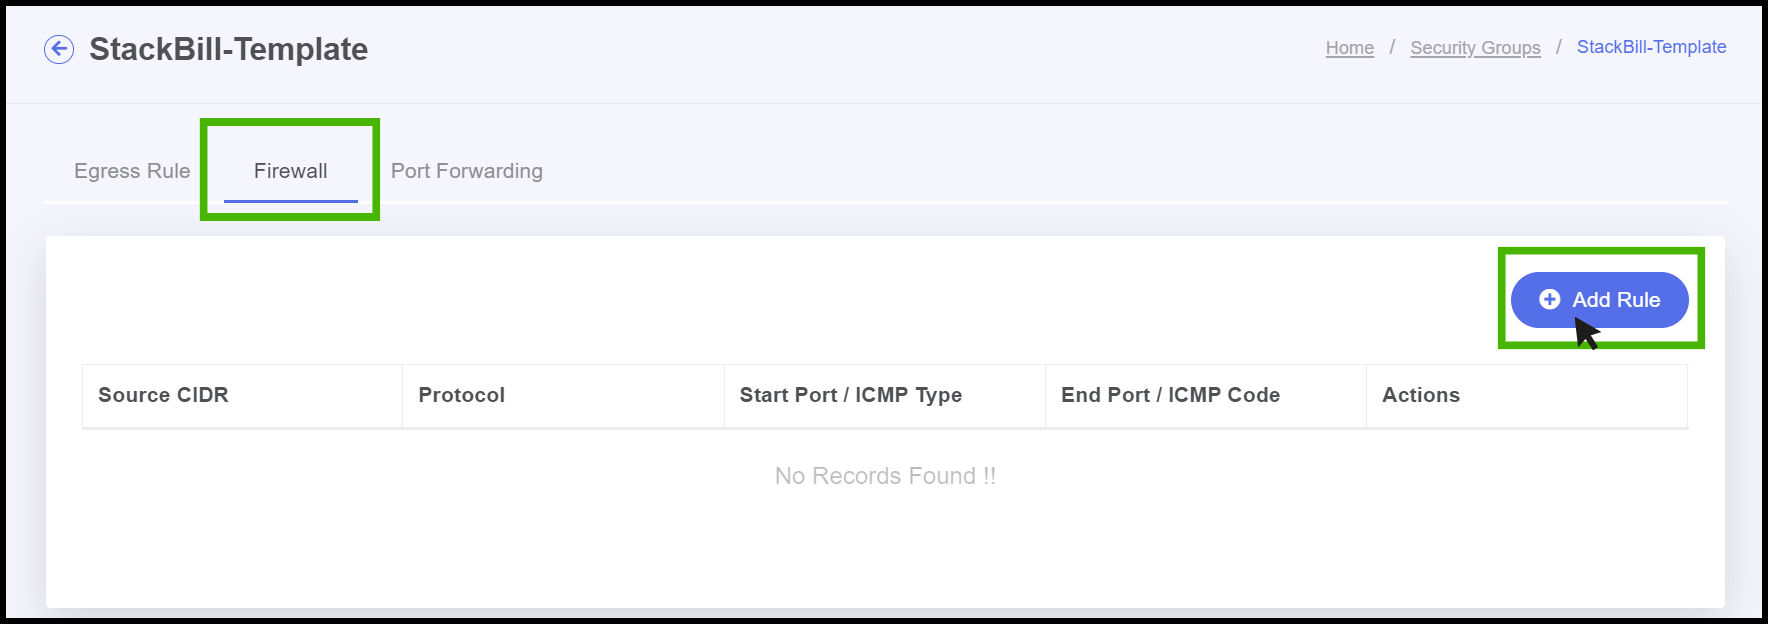
- Add a firewall rule by clicking on the Add Rule part
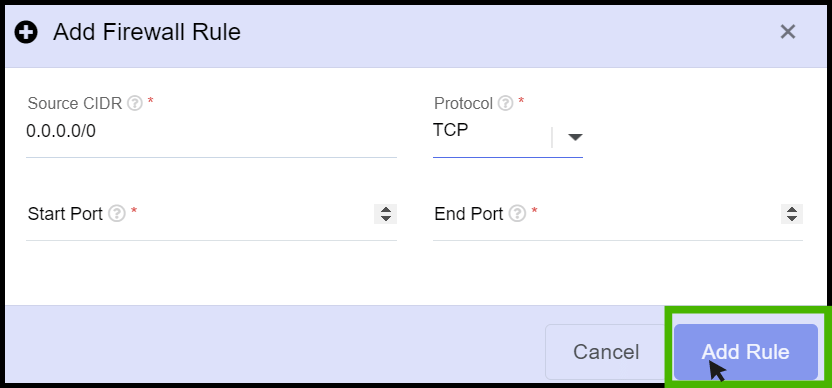
- Fill the required fields and click Add Rule button.
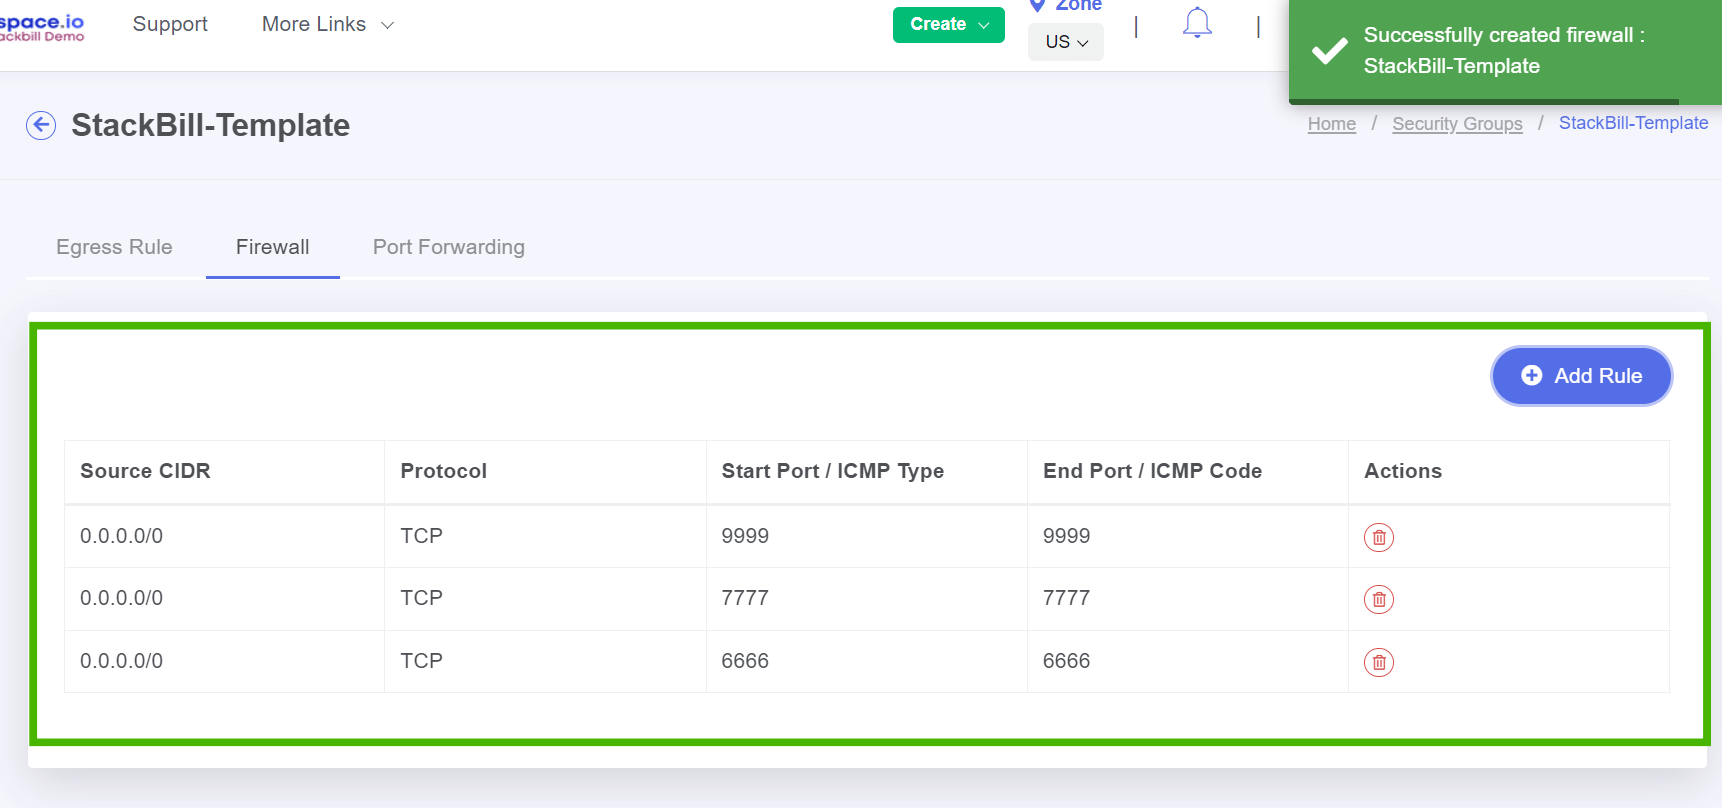
- Firewall rule has been created successfully.

- Go to the instance creation page to check the Auto Configuration of Firewall rules.
- Now the the Auto Configuration of Firewall rules has been created successfully when launching a VM in StackBill CMP.
ACS Native Autoscaling / StackBill Autoscaling
In StackBill CMP, users have the flexibility to choose between two types of autoscaling based on their preferences one is ACS native autoscaling and StackBill Autoscaling. They can easily enable their preferred option by following the guide below.
- Login into admin panel using credentials.
- At left side of the panel user can able to see a option called configuration. Click on it to view the dropdown.
- From the dropdown select General option and click on Feature Configuration option.
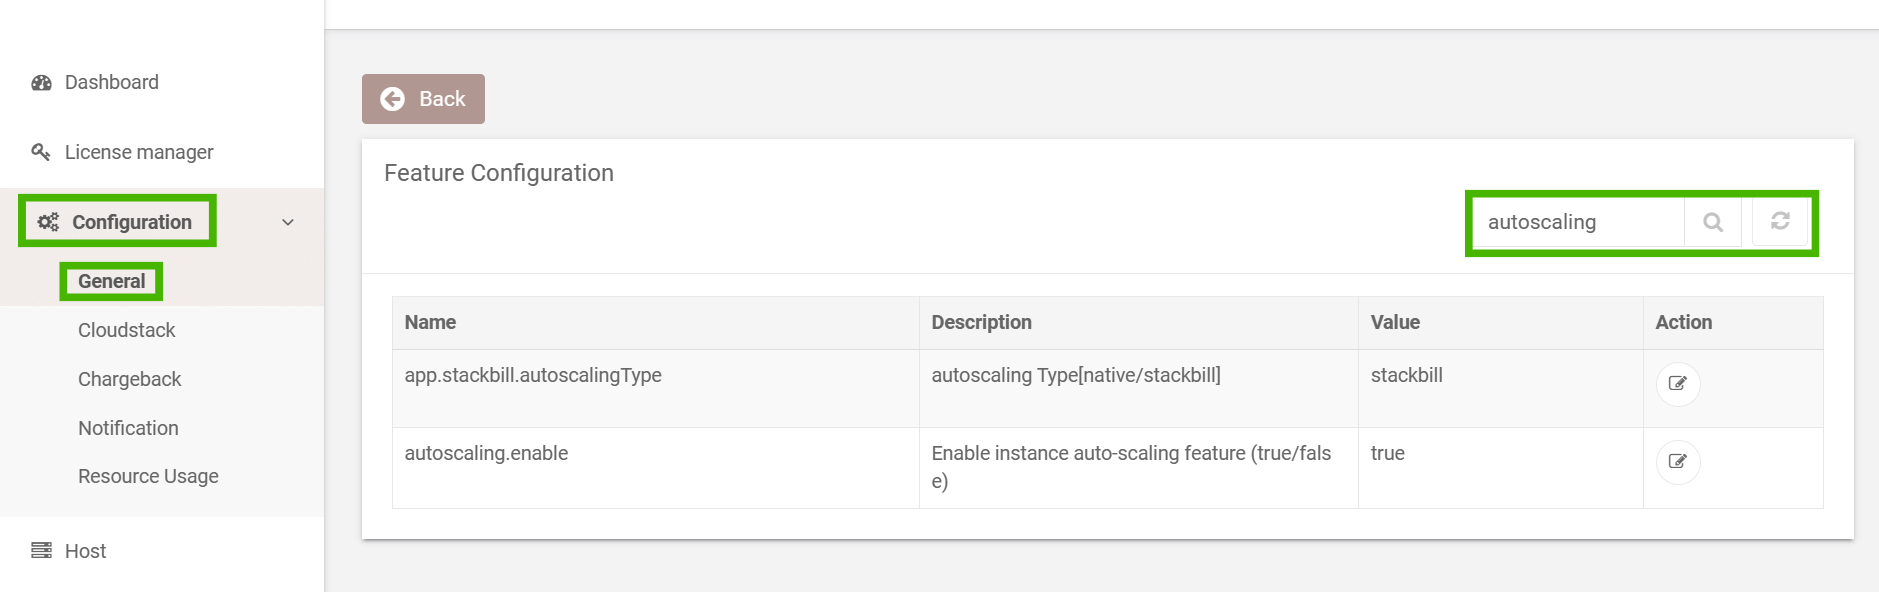
- Feature configuration screen appears.At right side of the panel user can able to see a option for search option.
- On the search option type Autoscaling and click search button.
.png)
- Autoscaling configuration appears on the screen.
- Click on the edit option available on the action menu to edit the autoscaling configuration.
- If the user enter the value as Native ACS Native autoscaling enables to the user portal.
- If the user enter the value as StackBill StackBill autoscaling enables to the user panel.