Basic Network
Network Manager in StackBill CMP
StackBill provides private networking, traffic filtering, and load balancing so you can secure and control your application traffic.
StackBill provides private networking, traffic filtering, and load balancing so you can secure and control your application traffic.
- There are two types of network available in StackBill CMP they are L2 network, and Isolated network.
L2 Network on Stackbill Cloud Management portal.
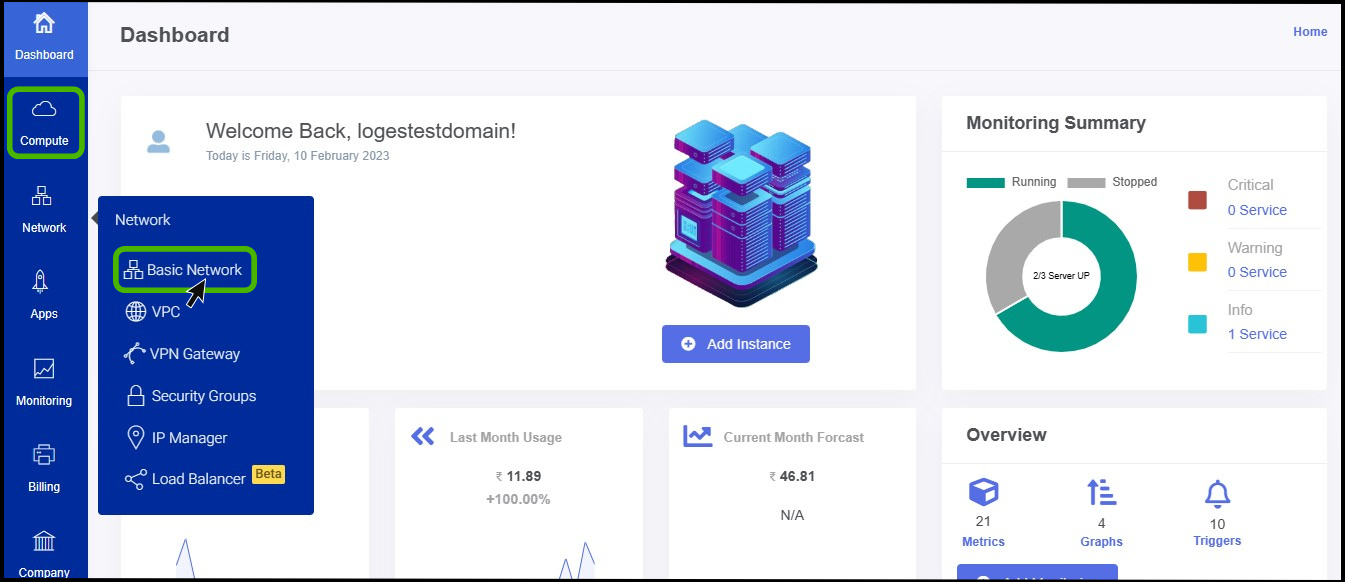
- Click on the Network dropdown button below the virtual resources icon, Which is available in the top left corner. from the dropdown, Click on Basic Network, to create a new network.
- Basic Network screen appears.
- At the right side of the panel the user can able to see a option called ADD NETWORK, Click on it.
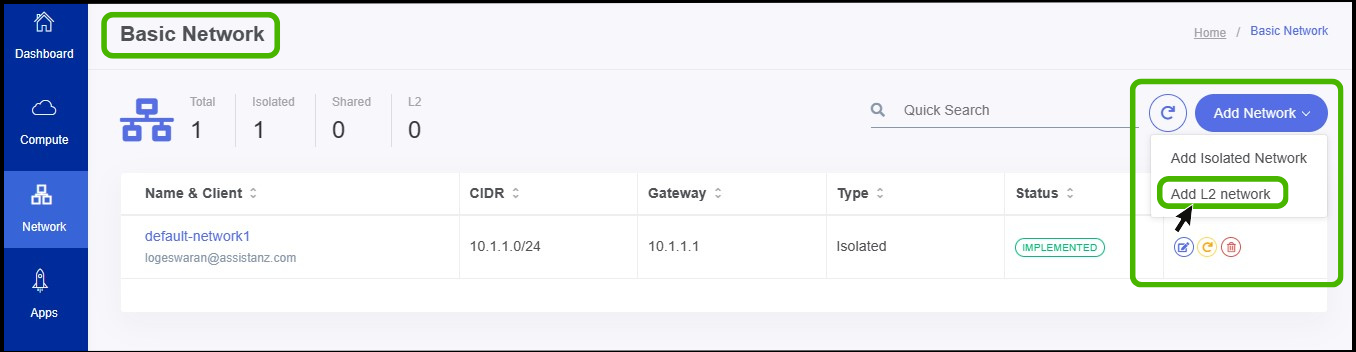
- So once You click on the Add network button select the required network type as per the need.
The following document shows the flow of the L2 network.
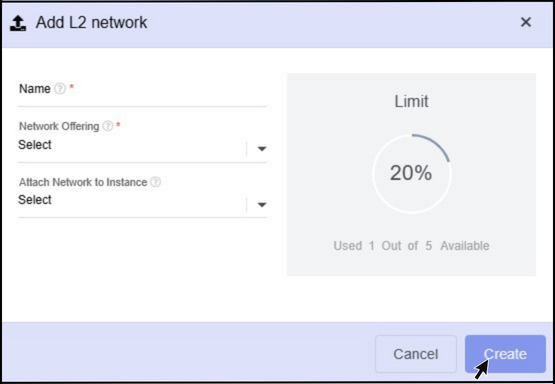
Name - Specify a name for the network.
Network offering - Select the Network offering.
Attach Network to Instance - The user can attach the network to their required instance using this option.
Finally,Click on the Create button.
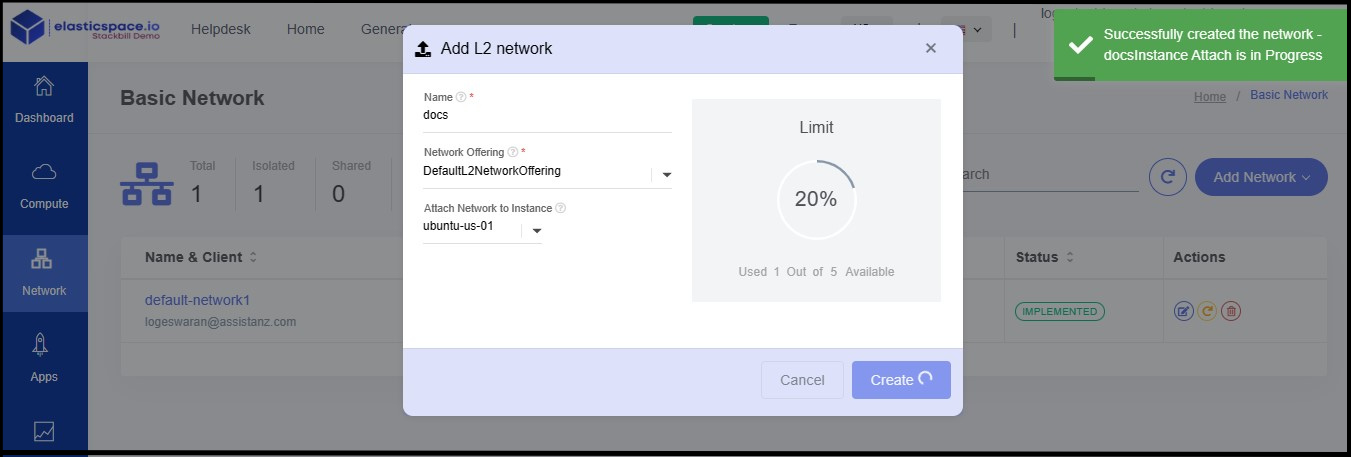
- Now the L2 Network has been created successfully.
Creating Isolated Network in StackBill CMP
An isolated network can be accessed only by virtual machines of a single account.
- Click on the Network dropdown button below the virtual resources icon, Which is available in the top left corner. from the dropdown, Click on Basic Network, to create a new network.
- Basic Network screen appears.
- At the right side of the panel the user can able to see a option called ADD NETWORK, Click on it.
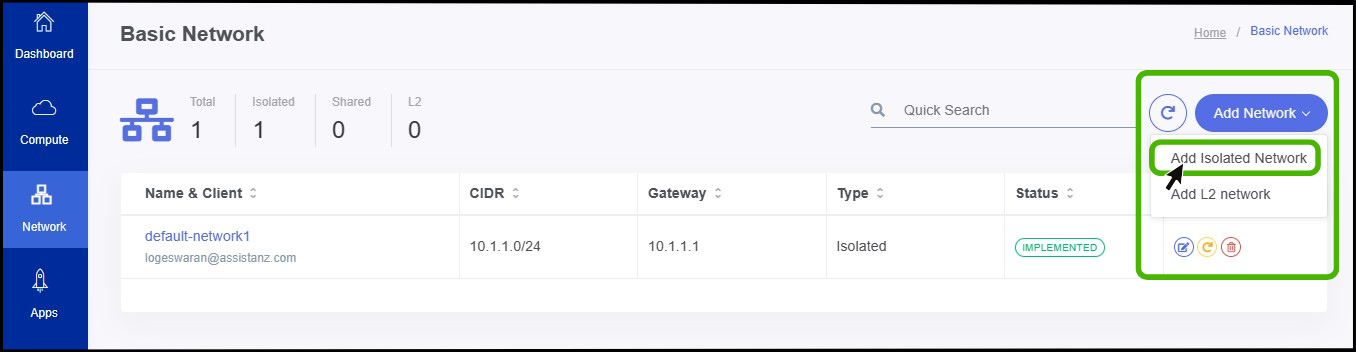
- Once You click on the Add network button select isolated network option to create a isolated network.
The following document shows the flow of the Isolated network.
Name - Specify a name for the network.
Network offering - Select the Network offering.
Attach Network to Instance - The user can attach the network to their required instance using this option.
Finally,Click on the Create button.
- Now the Isolated Network has been created successfully.
Adding Network to Instance in StackBill CMP

- Click on the Virtual Resources dropdown button below the dashboard icon, Which is available in the top left corner. from the dropdown, Click on Instance option.
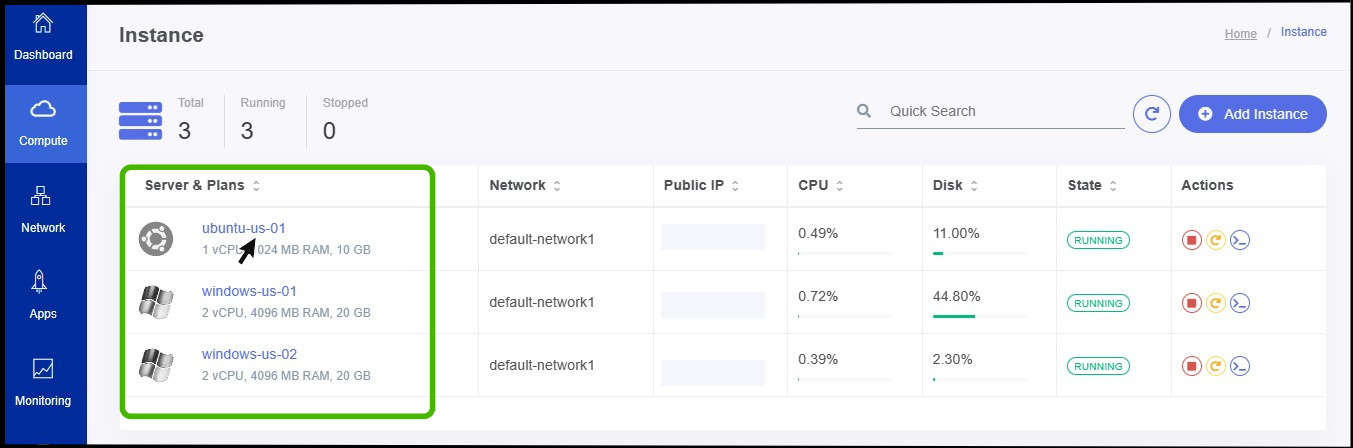
- Instance screen appears.
- Click on the particular instance.
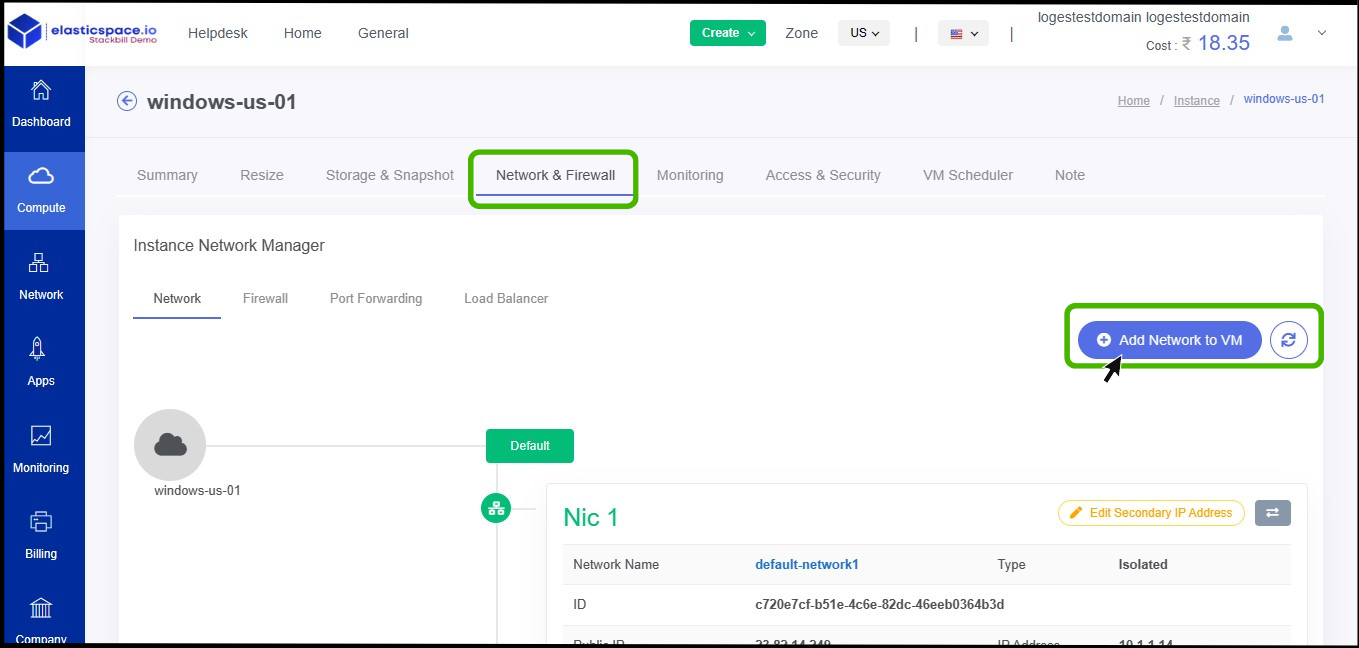
- Now the summary page of the instance appears, Select the Network & Firewall option on the summary.
- Network & Firewall option appears.
- At right side of the panel click on Add network to the VM button.
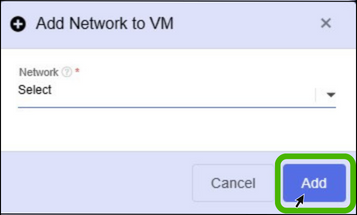
- Select the Network and click Add button.
IMG
- Now the the VM has been attached to network successfully.
Adding security groups in StackBill CMP
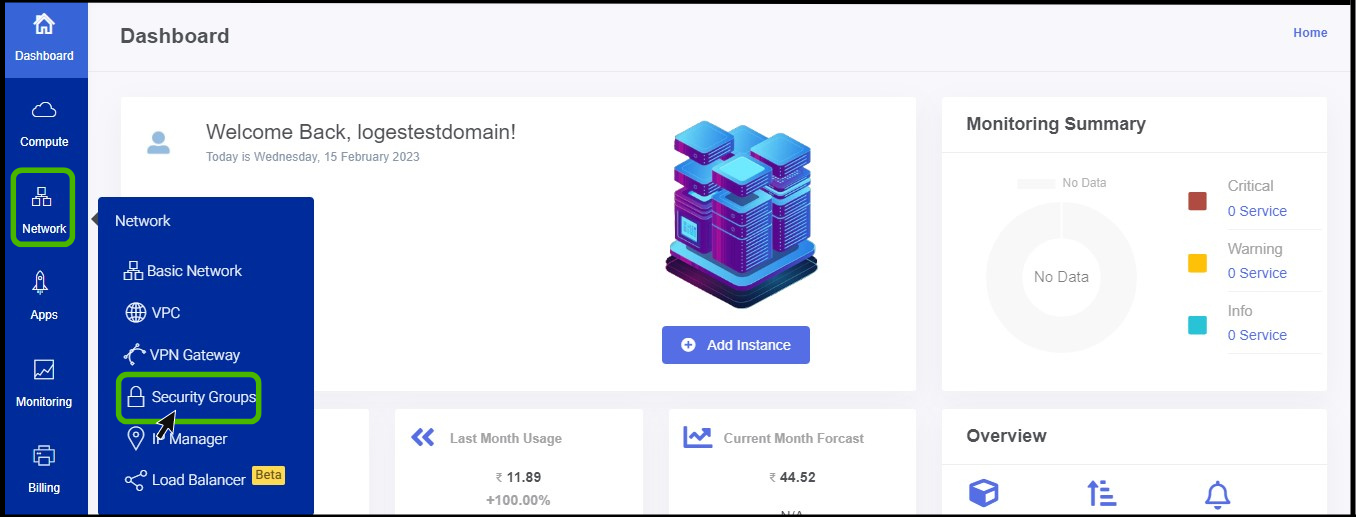
- Click on the Network dropdown button below the compute icon, Which is available in the top left corner. from the dropdown, Click on Security groups option.
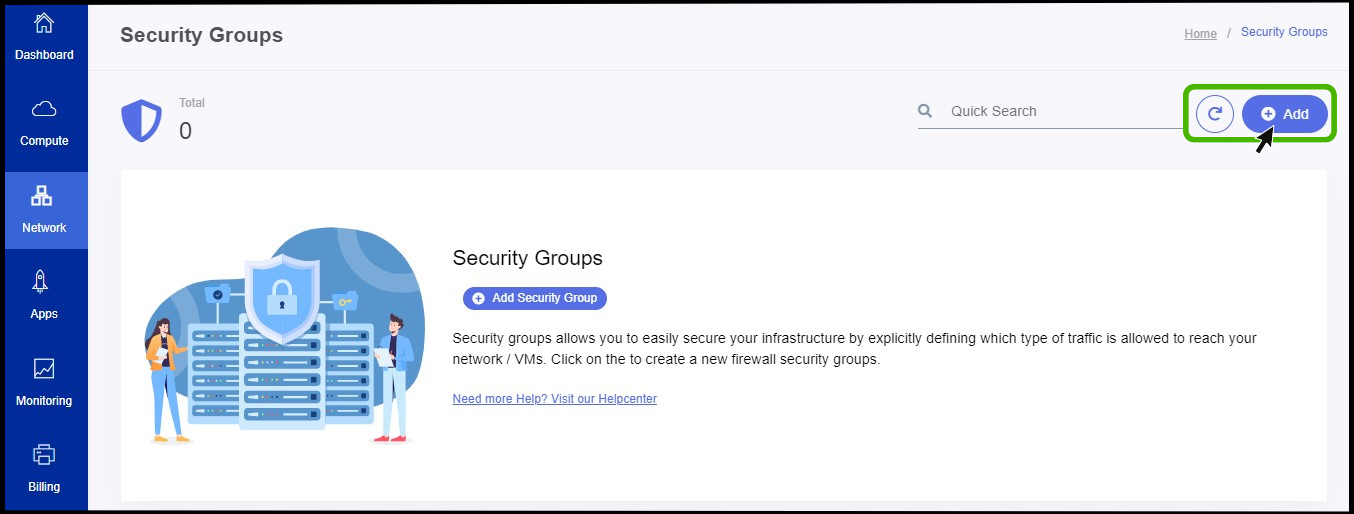
- Security group option appears on the screen.
- At right side of the panel the user can able to see a option called Add , Click on it to create a new security groups.
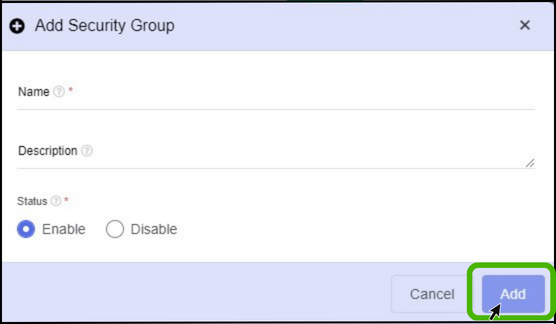
- Name - Specify a name for the security group that has been creating.
- Description - Give a short notes about the security group.
- Status - Specify IP version.
- Finally, Click on Add button.
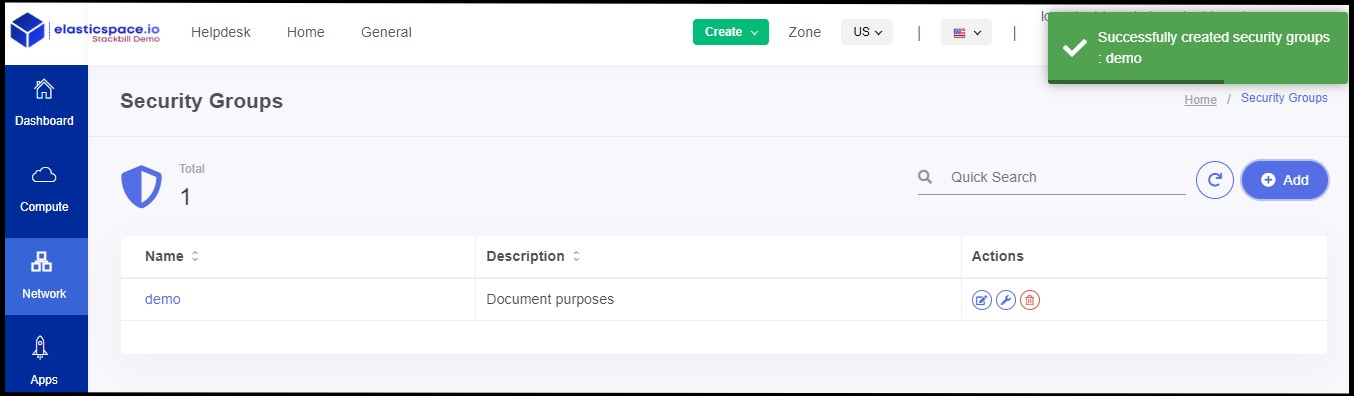
- Now the security group has been created successfully.
What is mean by Network Address Translation?
NAT stands for Network Address Translation
It will translates set of IP address to another set of ip address
In other words, As per wikipedia, it expains " Network address translation is a method of mapping an IP address space into another by modifying network address information in the IP header of packets while they are in transit across a traffic routing device"
In StackBill CMP, there are two types of NAT is available. They are: Source NAT & Static NAT
Source NAT - It will be used as shared NAT, in other words, using this source NAT IP, we can able to access multiple virtual machines.
Static NAT - It will be the dedicated NAT. In other words, this NAT IP will be attached to only a single virtual machine. It's like one-to-one communication.
Configure Port forwarding
Port forwarding allows computer over the internet to connect a specific computer (or) service within a private network.
A port number will have an IP address and based on the port number to determine what the purpose is.
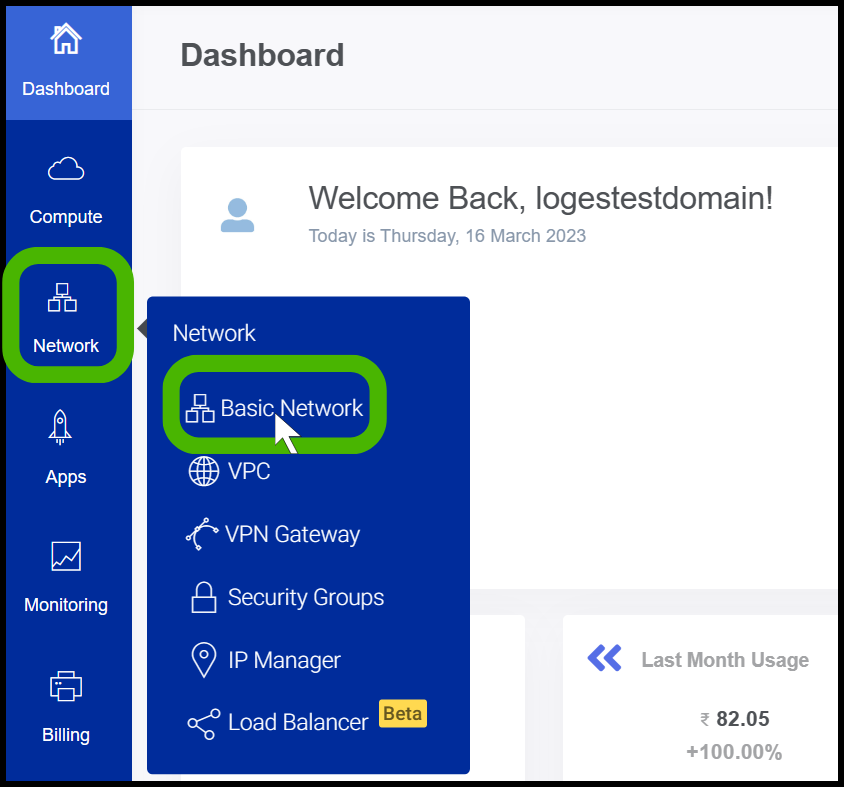
click on the Network dropdown below the virtual Resources icon, which is available in the top left corner. From the dropdown, click on Basic Network, to Configure Port Forwarding
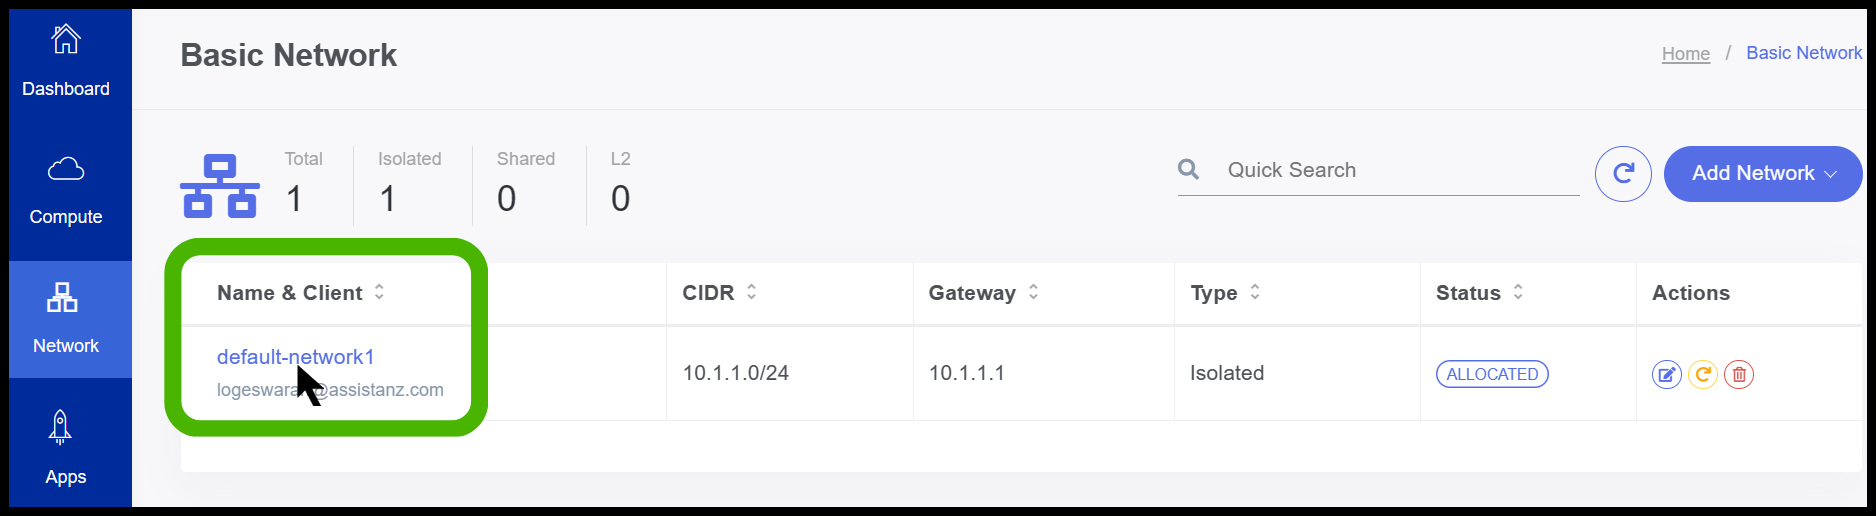
- Basic NetworkScreen appears.
- Click on the network in which you wish to configure port forwarding.
- Network details screen appears, Select the public IP section from the details screen.
.png)
- Click on the Source NAT option

- IP address screen open.
- Before configuring Port Forwarding user need to Configure Firewall
- To Configure the Firewall, click on Firewall option and configure it.
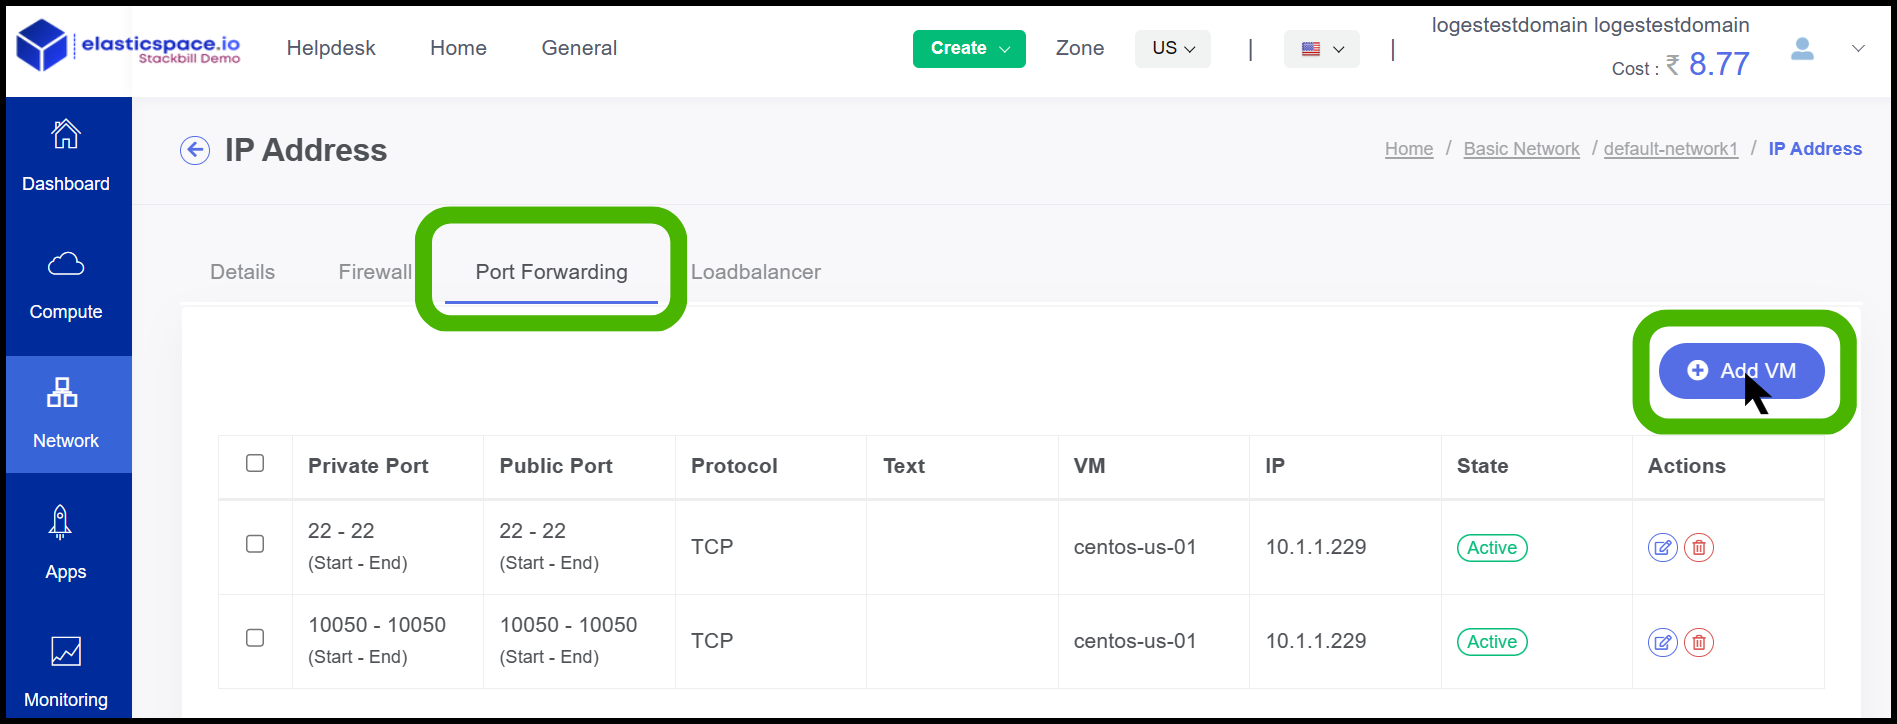
- Once the firewall has been configured go to the Port Forwarding option.
- Click on Add VM.
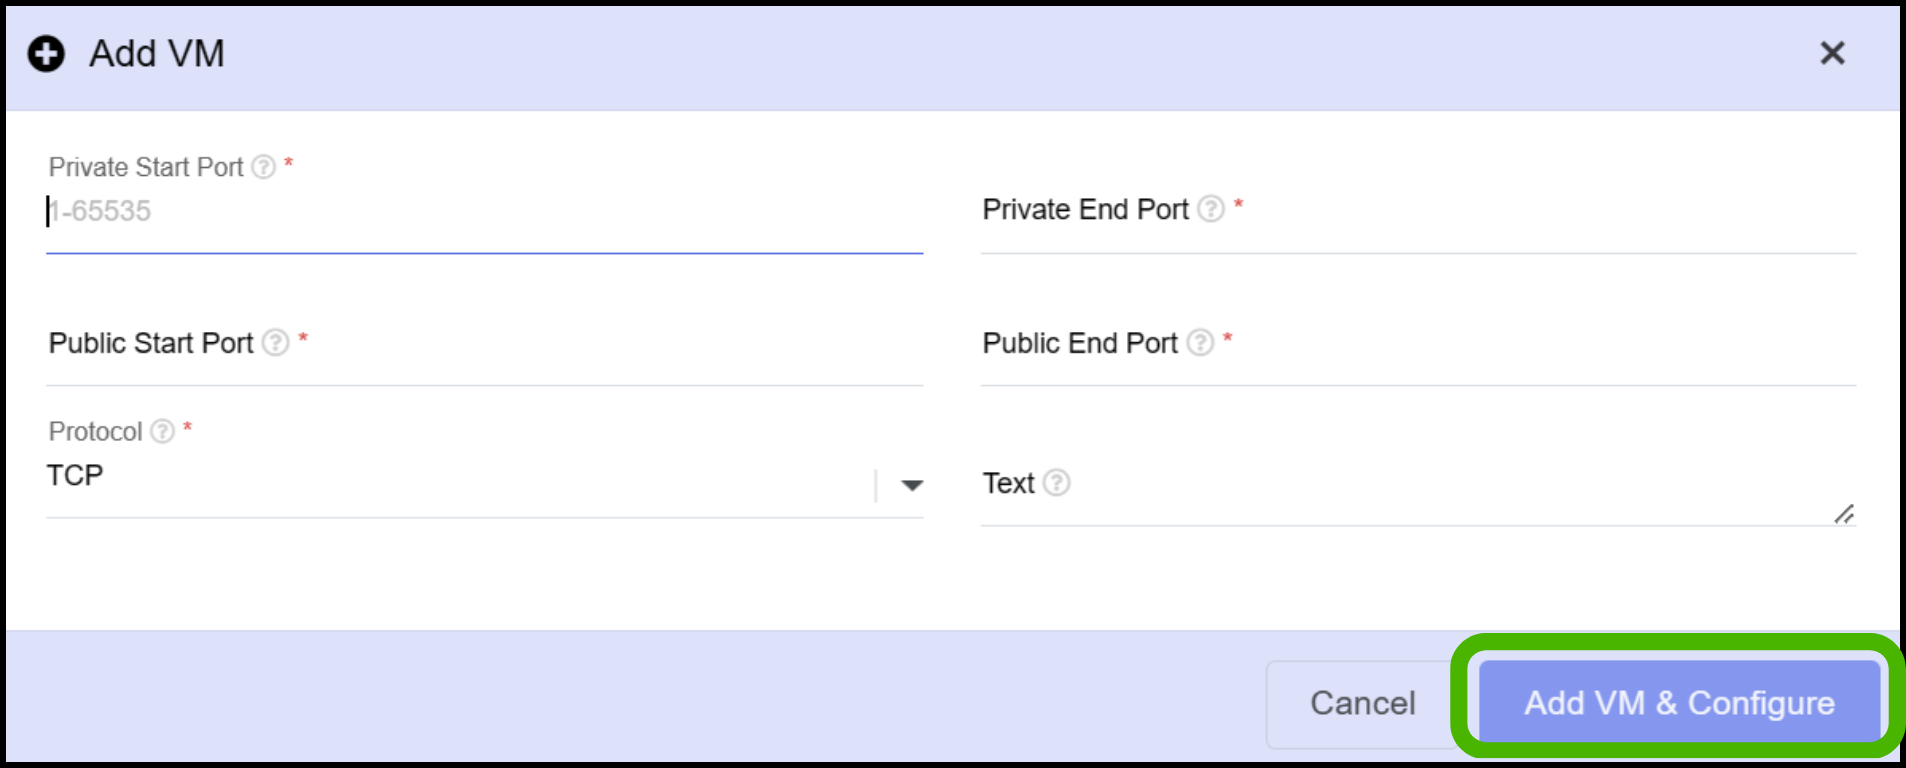
- Configure the required port and select the protocol
- Finally Click on Add VM & Configure.
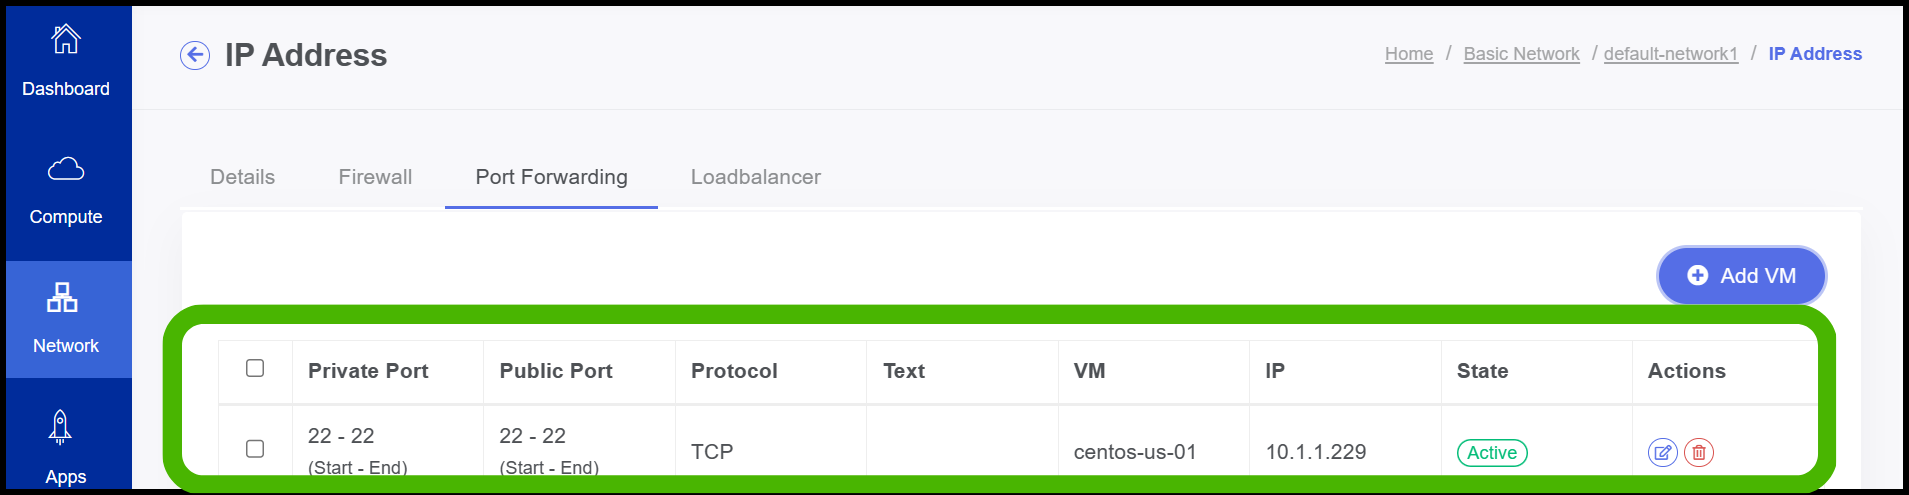
- Now the Port Forwarding has been configured successfully.
Creating Egress rule on StackBill CMP
- Egress rule will be used to allow your virtual instance to access outside network i.e. Internet.
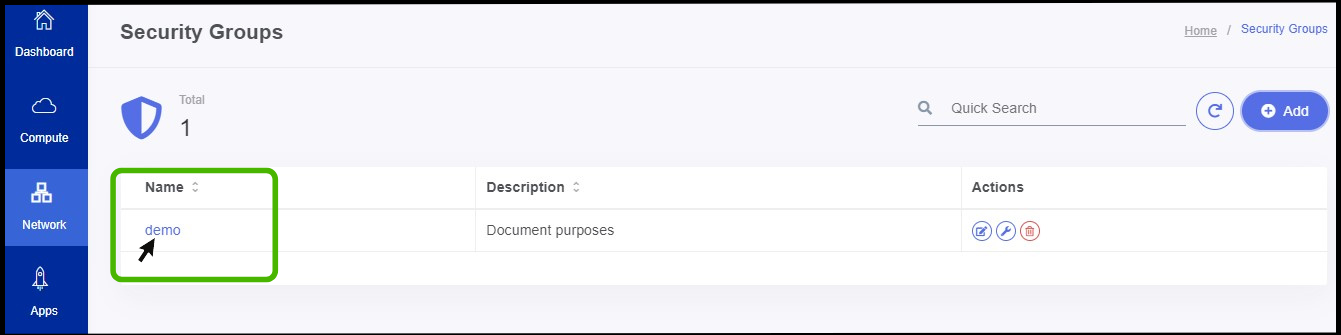
- Click on the particular security group in which the egress rule should be created.
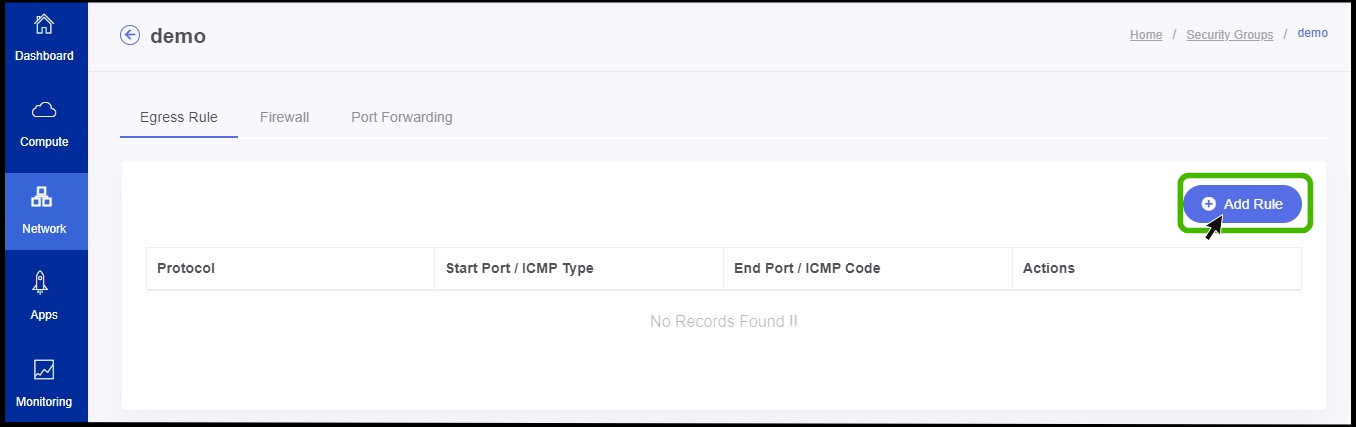
- Now egress rule creating menu appears.
- The user can see an option called Add rule on the right side of the panel.
- Click on it.
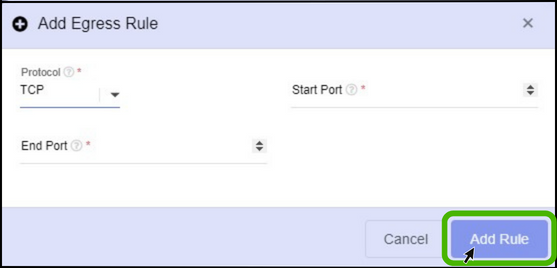
- Select the protocol as per the wish.
- Specify the start and end port number.
- Finally, Click on Add rule button.
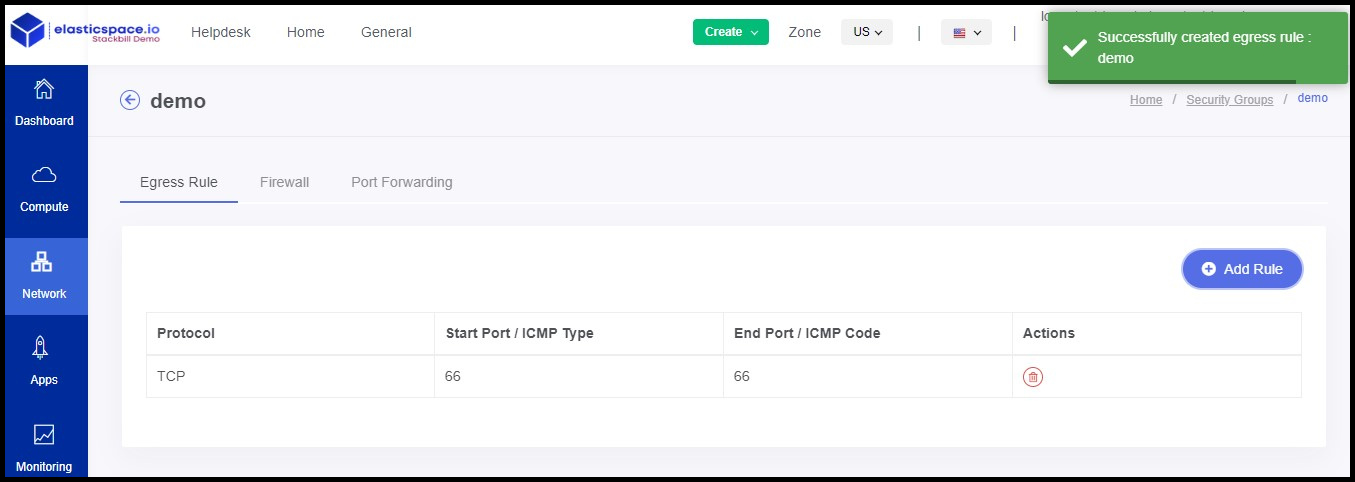
- Now the Egress rule has been created successfully.
IP Manager Overview on StackBill CMP
A StackBill CMP IP address is a publicly-accessible static IP address that you can assign to an instance and then reassign to another Instance later. To build a high-availability infrastructure, you can implement a failover mechanism using reserved IP addresses.
Acquiring new public IP address
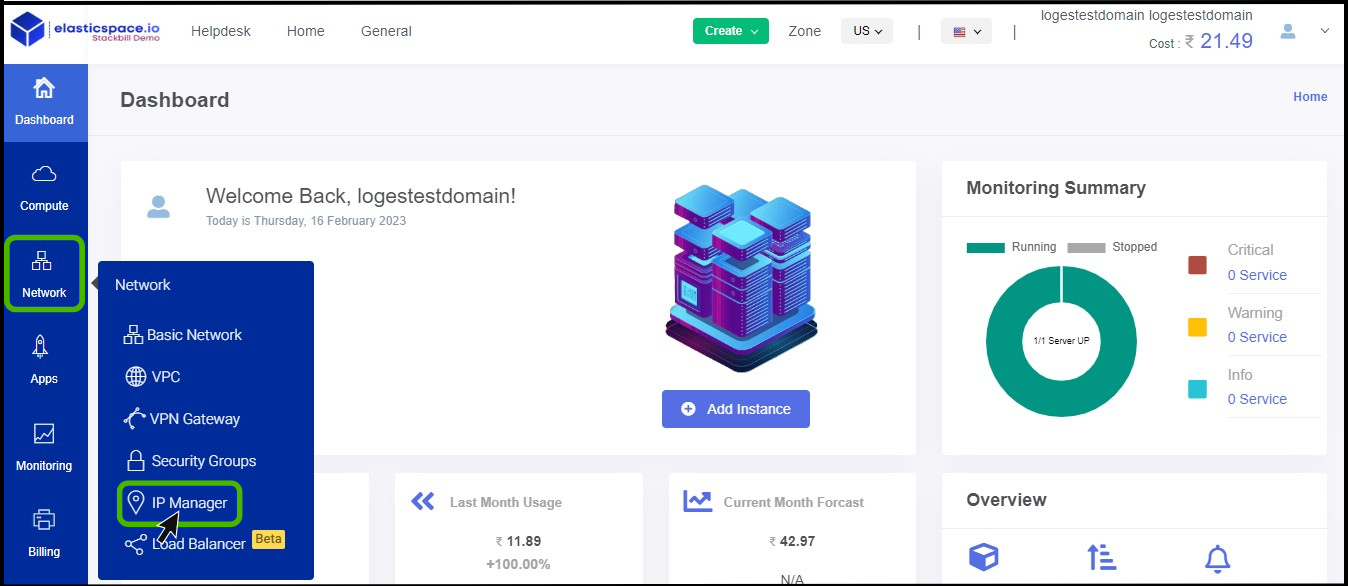
- Click on the Network dropdown button below the compute icon, Which is available in the top left corner. from the dropdown, Click on Ip Manager option.
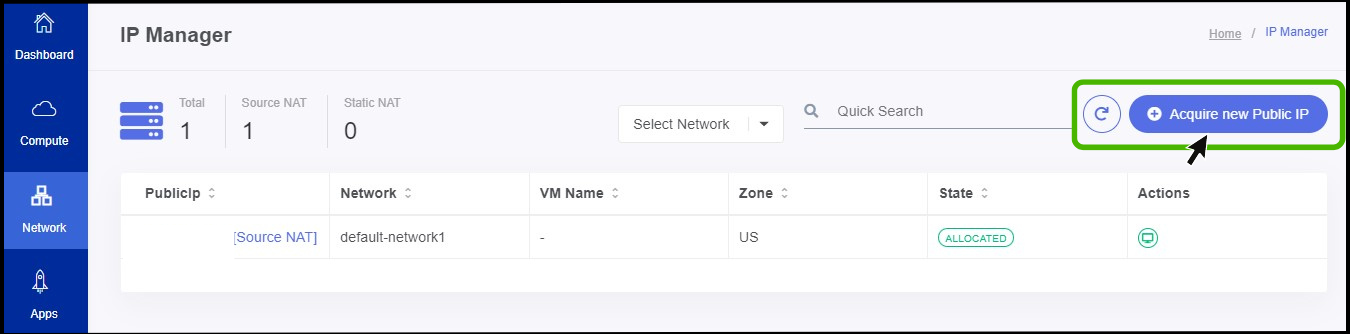
- IP manager screen appears.
- Click on Acquire New Public IP option.
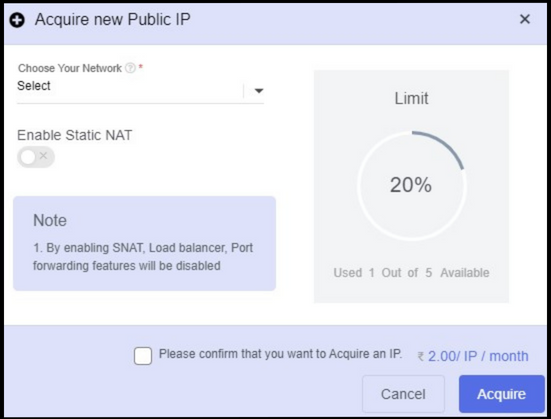
- Choose your Network - To acquire a public IP address, choose the network.
The loadbalancer and port forwarding features can be enabled by disabling static NAT while acquiring a new public IP address.
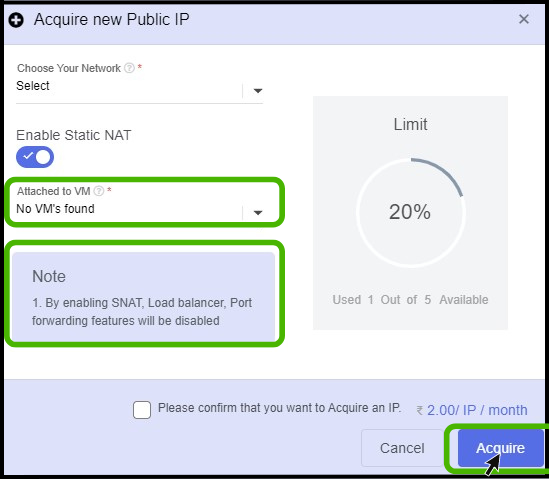
The loadbalancer and port forwarding features can be disabled by enabling static NAT while acquiring a new public IP address.
- To confirm the acquisition of the new IP address, click on the check box.
- The price is charged by the administrator to acquire a new IP address
- Finally click on the Acquire button.
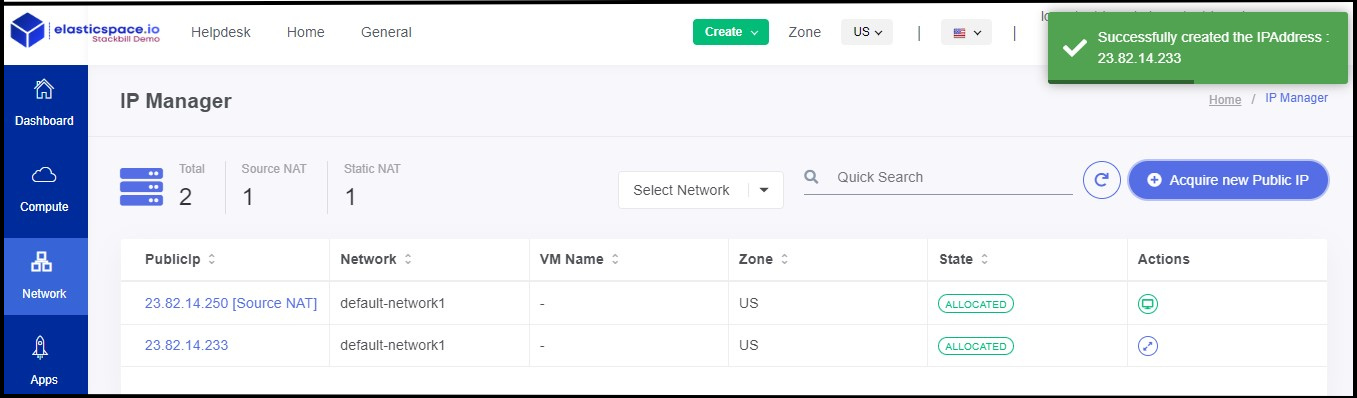
- Now the IP adress has been created successfully.
Releasing public IP address
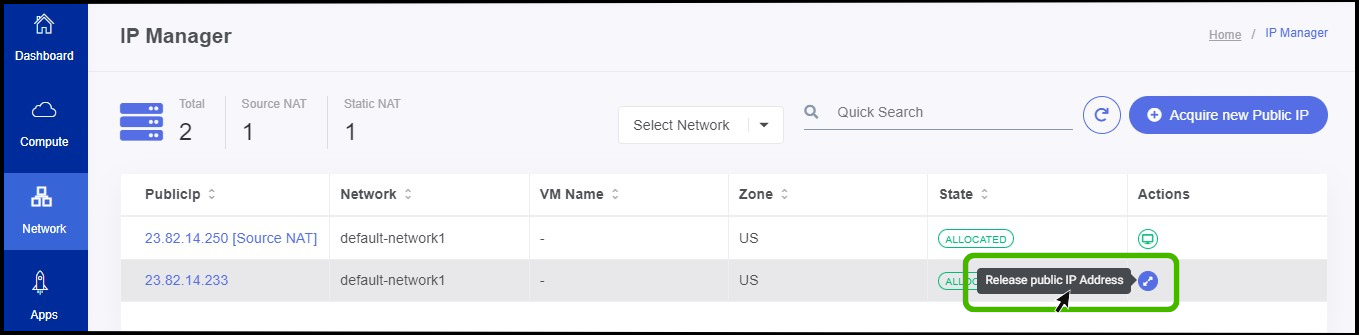
- To Release a Public IP, click on the release icon which is available on the Action menu.
- You will get a confirmation notification on the portal once you click on it.
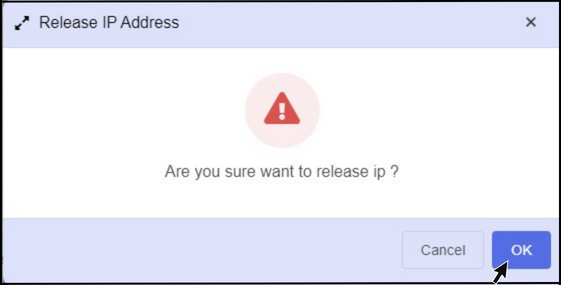
- To release the IP address, click OK.
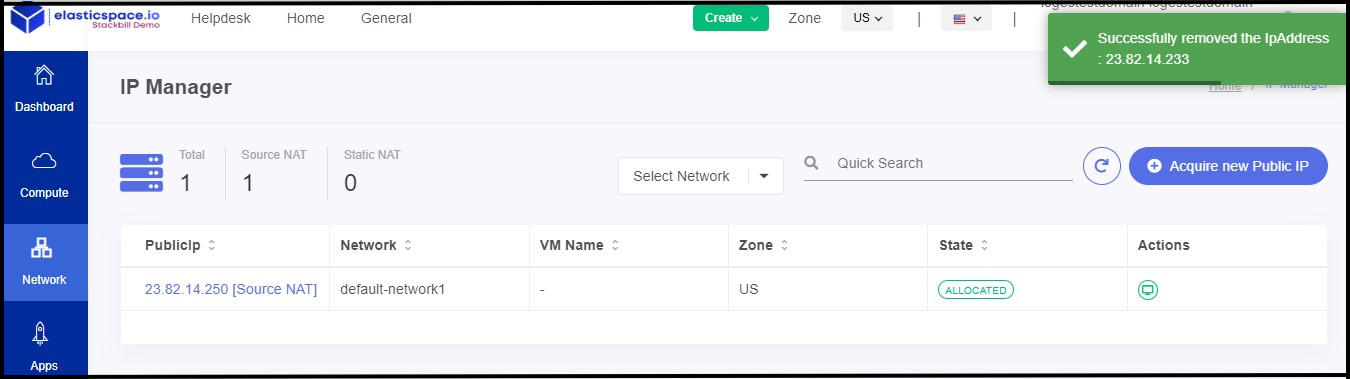
- Now your IP has removed successfully.
Virtual Private Cloud
INTRODUCTION
VPC (Virtual Private Cloud) is a networking feature in cloud control panel, that enables users to create isolated and logically defined private cloud environments within a public cloud infrastructure. VPC allows users to have complete control over their network topology and allows them to set up a private network space with multiple tiers of VMs, routers, firewalls, and load balancers.
FEATURES OF VPC
- Isolated Network Environment: VPC allows users to create an isolated network environment with its own private IP address space. This isolation provides enhanced security and separation from other VPCs and the public cloud.
- Multiple Tiers: Within a VPC, users can create multiple tiers or subnets to organize their network infrastructure efficiently. Each tier can have its own set of VMs and network services, such as routers, load balancers, and firewalls.
- Virtual Router: VPC uses a virtual router to provide essential routing capabilities between different tiers within the VPC and also between the VPC and the external network (public cloud or the internet). The virtual router handles network traffic and ensures that packets are correctly forwarded to their destination.
- Network ACLs and Security Groups: VPC allows users to define Network ACLs (Access Control Lists) and Security Groups to control inbound and outbound network traffic to and from the VMs in the VPC. This helps in enhancing security and access control for the VPC resources.
- VPN Connectivity: VPC supports the creation of VPN (Virtual Private Network) connections, which allows users to establish secure communication between their on-premises infrastructure and the VPC in the public cloud. This feature enables hybrid cloud scenarios and facilitates secure data transfer.
- Load Balancing: Users can set up load balancers within the VPC to distribute incoming traffic across multiple VMs in a tier. This ensures high availability and scalability for applications running within the VPC.
- Network Offering: VPC offers multiple network offerings that define the specifications and capabilities of the VPC, such as the number of subnets, IP address ranges, and supported services. Users can select the appropriate network offering based on their requirements.
- Elastic IP Addresses: VPC provides Elastic IP addresses (EIPs) that can be associated with VMs to allow them to have a static and public-facing IP address. This allows VMs to be accessible from the internet without changing their IP addresses.
STEPS TO CREATE VIRTUAL PRIVATE CLOUD
Login into your control panel.
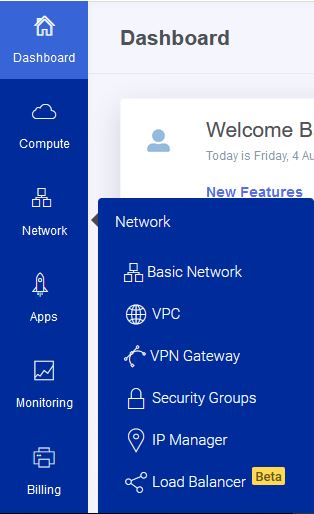
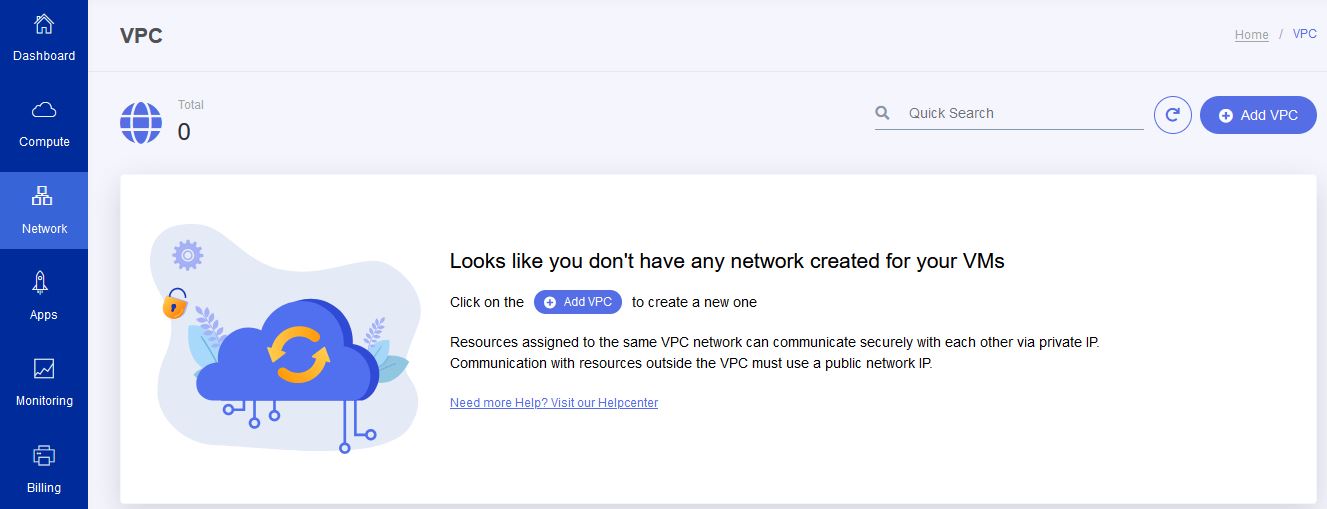
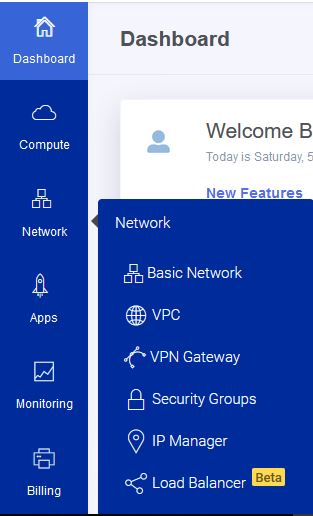
Go to Network and click on VPC.
Then click on Add VPC.
Provide name, description, and specify the IP address range for the VPC in CIDR notation (e.g., 10.0.0.0/16). This range should not overlap with other networks in your stackbill environment. Also, Choose the appropriate VPC offering that defines the specifications and capabilities of the VPC. Then click on Add button.
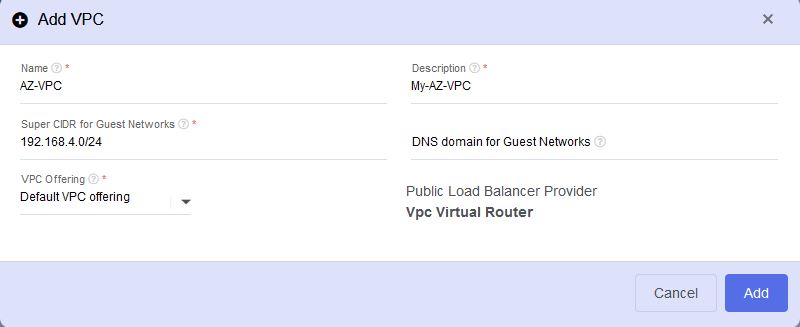
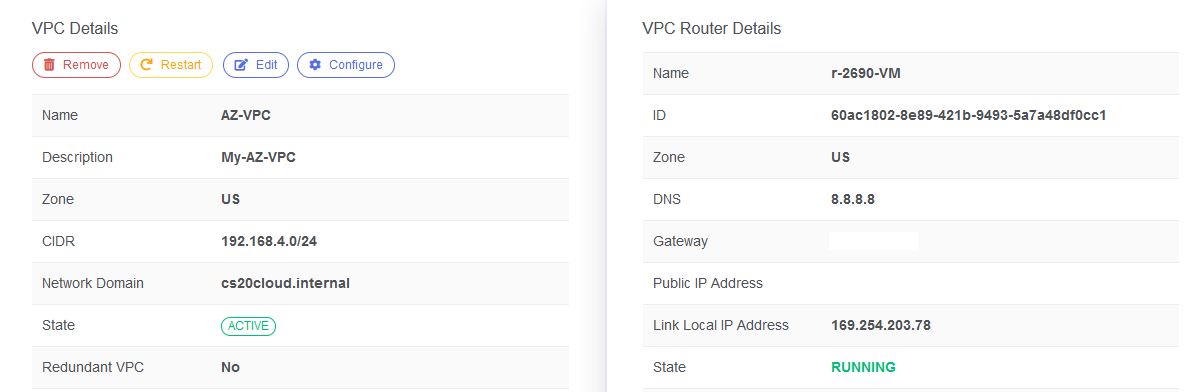
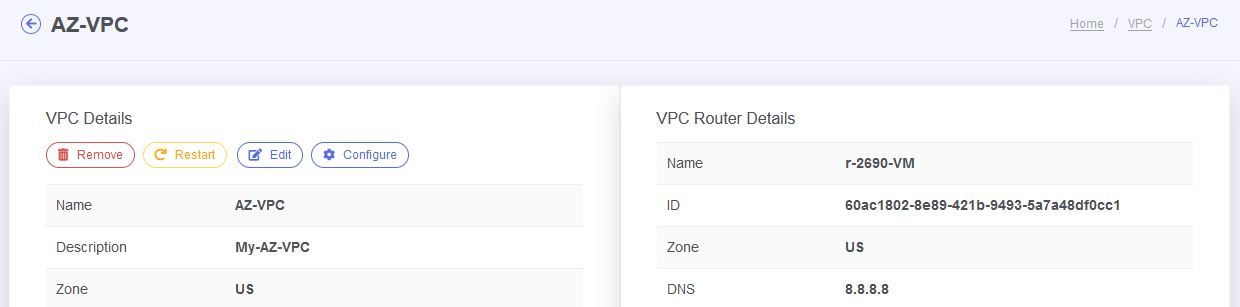
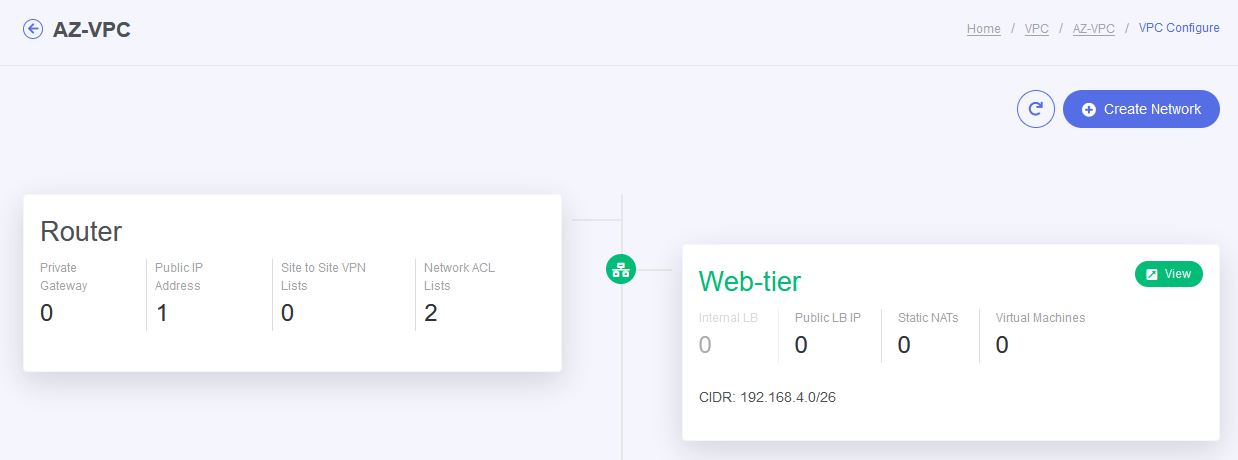
VPC created successfully.
ADDING YOUR VPC TIER NETWORK
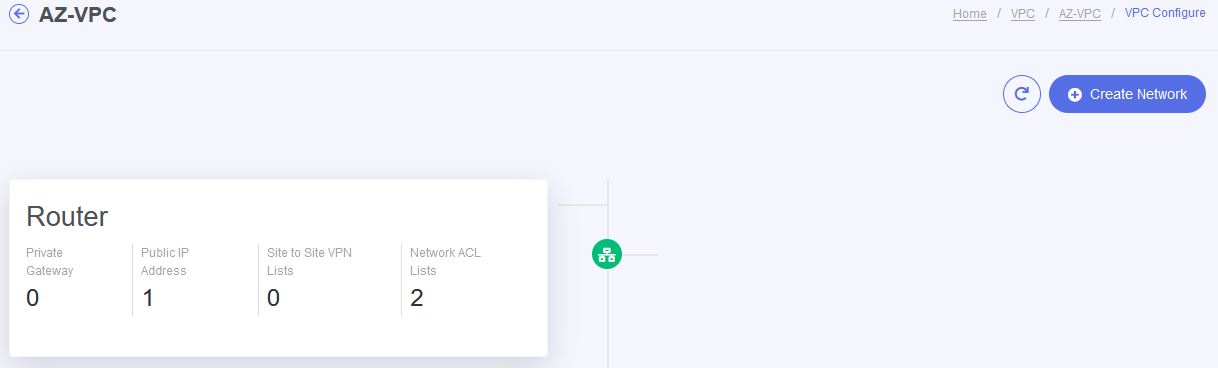
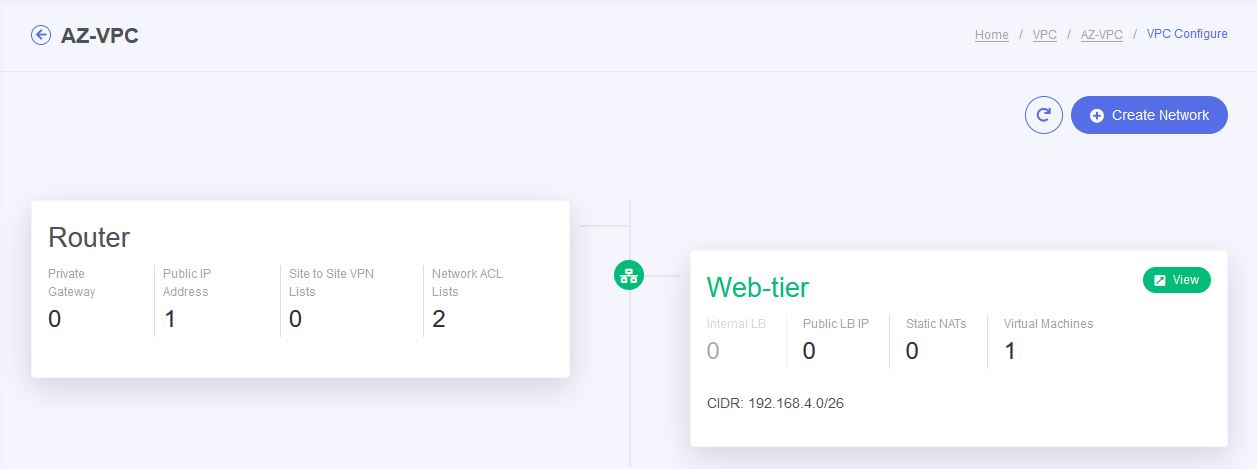
- After creating your VPC network, click on configure button.
- Then click on create network.
- Specify the name for your tier (e.g., "DMZ," "App," etc.)
- Select the appropriate ACL to allow (or) deny of your network access.
- Then provide the gateway, network mask and select the network offering for your tier and click on Add button.
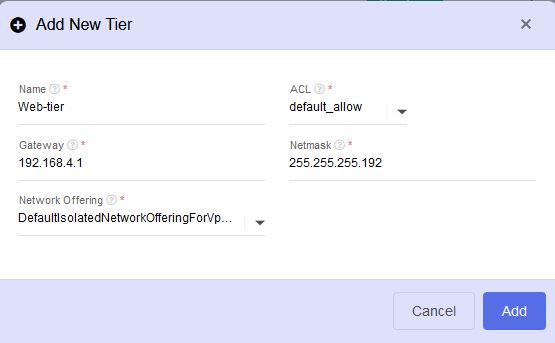
- your new tier network has been created successfully.
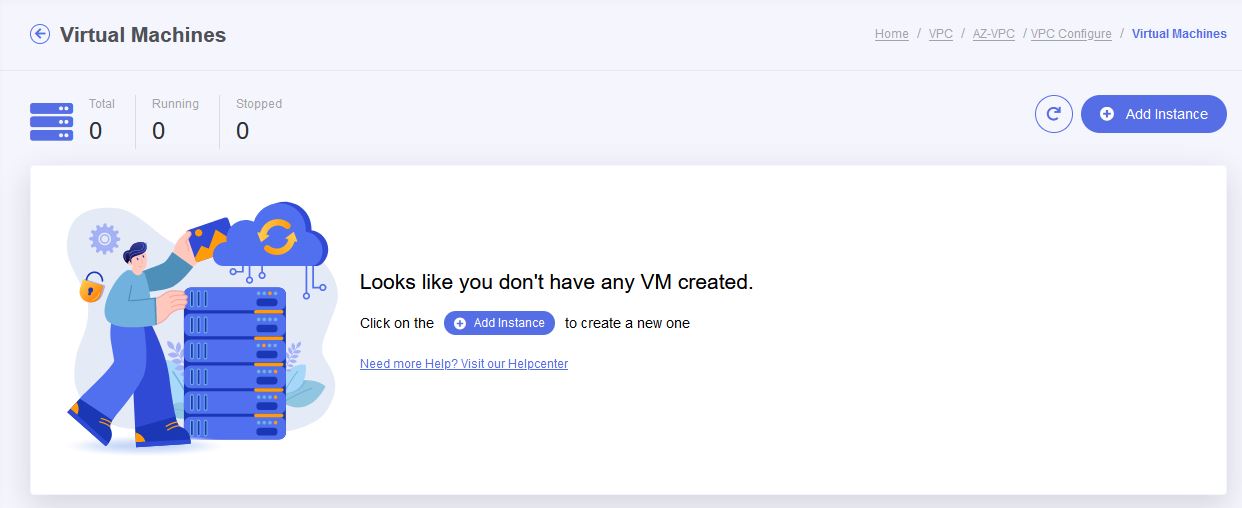
ADDING VIRTUAL MACHINES
- To create new virtual machine, click on the virtual machines link.
- Then click on Add instance.
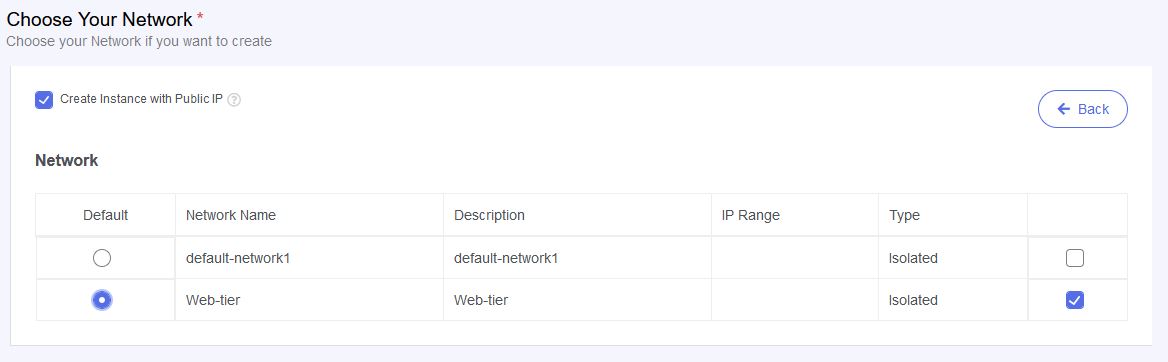
- Steps to create intsance
- while creating the VM, make sure that you have selected your VPC tier under network list.
VPC to VPC VPN configuration in stackbill
- To explain the VPC to VPC VPN, please check the below image for demonstration purpose.
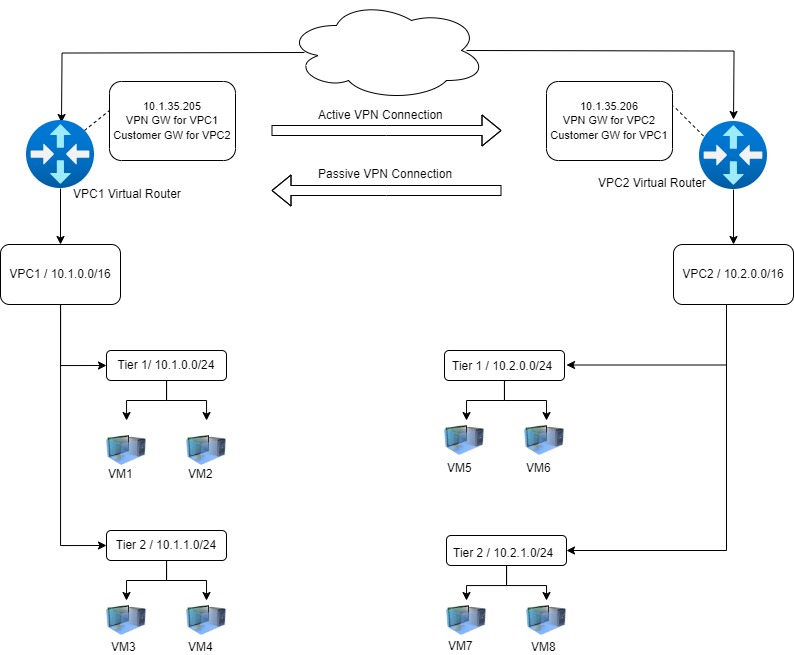
VPN gateway - The VPN gateway is the term used for the local VPN endpoint. This is simply enabled on the source-NAT IP address of the VPC virtual router – and it allows the local VR to accept incoming VPN connections.
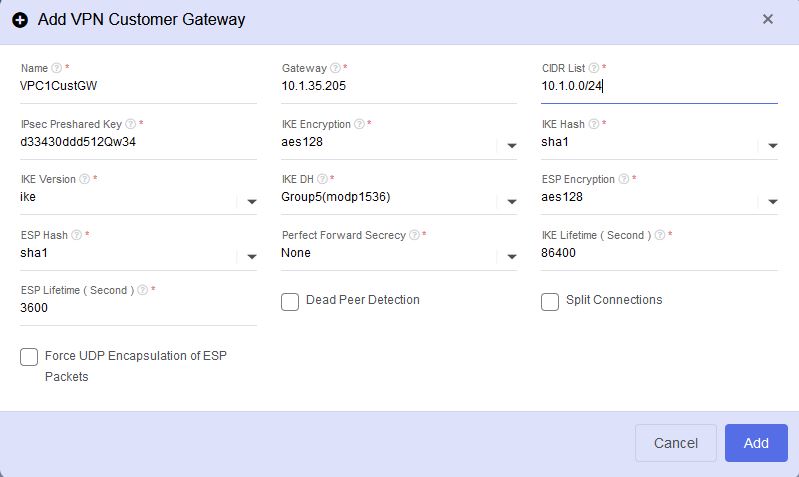
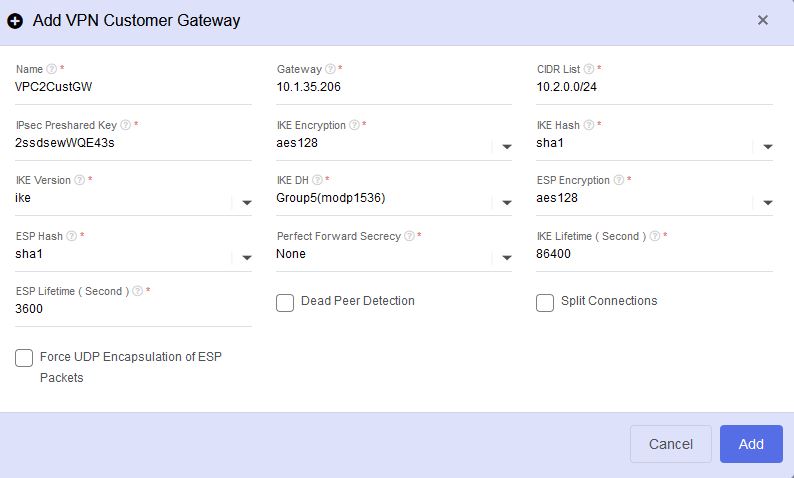
VPN customer gateway - The VPN customer gateway is the remote endpoint we target when we configure the VPN connection. When we configure these we need to specify all the details for this VPN connection.
- Name: user friendly name for the gateway
- Gateway: the public facing IP address of the remote VPC virtual router.
- CIDR list: this is a list of CIDR networks which are reachable at the remote end of the tunnel. Multiple CIDR ranges can be specified, separated my commas.
- IPsec pre-shared key: this is effectively the VPN passphrase used when the VPN connection is negotiated – and it should therefore follow standard password best practices in a production environment.
- IKE / ESP encryption details for the VPN tunnels.
VPN connection
The VPN connection is the pairing from the source – or local – VPN gateway to the remove VPN customer gateway. This is configured in one of two modes:
- Active: the connection which initiates the VPN tunnel, typically from the VPC hosting VMs which consumes resources on the remote VPC.
- Passive: this connection waits for the opposite VPC VR to initiate the connection, and is typically on the VPC hosting the resources to be consumed.
Please note for both of these connections the resources either end must be reachable over the CIDR list configured for the VPN customer gateway.
STEPS TO CREATE VPN GATEWAY
- Login into the cloud control panel.
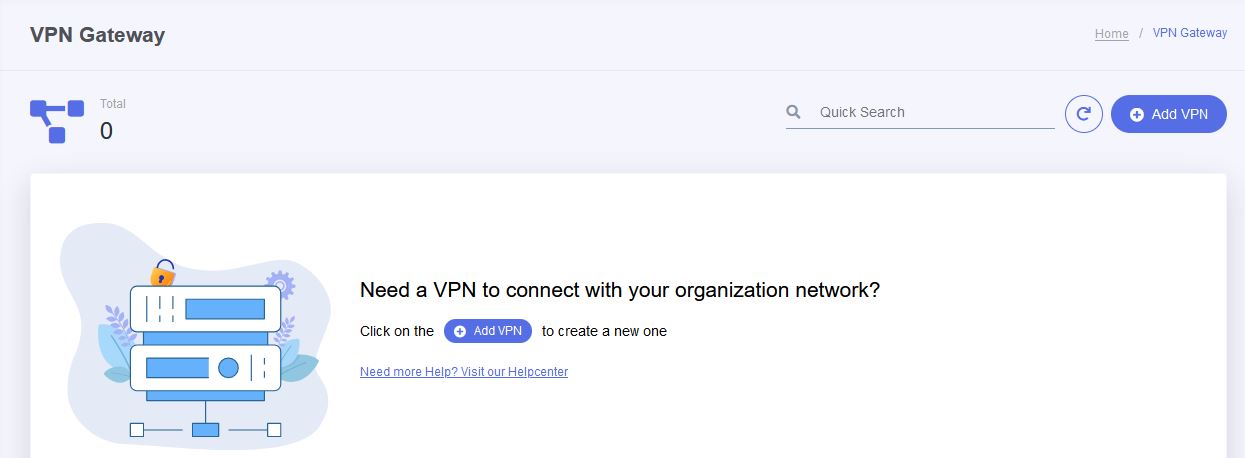
- Then click on network and select VPN Gateway.
- Then click on ADD VPN button.
- In this example we assume that VMs on both VPC1 tier 1 and 2 will consume resources on VPC2. Please note in this case we only configure the name, public gateway, CIDR list and the IPsec preshared key, all other fields are left as defaults.
- Repeat this step for the customer gateway on VPC2:
Enable Site-to-Site VPN
- Login into your cloud control panel.
- Then click on VPC menu.
- Then click on the corresponding VPC from the list.
- Then click on configure.
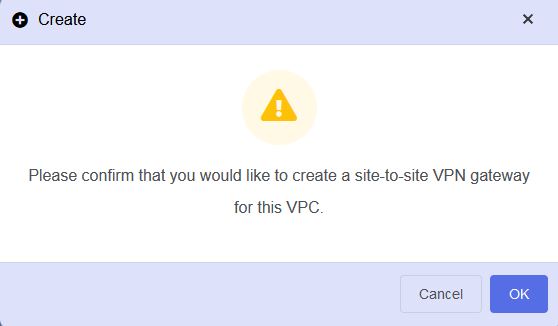
- Click on Site to Site VPN list menu.
- Click OK to confirm the creation.
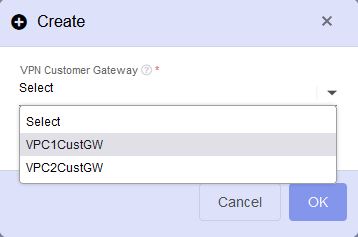
- Once the Site to site VPN enabled, then click on the VPN connection tab. Click on Add button.
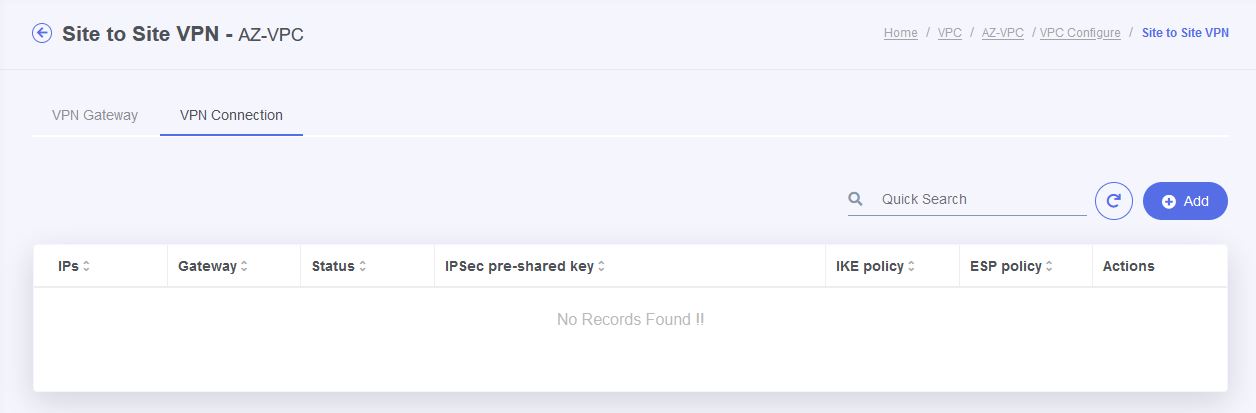
- Then select the VPN gateway from the drop-down list and click on OK.
Repeat this step for the passive connection from VPC2 to VPC1, but for this one tick the “passive” tick box.
Once both VPN connection have been configured refresh the screen and ensure the VPN connection state is “connected”.
If the VPN connection doesn’t come up automatically simply go back to the active connection (from VPC1 to VPC2) and click the “Reset" button.

Overview of Load Balancer in Stackbill Cloud Management Portal.
A load balancer can be deployed as software or hardware to a device that distributes connections from clients between a set of servers. A load balancer acts as a ‘reverse-proxy’ to represent the application servers to the client through a virtual IP address (VIP). This technology is known as server load balancing (SLB). SLB is designed for pools of application servers within a single site or local area network (LAN).
Add a load balancer to an instance in StackBill Cloud Management Portal.
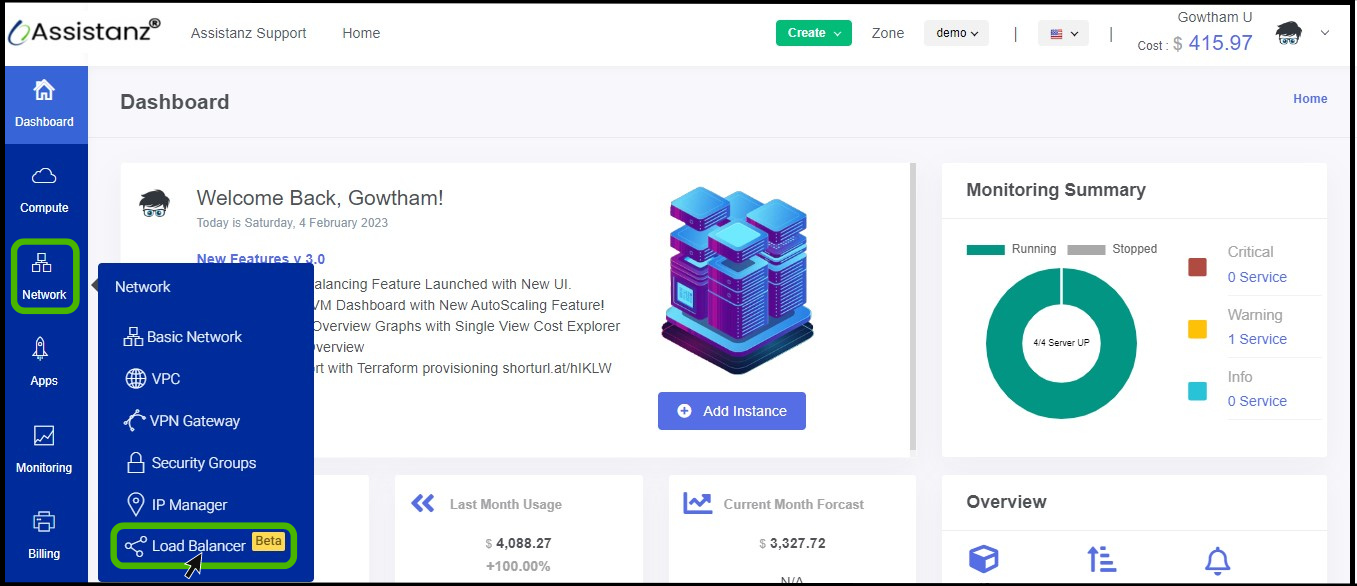
- Click on the Network dropdown button below the Compute icon, Which is available in the top left corner. from the dropdown, Click on Load Balancer, to create a new Load Balancer.
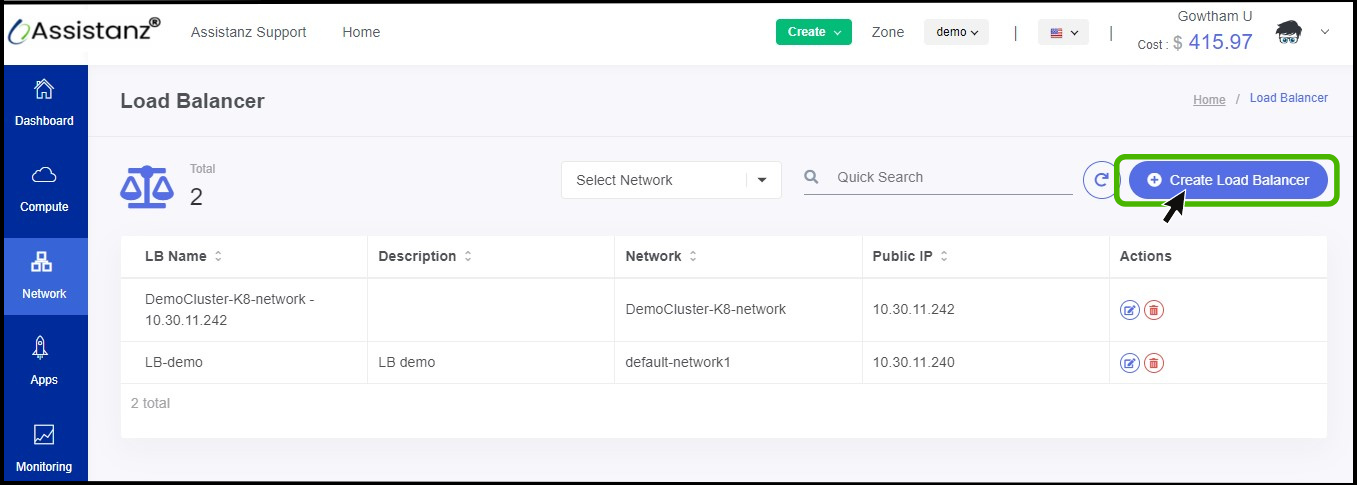
- Load balancer screen appears.
- On the right side of the panel you can see a option called Create Load Balancer option, Click on it.
- Add Load Balancer option appears on the screen.

- As a first step enter a name and description for the load balancer that you create.
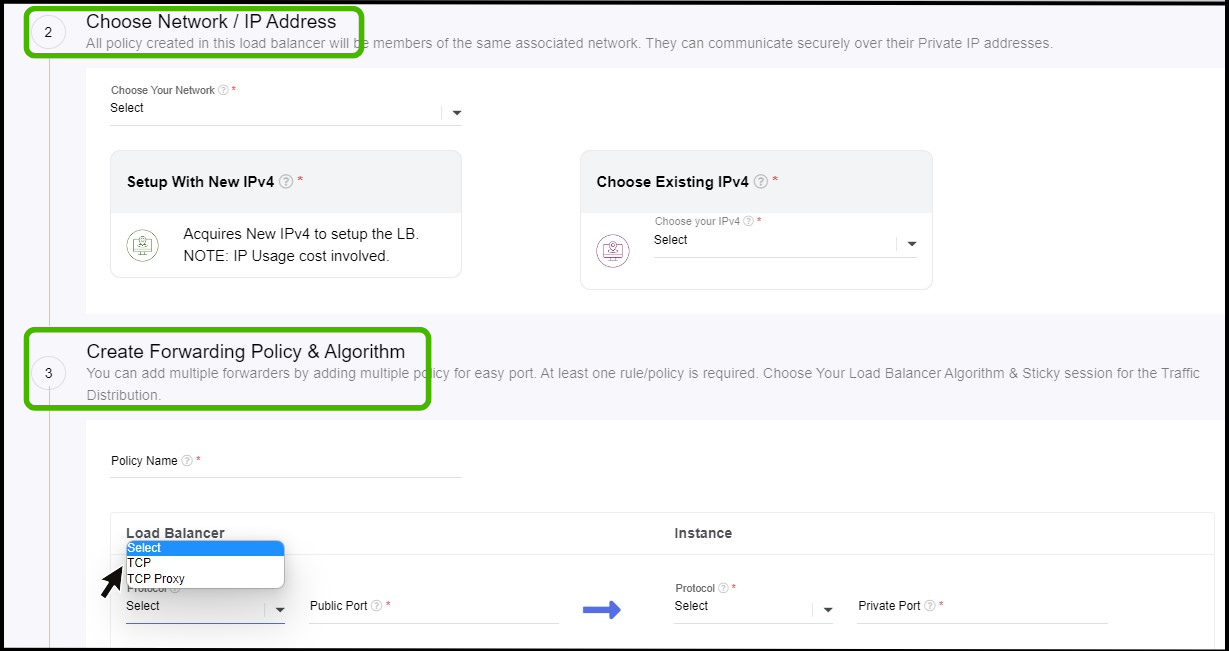
Network & IP Address
- Here you select the network and IP address for the Load Balancer.
- Create Forwarding Policy & Algorithm
- Policy name - Give a Policy name.
- Select the protocol and assign a Port number for both load balancer and instance.
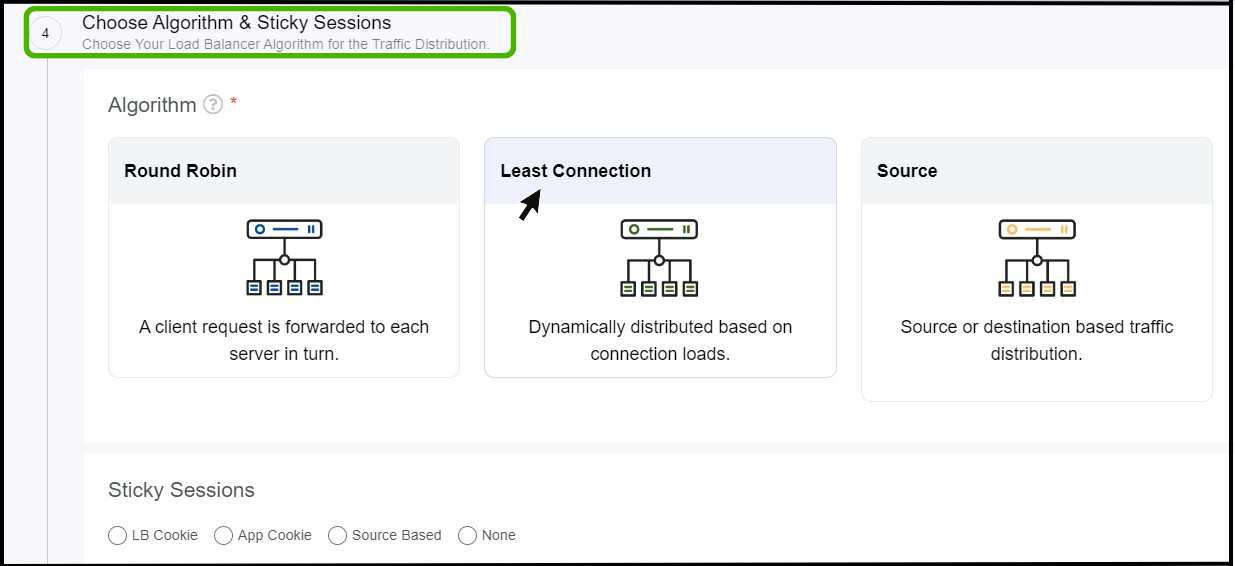
Choose Algorithm and Sticky Sessions
- Choose your Load Balancer algorithm for the traffic distribution.
- Select the sticky session as per the requirement.
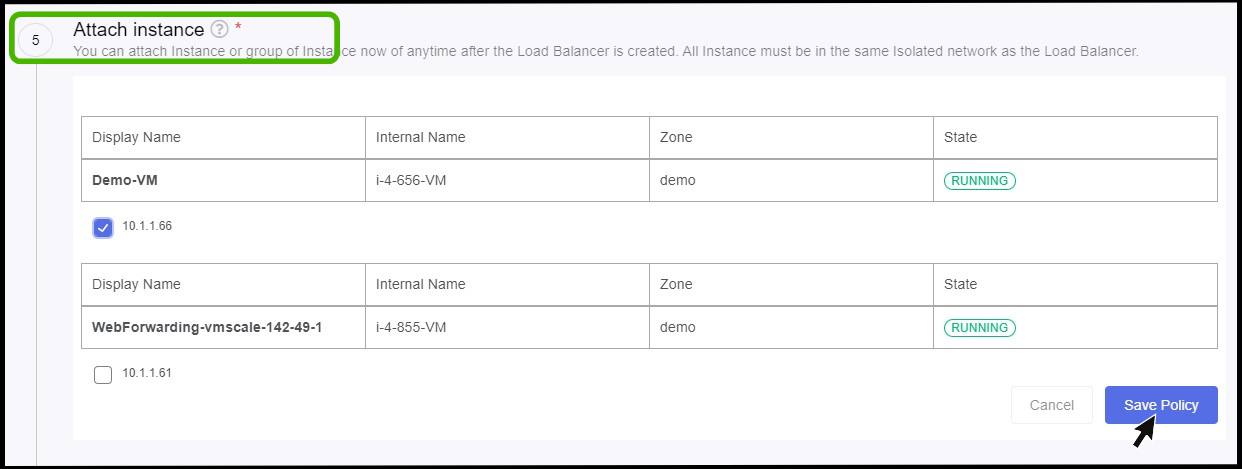
Attach Instance
- Attach the policy to the required instance and click Save policy button in the below.
- Now the Load balancer Policy has been created successfully.
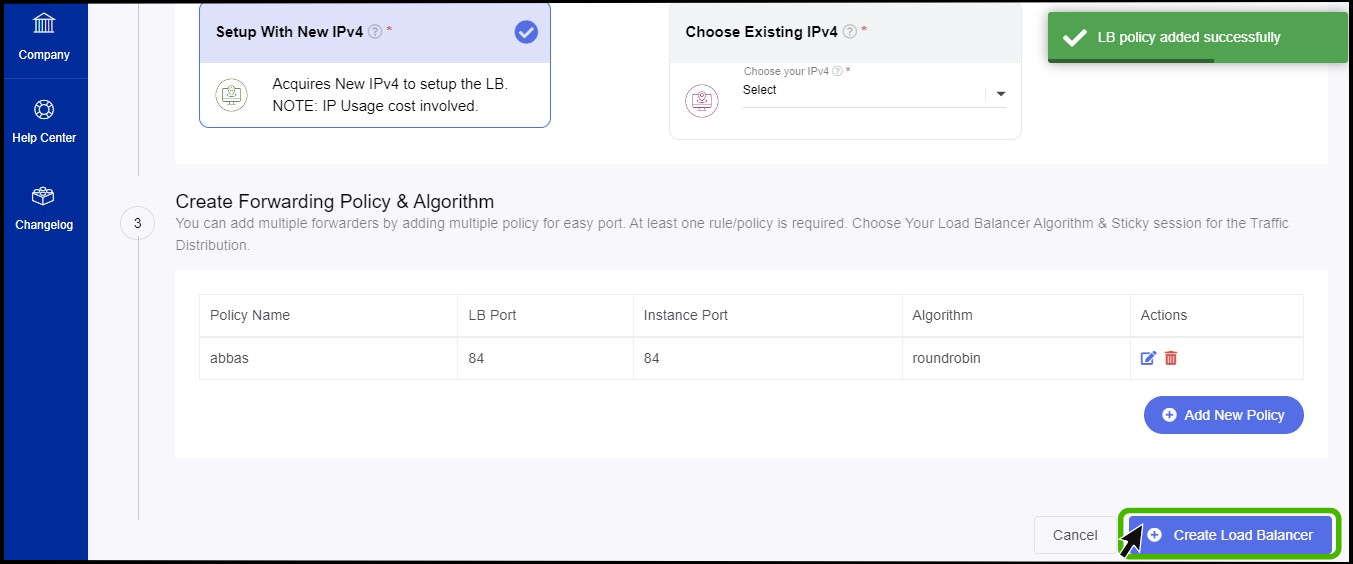
- Once the policy has been created successfully click on Create Load Balancer button which available on the below.
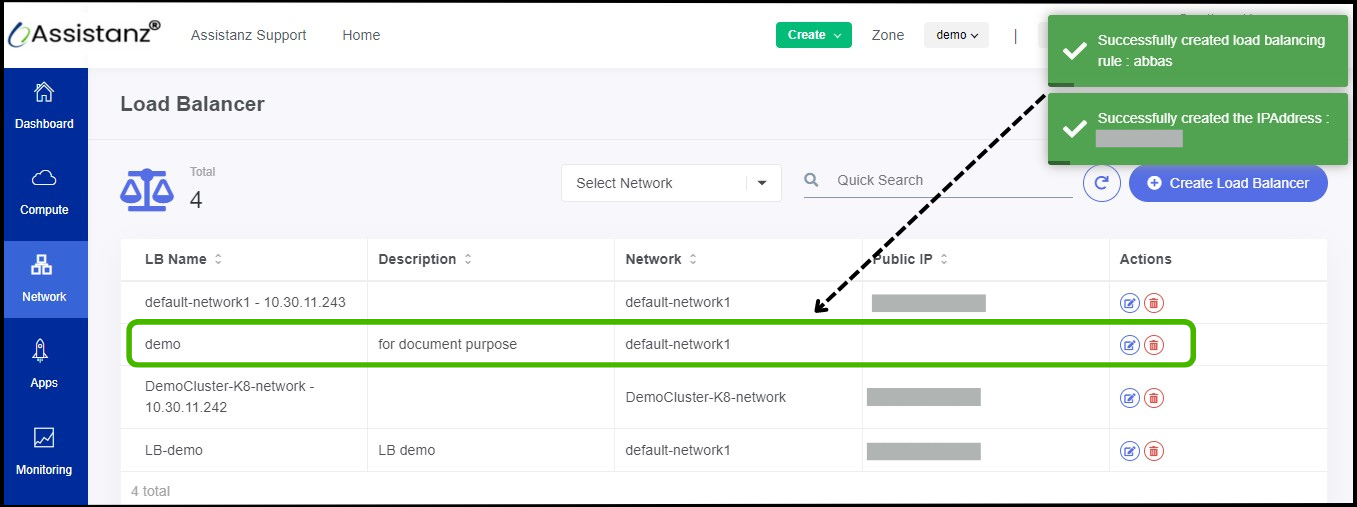
- The load balancer has been successfully configured on the instance.
- It is now possible to view the created policy on the Loadbalancer dashboard.
About StackBill
StackBill is a complete self-service intuitive Cloud Management Portal with extensive features leveraging Apache CloudStack® with state of art years of expertise.