Getting Started
A storage volume is a virtual disk that provides persistent block storage space for instances in StackBill Cloud Management Portal Service. You can use storage volumes to store data and applications. You can attach one or more storage volumes to an instance either while creating the instance or later when the instance is running.
Adding a Volume in StackBill CMP
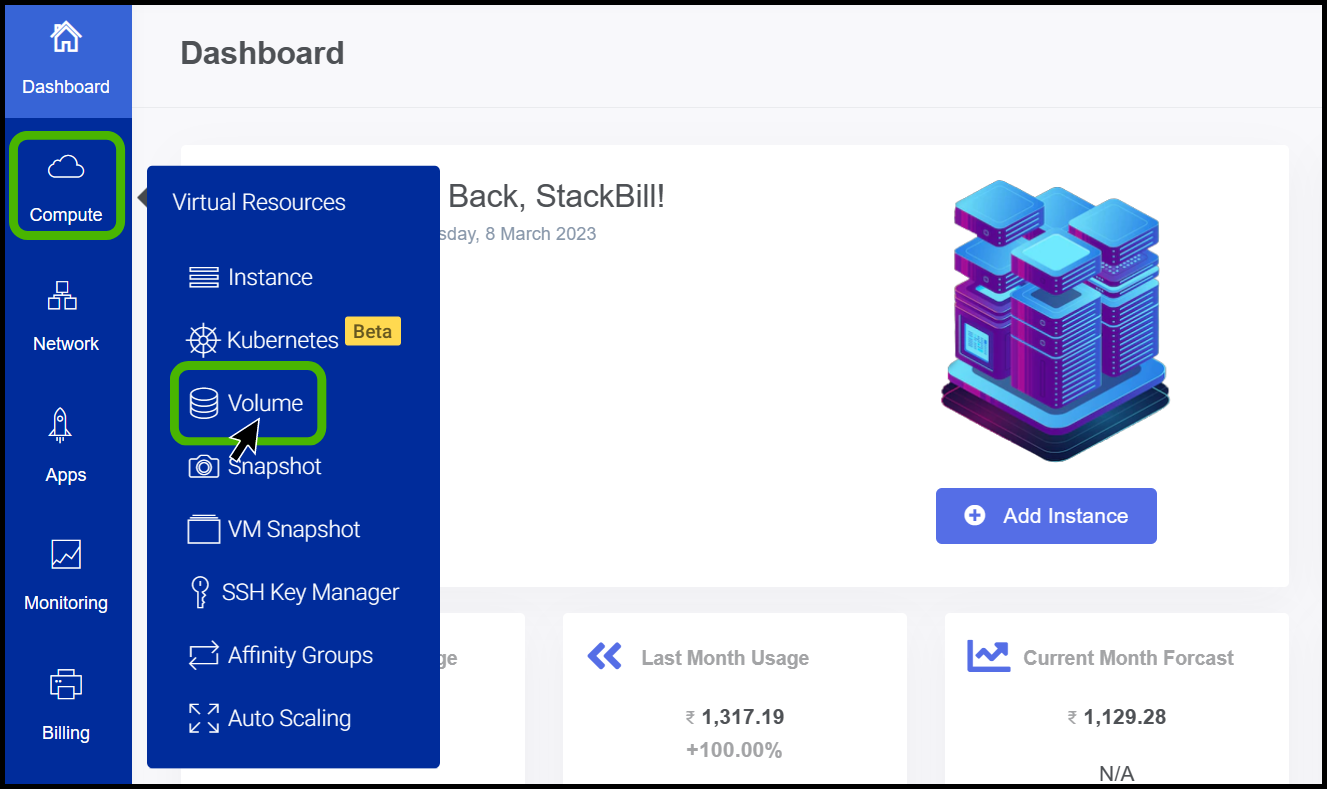
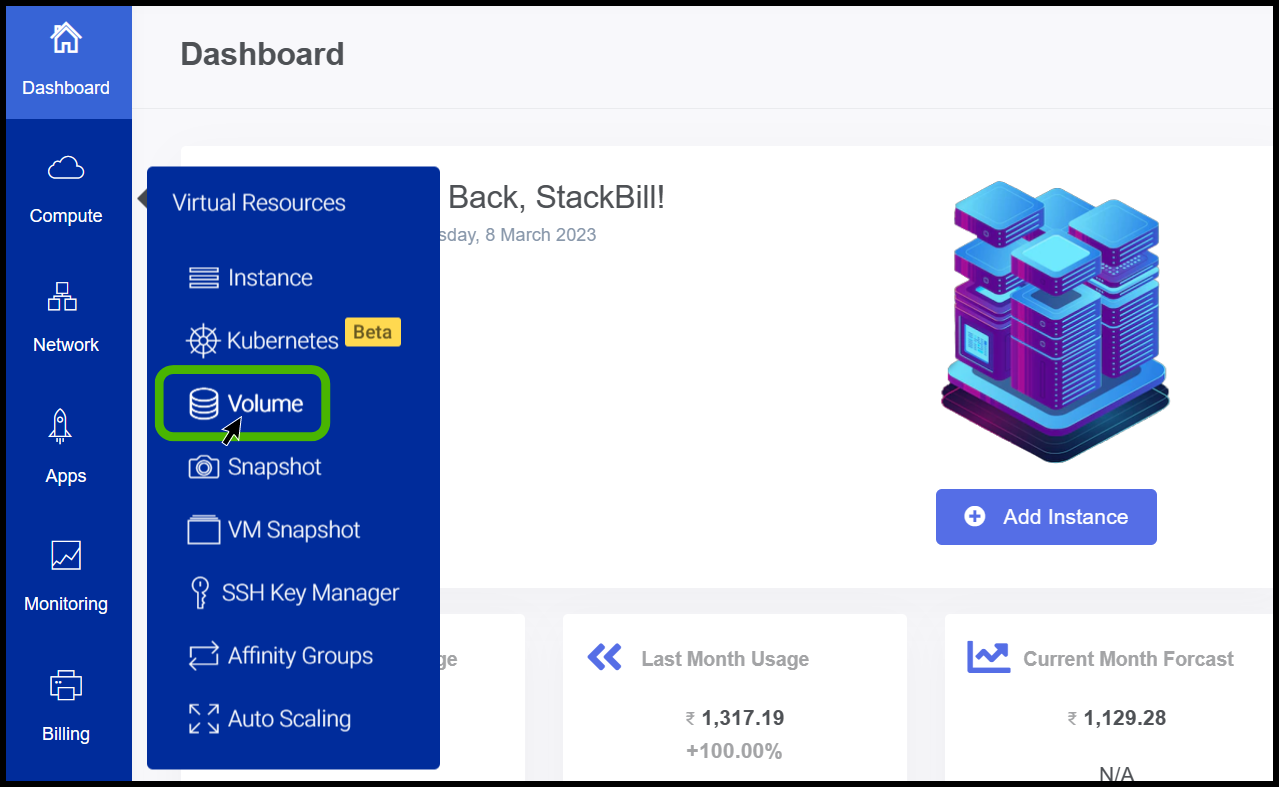
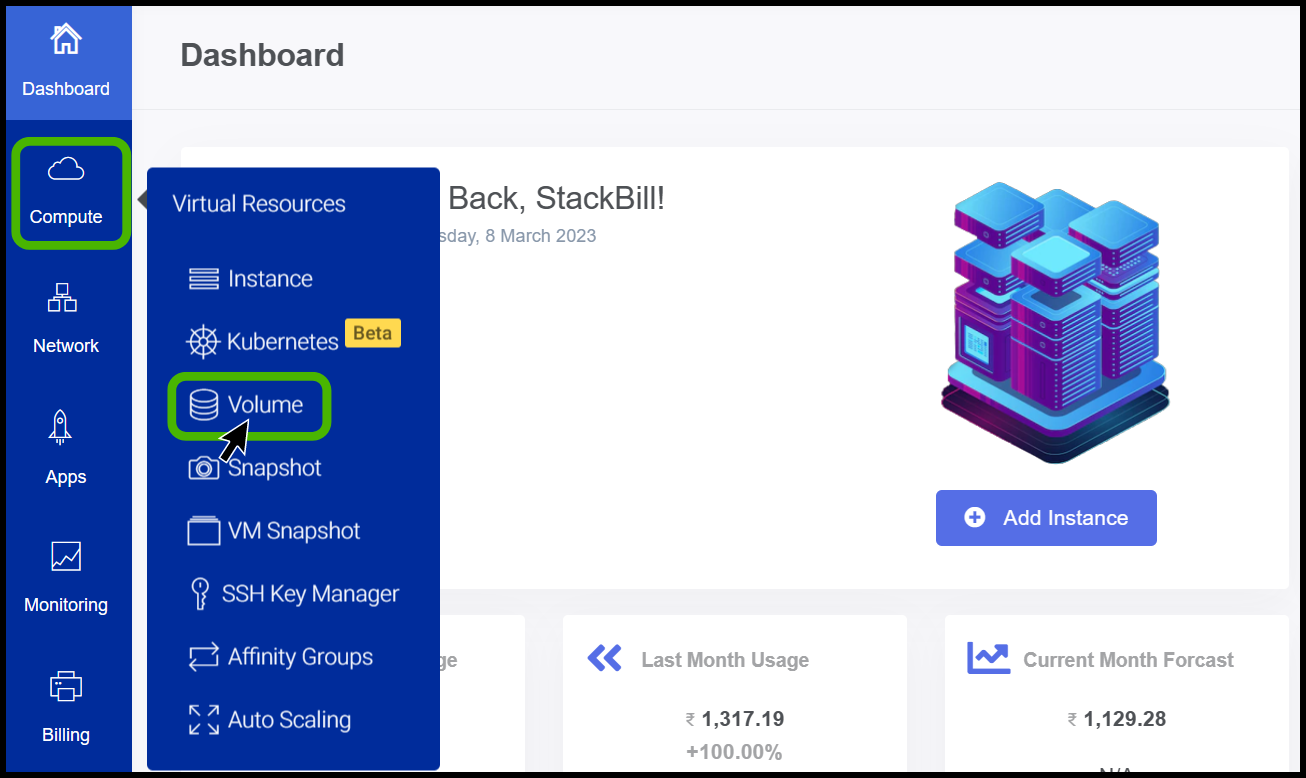
- click on the Virtual Resources dropdown below the DashBoard icon, which is available in the top left corner. From the dropdown, click on Volume option, to create a new Volume.

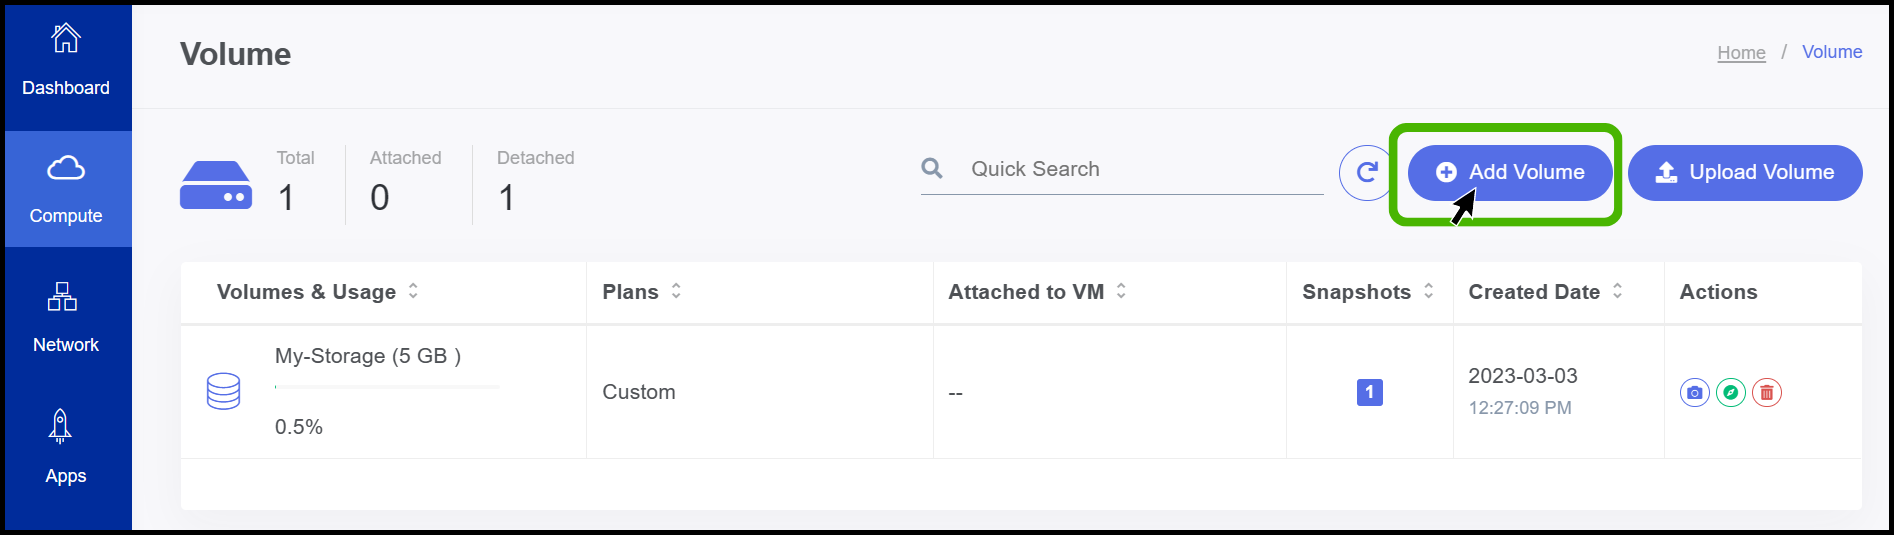
- The volume screen appears now.
- Click on the ADD Volume button to add a volume to the instance.
- Add volume screen appears.
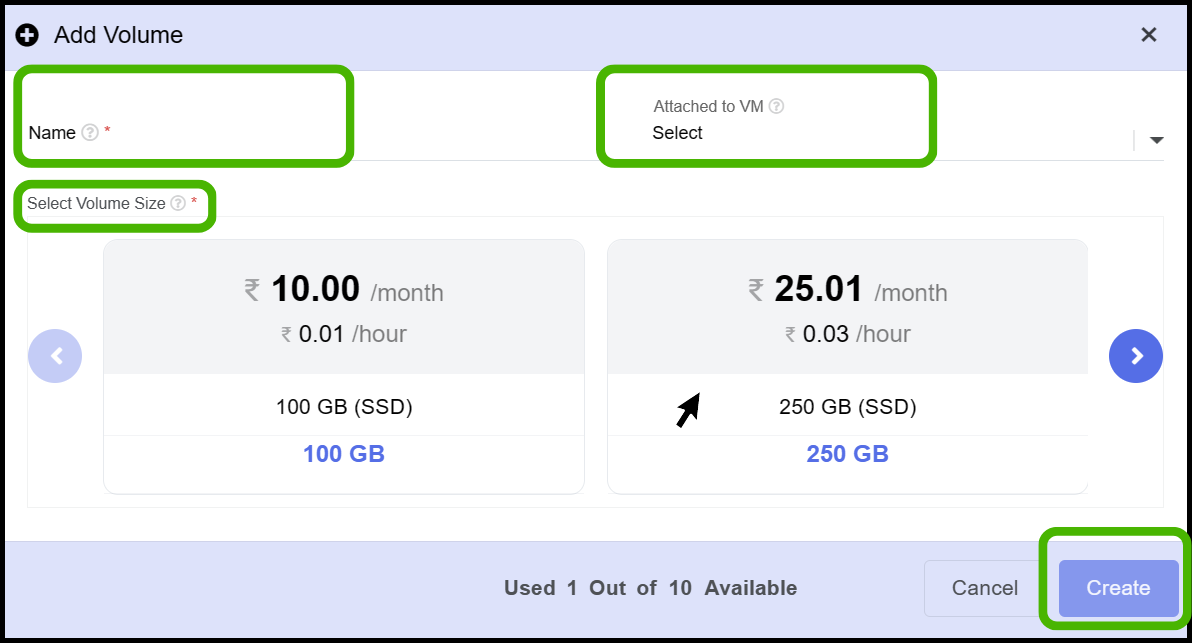
- In the next step, you need to give the volume a name and select which VM to attach the volume to.
- Select the Volume size as per the need.
- Finally, Click on Create button.
- Now the Volume has been created successfully.
How to Format and make Available a volume in Linux Machine
- Before formating a volume in linux machine ensure that you have created instance and attached the volume to the instance.
- Use any ssh client software to login into the server.
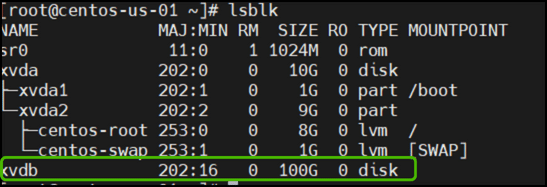
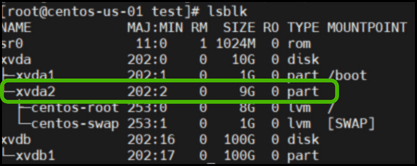
- Verify that our disk has been attached and what its name is.

- To create a partition enter the command dev/$disk (for ex): fdisk /dev /xvdb
- use fdisk to create the partition from the attached disk
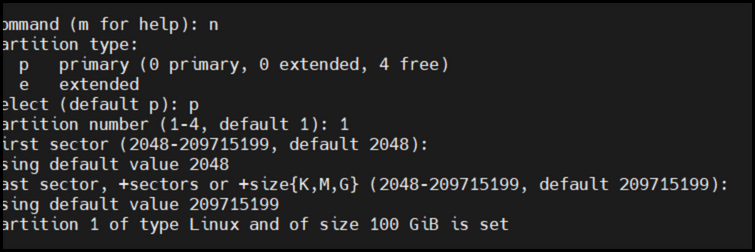
- Follow the below instruction to partition the disk.
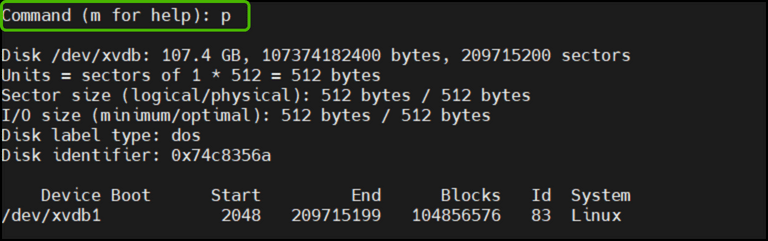
- Enter the command (p) to verify the created partition.
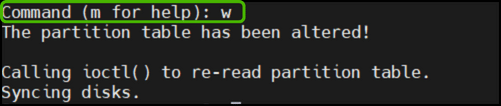
- save the created partition using (w) command.
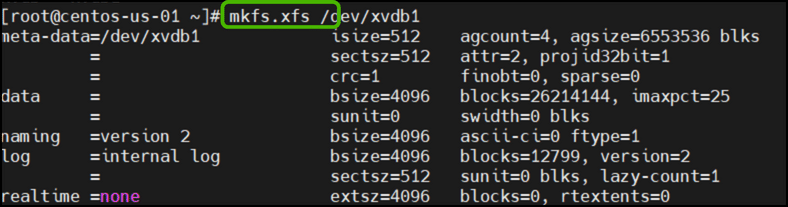
- Make a file system from created partition and use (mkfs.filesystem partion).
- Now the disk partition has been created successfully.
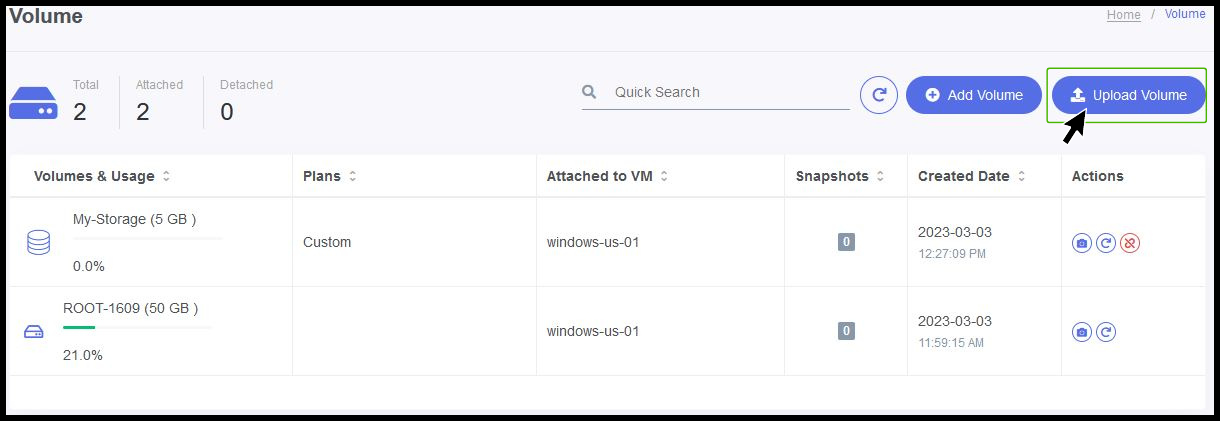
Upload a Volume
You can able to upload your existing data volumes under your stackbill account.
When you want to move a virtual machine that is now running on your local infrastructure to cloud infrastructure, this capability will come in extremely handy.
You can access the upload volume under volume menu.
- First provide your name of your volume.
- Stackbill supports only the below list of volume formats. OVA, QCOW2, RAW, VHD, VHDX. Select the appropriate disk format which you are tying to upload.
- Then provide the path of the volume either HTTP or HTTPS format. EX: https://somewherestored.com/mydisk.vhd
- Then click on upload button.
Attach a Volume in StackBill CMP
You can attach a volume to your virtual instance to provide extra storage facility.
Before attaching a volume, First you need to create a volume.
Go to Compute -> and click on volume option.
It will displays all the available volumes under your stackbill account.
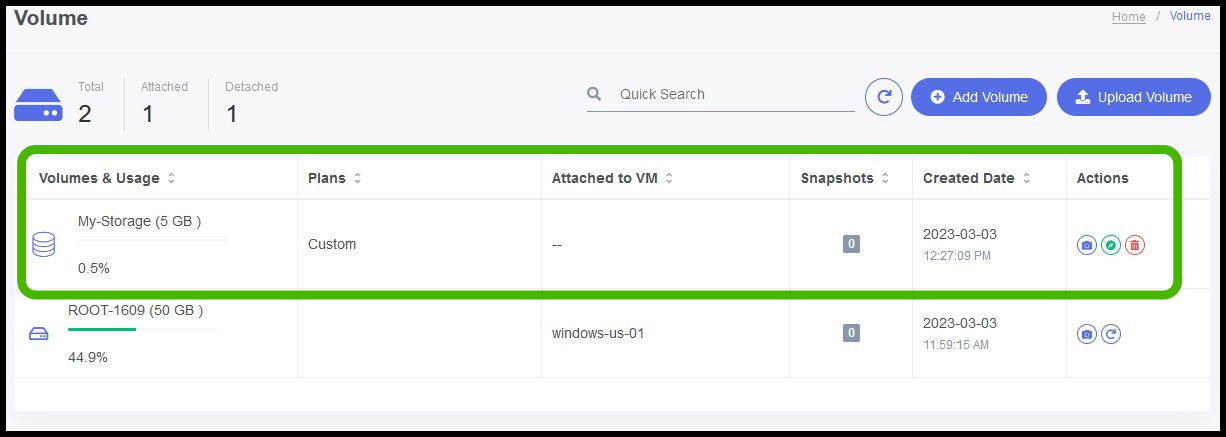
- You can find the attach button under actions menu.

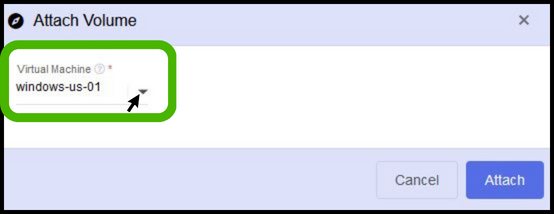
- Select the virtual machine to attach your volume and click on Attach button.
How to take Volume Snapshot
Stackbill supports snapshot of volumes.
Snapshots are a point-in-time capture of virtual machine disks.
Snapshots can be taken both root and data disks.
Go to Compute -> and click on volume option.
It will displays all the available volumes under your stackbill account.
You can click on volume snapshot under actions menu.
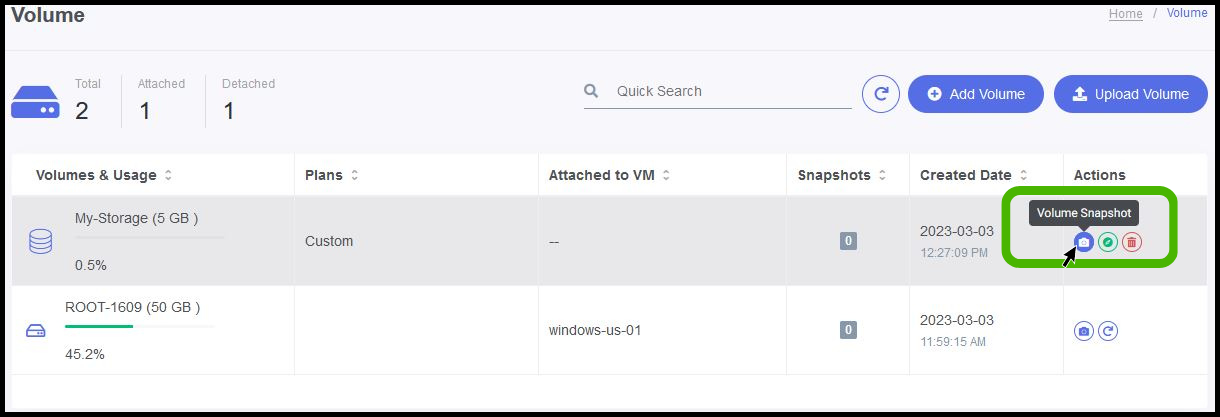
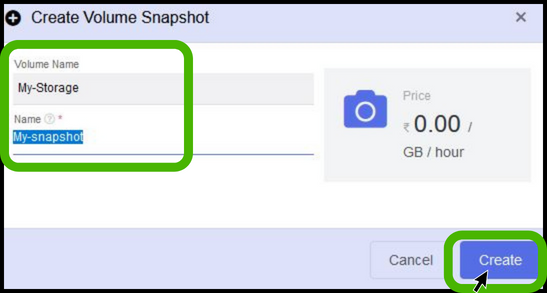
- Provide a name for the volume snapshot and click on the create button.
Configuring Recurring Snapshot in StackBill CMP
- Users can create snapshots manually or by setting up automatic recurring snapshot policies
Setting up Recurring Snapshots on StackBill CMP
- The Compute option can be found on the left side of the portal.
- The screen displays a pop-up menu. For Recurring, a snapshot from a volume, select the Volume option from the menu.
- Volume page appears.
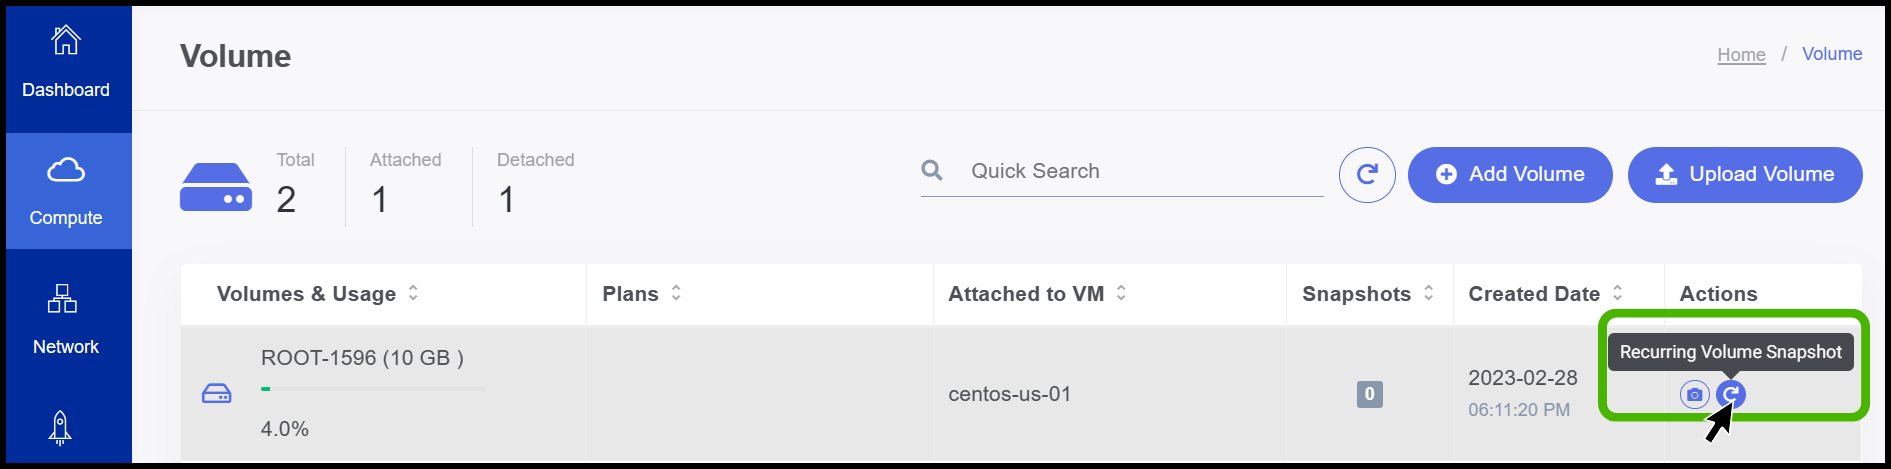
- At right side of the panel User can able to see an icon for Recurring snapshots for volume in the Action.
- Click on the option to Recure Snapshot.
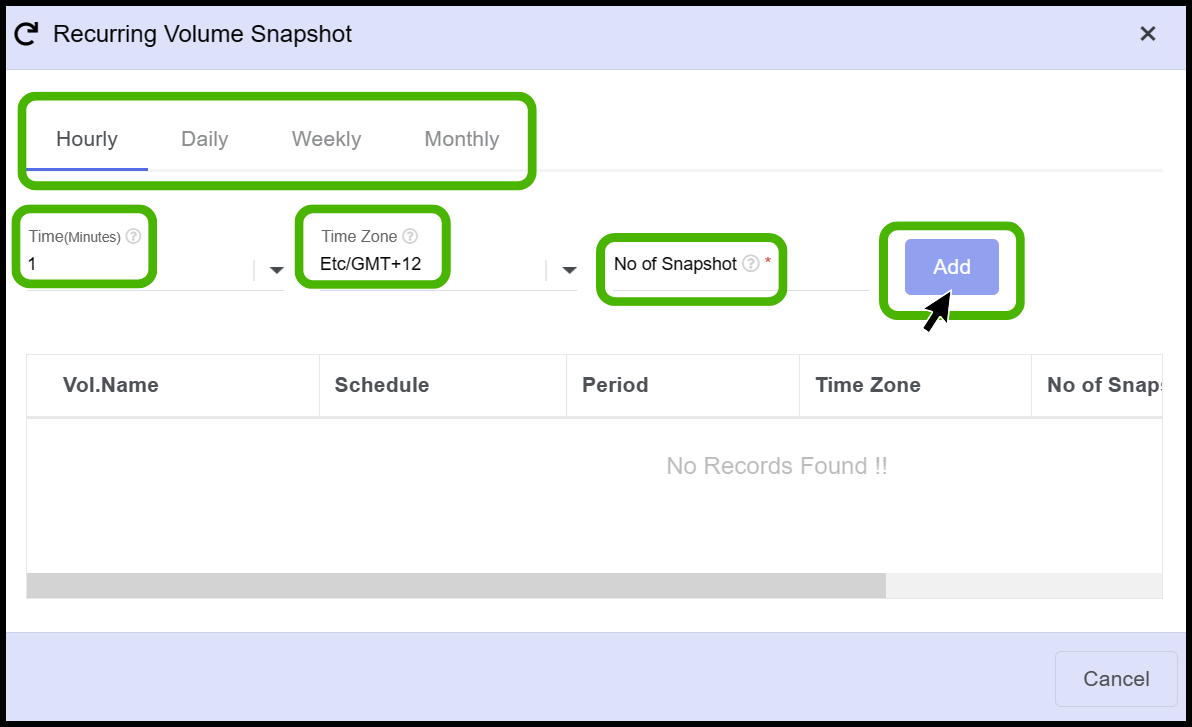
- In StackBill CMP, User can retrieve snapshots hourly, daily, weekly, and monthly.
- The screen in above shows the Hourly option
- Time - The snapshot should start from the selected minutes in the popup
- Time Zone - Select your time zone using this option.
- NO.of Snapshot - Here, the user can specify how many shots should be taken.
- Finally, Click on the Add button.

- Now the Recurring Volume Snapshot has been created succesfully.
Resize your Volume in StackBill CMP
In StackBill CMP, there are two types of volumes that can be resized they are Root volume and Data volume.
- Step1: Resize your Root Volume in StackBill CMP
A storage volume is a virtual disk that provides persistent block storage space for instances in StackBill Cloud Management Portal
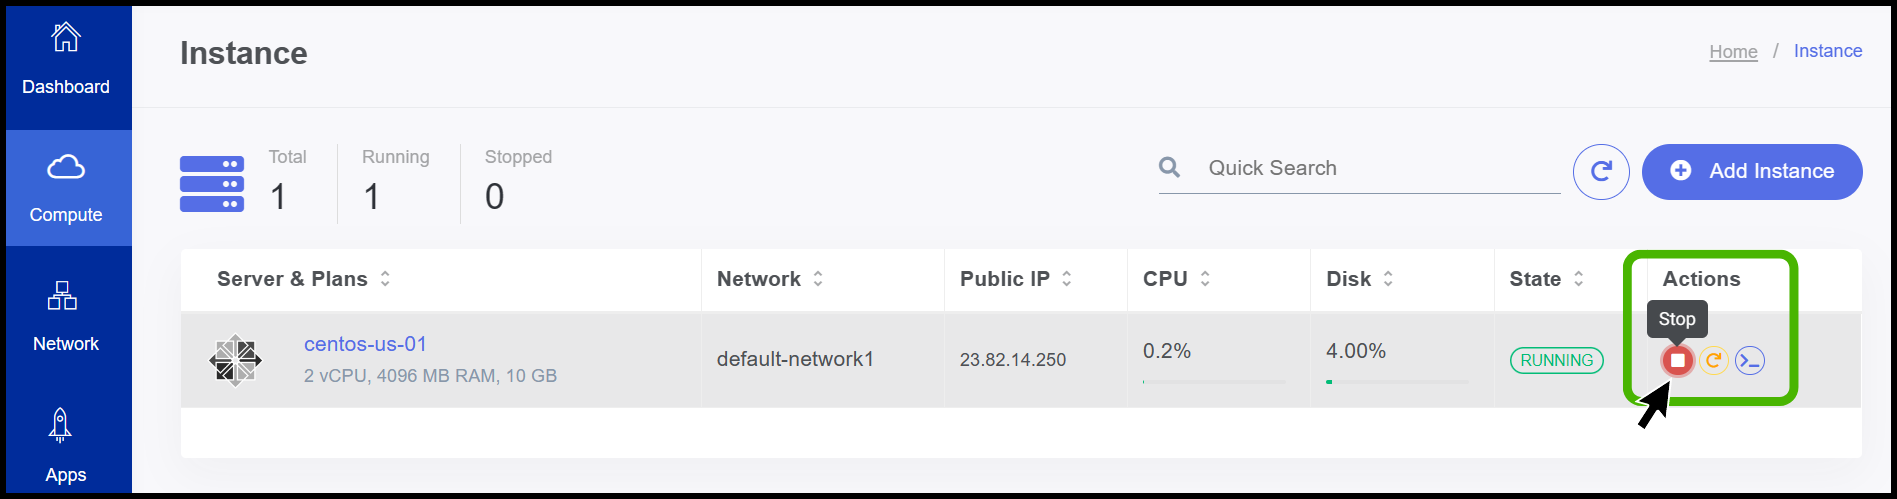
- Before resizing the volume ensure the vm is on stopped stage.
- Go to the Virtual resource option under the Dashboard option to Resize your volume. Click on the Virtual Resource and then click on the Volume option.
- Volume screen appears.
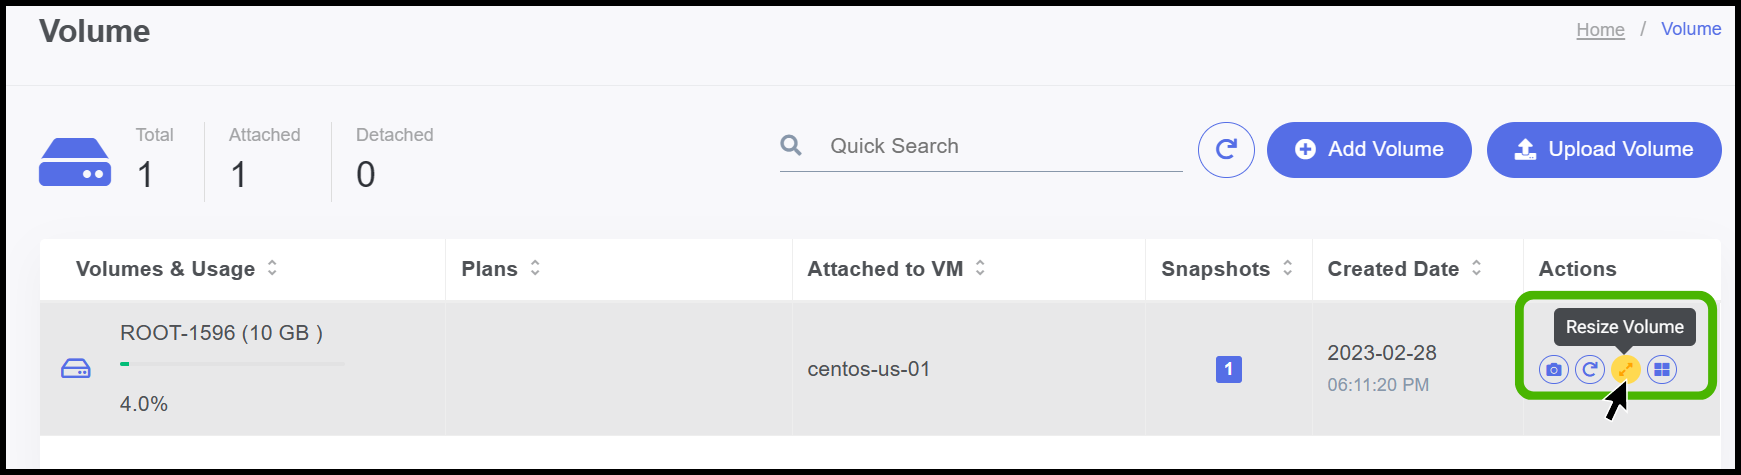
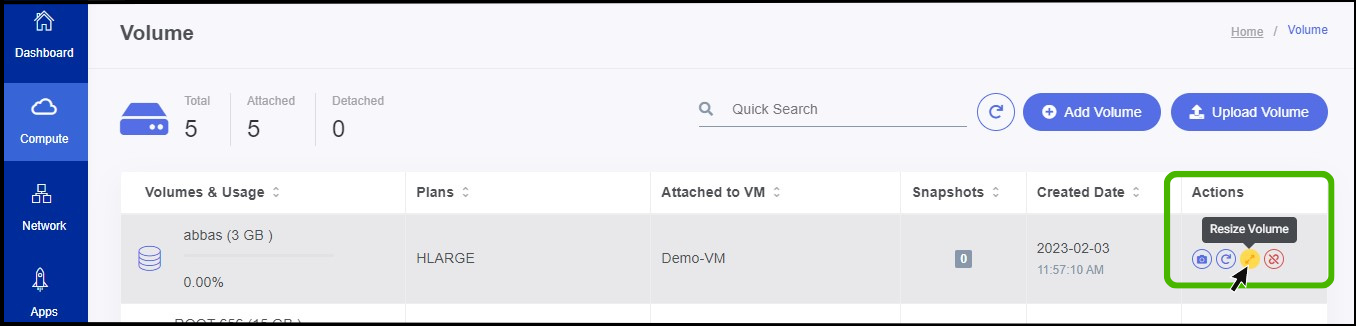
- On the right side of the panel the user can able to see an option called Action.
- Click on the Resize Volume icon in the Action option to resize the volume. Once you add the appropriate fields click on OK button.

Now the volume has resized successfully.
Step2: Resize your Data Volume in StackBill CMP
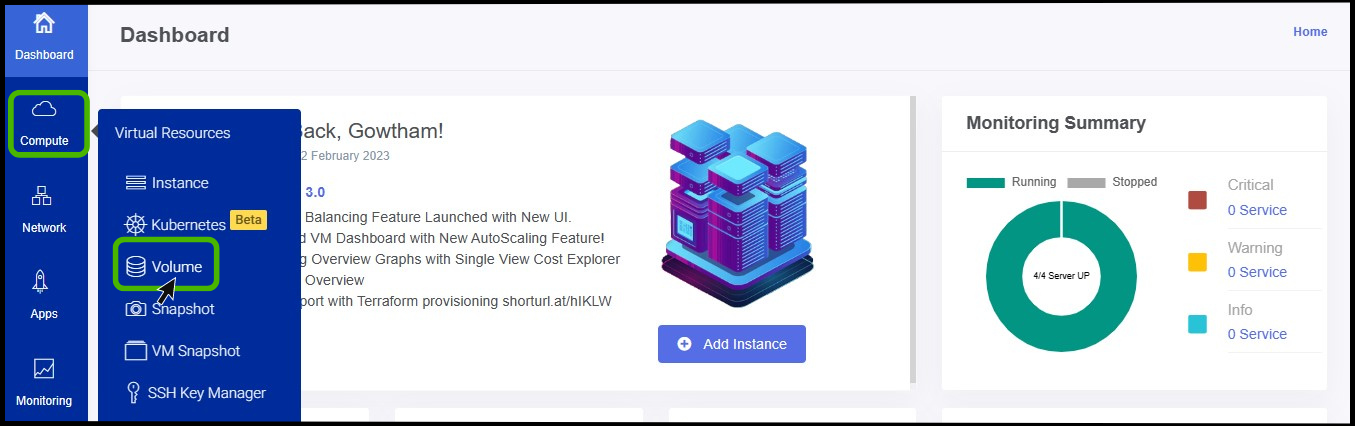
Click on the Virtual Resources dropdown button below the dashboard icon, Which is available in the top left corner. from the dropdown, Click on Volume option.
- Volume screen appears on the screen.
On the right side of the panel, the user can see an option called ACTION.
Under the Action option, the user can see an option for Resizing the data volume. Click on it.
Resizing data volume option appears on the screen.
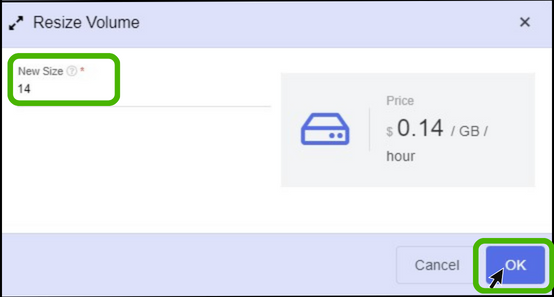
- Resize volume screen appears.
- New Size - By default, it shows the current volume size. We can increase the amount of space by simply entering the new size value.
- You can see the pricing for additional resources on the right side of the panel.
- The above screenshot pricing is only used for demonstration purposes; the fees for additional resources are configured by the admin.
- Finally click Ok button.
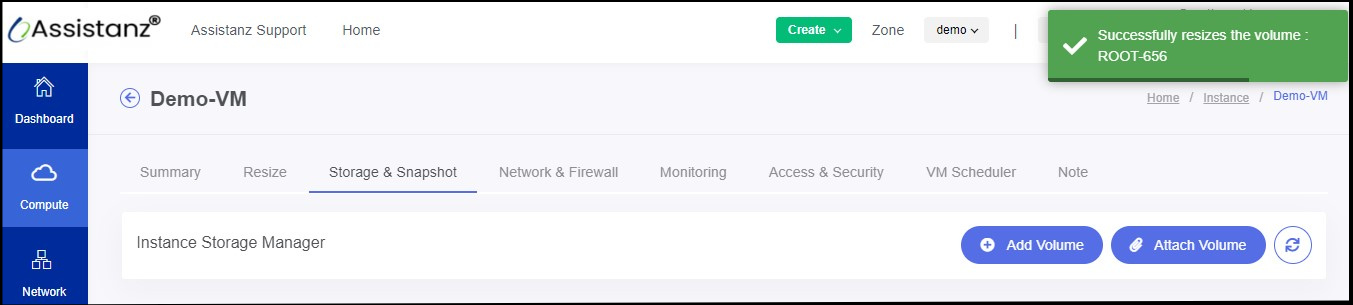
- Now the the Root volume has been resized successfully.
Creating Template for a Volume in StackBill CMP
A template is a reusable configuration for virtual instances. When users launch VMs, they can choose from a list of templates in stackbill.
Stackbill will provide different flavors of operating system for all user by default. There are a variety of ways to add more templates.
Note - The user can create their own template only on root volume.
- Before resizing the volume ensure the vm is on stopped stage.
- To Create Template using volumes, click the icon named Volume.
- Now the Volume menu screen appears.
- You can find the ACTION menu at the right corner of the portal.
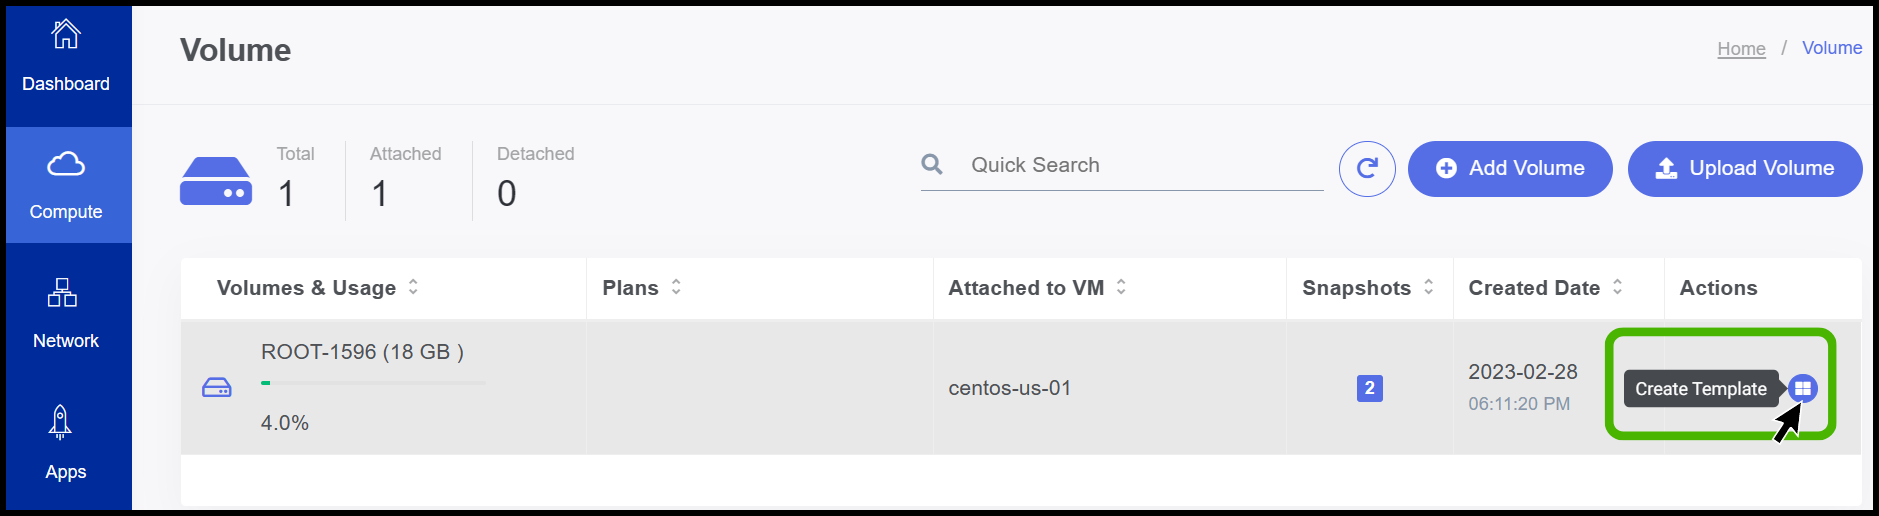
- In the action menu, click on the icon which nameed as Create template.
- Click on it.
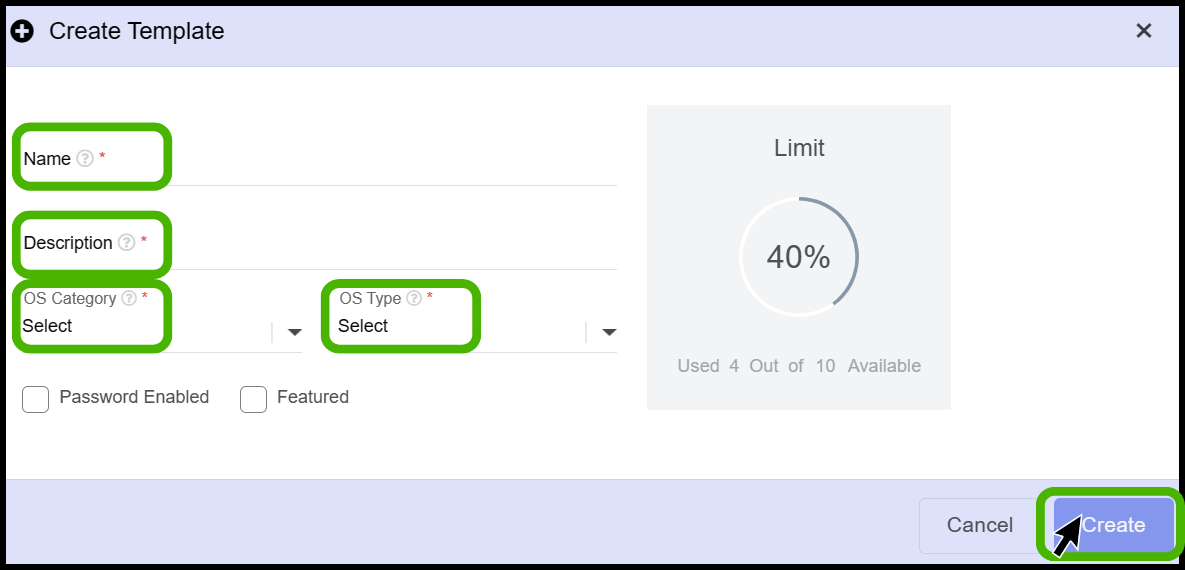
- Create template menu appears on the screen.
- Name - Enter a name for your template.
- Description - Give a short description of the template.
- OS category and type - Select the OS and its list.
- Select the Apps OS type, and click ok.

- Now the template has been created successfully from the volume.
Delting the Volume in StackBill CMP
- Click on the Virtual Resources dropdown button below the dashboard icon, Which is available in the top left corner. from the dropdown, Click on Volume option.
- Volume screen appears on the screen.
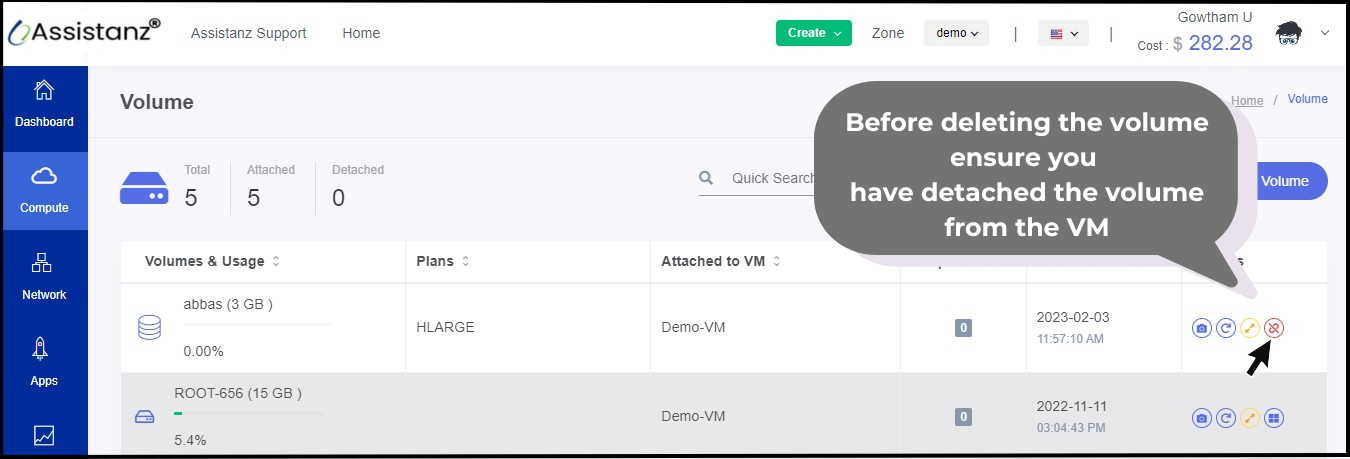
- Make sure the VM is detached from the volume before deleting the volume.
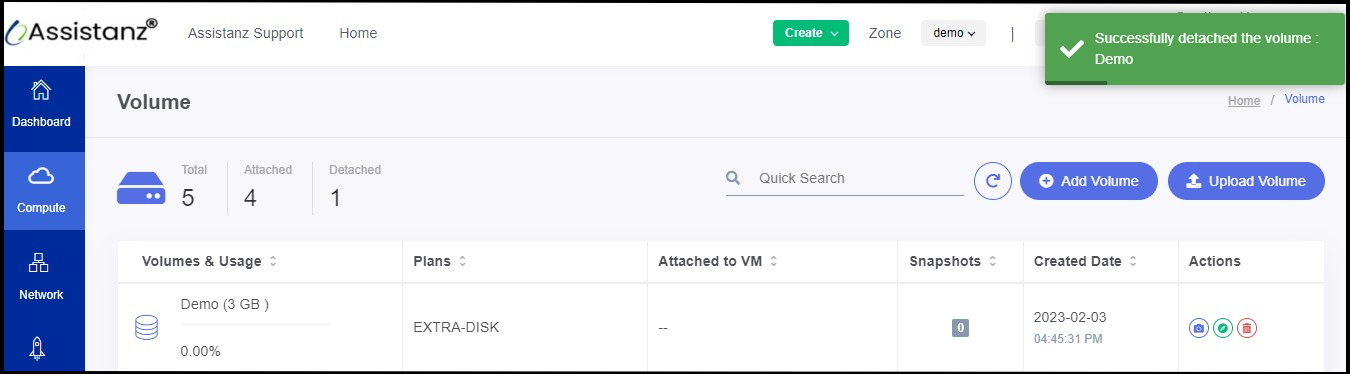
- Now the volume has been detached successfully.
- Once the VM is dettached from the volume you can able to see the Delete button from the action option.
- You can delete the volume by clicking on the Delete option on the right side of the panel.
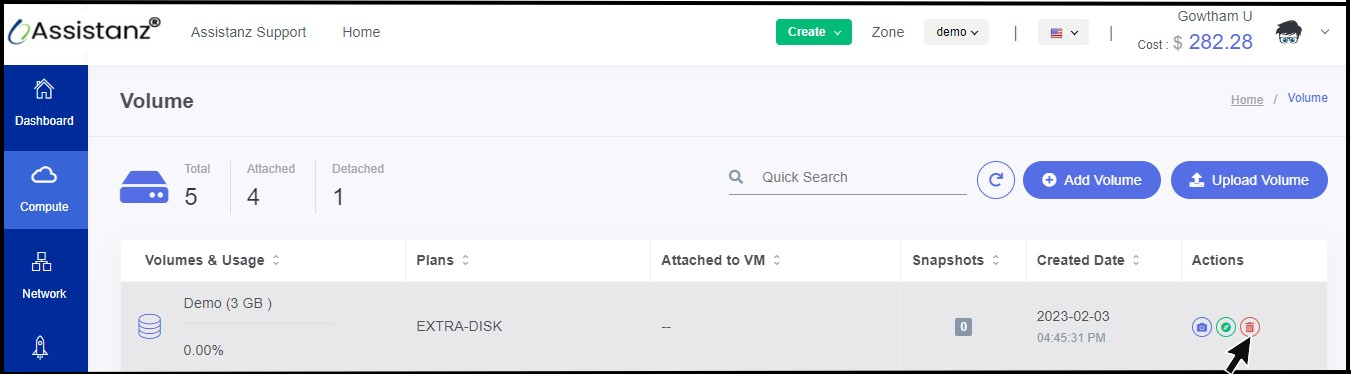
- Click on the delete option.
- Click OK on the Delete Confirmation pop-up.
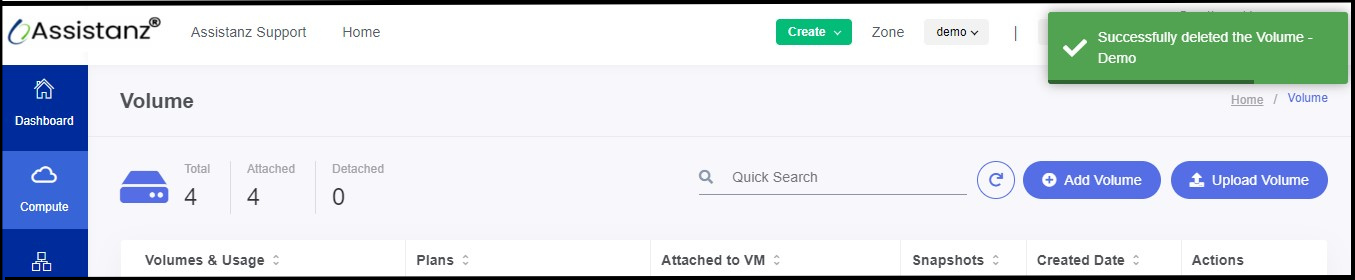
- Now the Volume has been deleted successfully.
About StackBill
StackBill is a complete self-service intuitive Cloud Management Portal with extensive features leveraging Apache CloudStack® with state of art years of expertise.