Kubernetes Cluster Scaling
The Cloud Management Portal offers a user-friendly and efficient interface that enables you to resize your Kubernetes cluster in response to fluctuating workload requirements. Whether your applications experience a sudden spike in traffic or require additional computing resources for scheduled batch jobs, the portal provides intuitive controls to increase or decrease the number of worker nodes as needed. This ensures your cluster remains agile, cost-efficient, and performance-optimized at all times, without requiring complex manual configurations or downtime.
1. Accessing Cluster summary page
-
Login into the cloud management portal.
-
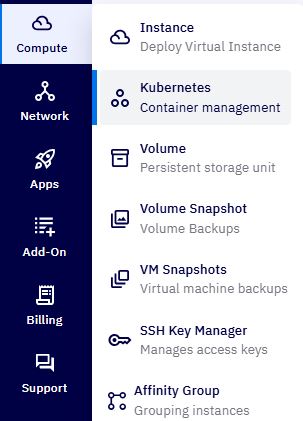
Then navigate to Compute > Kubernetes > Select the cluster > Summary Tab
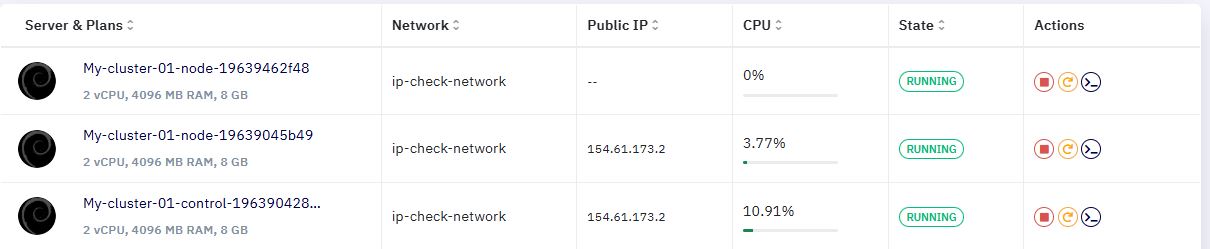
Once a kubernetes cluster is selected, the portal displays the cluster summary page by default, presenting real-time operational status, compute configurations, network data, and actionable controls.
2. Access the Resize page :
- From the Summary tab of the selected cluster, click on the Resize or Autoscale button.

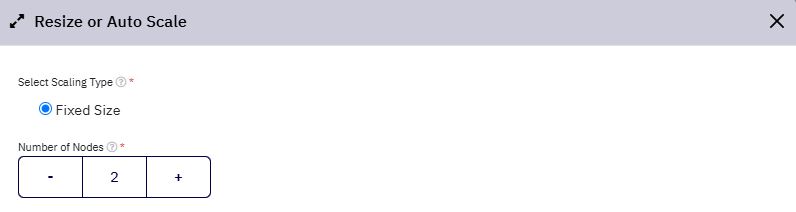
3. Configure Worker Nodes :
-
From the popup screen, Select the desired number of worker nodes to scale your Kubernetes cluster.
-
This determines the total number of nodes that will be active in your cluster after scaling.
4. View Estimated Cost :
-
Just below the scaling configuration, you can view a cost breakdown for the selected number of worker nodes.
- Pricing is displayed per node to help you estimate resource costs accurately.
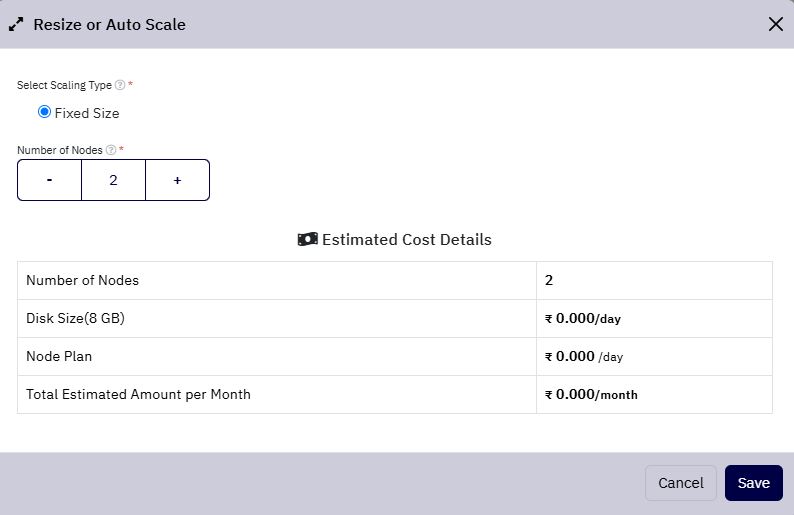
5. Initiate Scaling Operation :
- Click the Save button to apply the changes and begin the scaling process.
6. Completion and Confirmation :
- After a few minutes, the additional worker nodes will be provisioned and attached to your Kubernetes cluster. You will be able to view the updated node count in the cluster summary.