Kubernetes Cluster Creation
The Cloud Management Portal provides a seamless interface for creating, managing, and monitoring Kubernetes clusters. Users can deploy clusters in just a few steps using the intuitive UI, with customizable options for compute plans, networking, and access control.
1. Portal Login :
-
Navigate to the Cloud Management Portal.
-
Enter your credentials and log in to your account.
2. Access the Kubernetes Section :
- From the main dashboard, navigate to Compute.
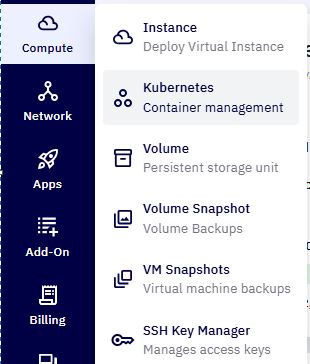
-
Click on Kubernetes to view the existing Kubernetes cluster.
-
After that, click on Create Cluster to initiate the creation of a new cluster

3. Identify Your Cluster :
Provide the following information:
-
Cluster Name (Required): Enter a unique name for your Kubernetes cluster.
-
Description (Optional): Add an optional description to help identify the purpose or workload of the cluster.

4. Choose Your Cluster Image :
- Select a Kubernetes version based on your preference or application compatibility.

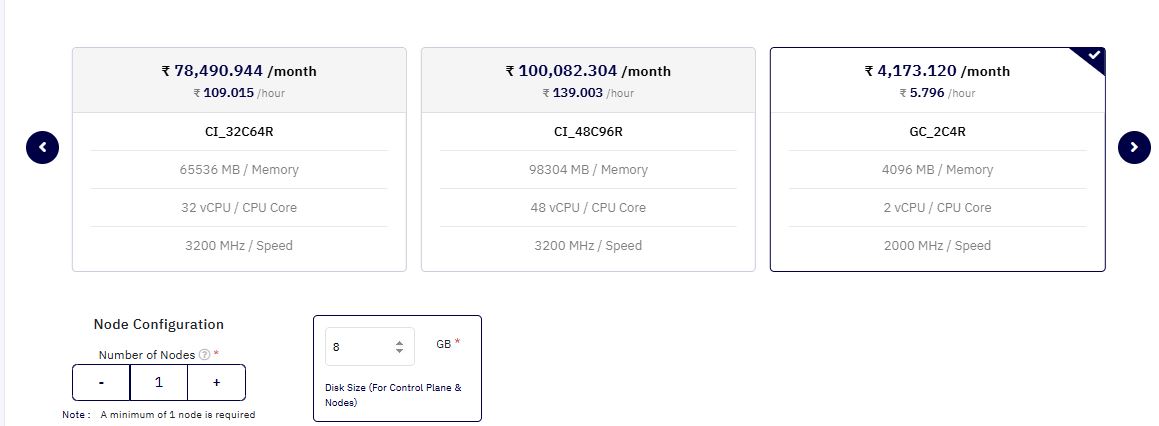
5. Choose Your Node Plan :
-
Select the hardware configuration for the master & worker nodes in your cluster.
-
After selecting the node plan, you will have the option to choose the number of worker nodes. A minimum of 1 worker node must be assigned, and you will also need to specify the disk size for each worker node.
6. Network Configuration :
- Select a predefined network from the drop-down list to associate your Kubernetes cluster.

Note: If a network is not displayed in the list, ensure that it is not currently assigned to any VM's. Additionally, verify that there are no firewall or load balancer rules associated with that network. If either of these conditions is present, the network will not appear in the list.
7. Add Extra Reliability (Optional) :
- You may choose to add features or configurations that increase the fault tolerance or availability of your cluster.

8. Add SSH Key Pair :
Add or select an SSH key pair to enable secure access to your nodes.
-
Select from existing SSH keys
-
Or use Add SSH Key Pair or Upload SSH Key Pair to register a new one.

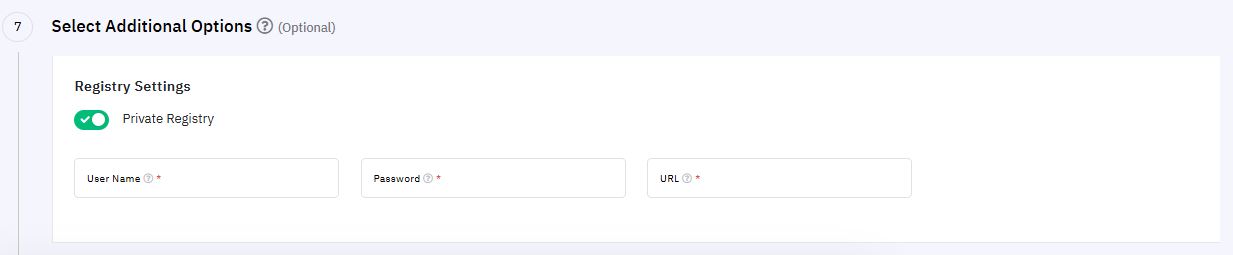
9. Select Additional Options (Optional) :
- In the Additional Settings section, you can configure your private registry for the clusters being created.
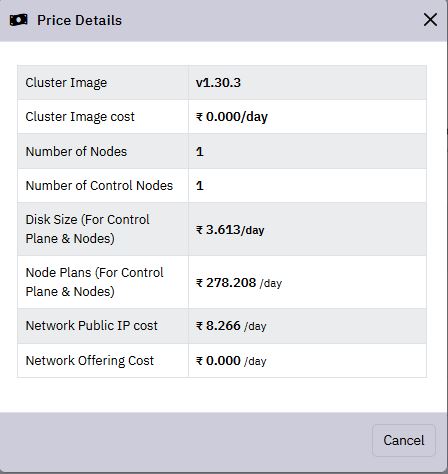
10. Review Cost Estimation
- Click Total Estimate to view an approximate cost estimation for deploying the cluster.

11. Cluster Creation :
-
Click the **Create Cluster ** button to create the new cluster.
-
The provisioning process may take 5-15 minutes to complete.
12. Monitor Cluster Status :
- Navigate back to the Kubernetes cluster list to view the current status of your cluster.
