Creating a Shared File Service (SFS)
The Shared File Service (SFS) is a fully managed NFS-based storage solution within the Cloud Management Portal that allows multiple virtual machines (VMs) under the same account and network to share a persistent storage volume.
This guide walks you through the step-by-step process of provisioning a new SFS instance through the user-friendly Cloud Management Portal interface.
Prerequisites
Before you begin:
-
Ensure you have valid login credentials for the Cloud Management Portal.
-
Verify that your account has the necessary permissions and quota to create an SFS service.
-
Confirm the network zone in which the SFS service will be deployed.
Steps to Create an SFS Service
1. Login to the Portal :
-
Open your browser and navigate to the Cloud Management Portal.
-
Login using your user credentials.
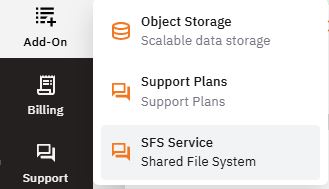
2. Navigate to the SFS Service :
-
From the main dashboard, go to the left-hand navigation panel.
-
Click on Add-ons.
-
Under Add-ons, select SFS Service.
First-time Access:
If there are no existing SFS services under your account, you will be redirected to the SFS Welcome Page. This page introduces the key features of SFS and provides a quick-start path.

3. Start Creating the SFS Service :
-
On the welcome page, click the Create button to initiate the provisioning process.
-
You will be redirected to the SFS Creation Wizard.
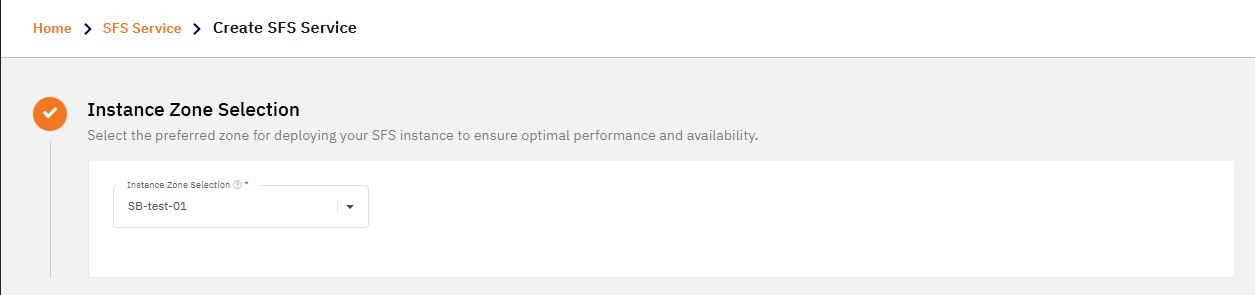
4. Configure Deployment Settings :
- Select Instance Zone - Choose the zone in which your SFS service should be deployed. This zone should match the zone where your VMs are located to minimize latency and ensure compatibility.
- Set Service Name - Provide a meaningful name for your SFS service. This name will be used for identification across the portal. Example:
project-data-storeorshared-logs-volume

5. Select Storage Configuration :
- Choose File System Type - You can select from the following file systems:
-
XFS – Ideal for high-performance applications and large files.
-
EXT4 – Widely supported and suitable for general-purpose workloads.
-
Choose the format based on your application compatibility and performance requirements.

- Specify Storage Size - Enter the desired size of your shared file system in GB.

6. Create the SFS Service :
-
Review your selected options:
-
Zone
-
Name
-
Storage Type (XFS/EXT4)
-
Storage Size
-
-
Once confirmed, click the Create button.

- The provisioning process will begin. It typically takes a few minutes to complete, depending on system load and selected zone.

7. Monitor SFS Creation Status :
-
After the creation process completes, You will be redirected back to the SFS Service List page.
-
Your newly created SFS instance will appear in the list with a status indicator (e.g.,
Running,Initializing, orFailed).