Load Balancer
The Load Balancer associated with an Autoscale Group ensures seamless distribution of network traffic across multiple instances, enhancing availability and reliability.
This section provides a detailed guide on how to view and manage Load Balancer settings from your Cloud Management Portal.
1. Accessing the Native Autoscale Section :
-
Log in to your Cloud Management Portal using your authorized credentials.
-
From the left navigation pane, go to:
Compute → Native Autoscale
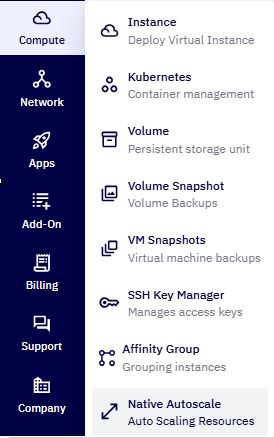
- Here, you’ll find a list of all Autoscale groups available under your account.
2. Navigate to Load Balancer Page :
-
Locate the desired Autoscale Group and click on it to open its summary page.
-
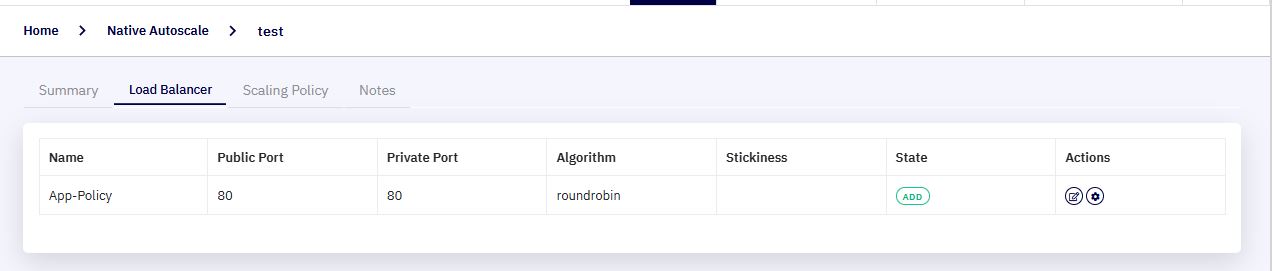
In the summary page, click on the Load Balancer tab.
3. Load Balancer Details :
Within the Load Balancer tab, the portal displays key information about the associated Load Balancer, including:
-
Name: The identifier of the Load Balancer.
-
Public Port: The external-facing port that receives client traffic.
-
Private Port: The internal port to which the traffic is forwarded.
-
Algorithm: The load balancing algorithm used (e.g., Round Robin, Least Connections).
-
Stickiness: The session persistence method configured for the Load Balancer.
-
Status: The operational status of the Load Balancer.
4. Managing Load Balancer Settings :
Under the Actions section, you will find options to Edit and Configure the Load Balancer settings:
-
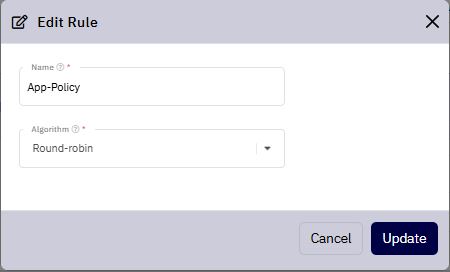
Edit Load Balancer
-
Click the Edit icon next to the Load Balancer you wish to modify.
-
A pop-up window will appear, allowing you to update the Load Balancer Name and the Algorithm.
-
After making the desired changes, click on the Update button to save and apply your modifications.
-
-
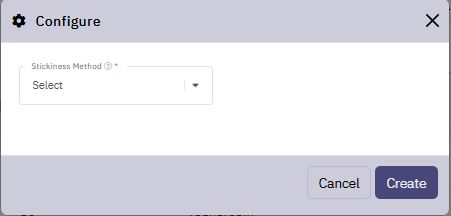
Configure Stickiness Settings
-
Click the Configure option available under the Actions menu.
-
This will open a configuration panel where you can modify the stickiness policy for your Load Balancer.
-
Adjust the stickiness settings based on your application requirements, and then click Save to update.
-