Enabling Advanced Monitoring for Linux VM
This section provides step-by-step instructions to enable advanced monitoring for a Linux VM.
Steps to Enable Advanced Monitoring:
-
Log in to the cloud management portal.
-
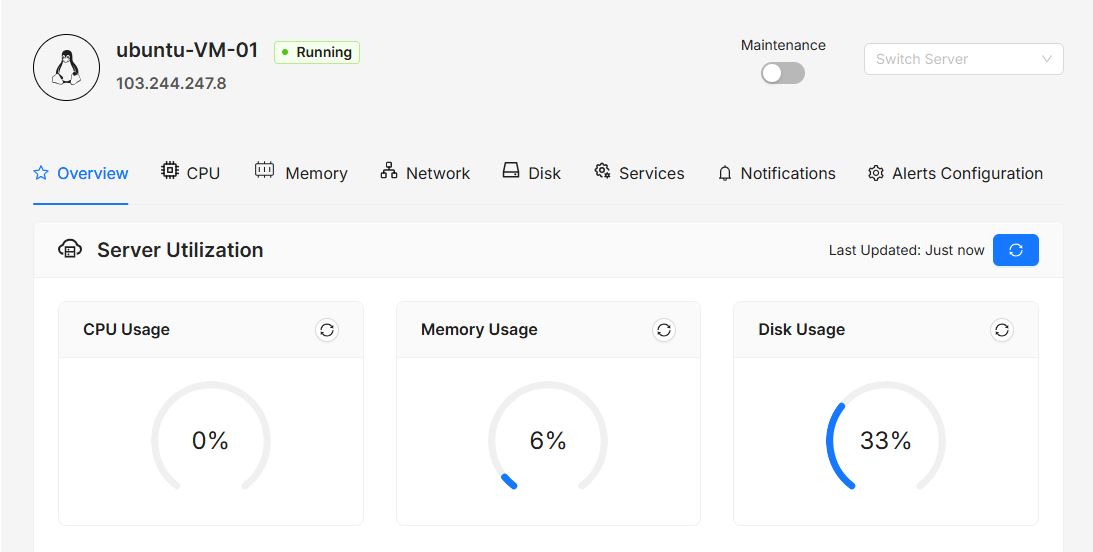
Select the VM where you want to enable advanced monitoring, then click on it.
-
Navigate to the Monitoring section. You will see the "Configure Advanced Monitoring" button in the top-right corner of the portal. Click on it.
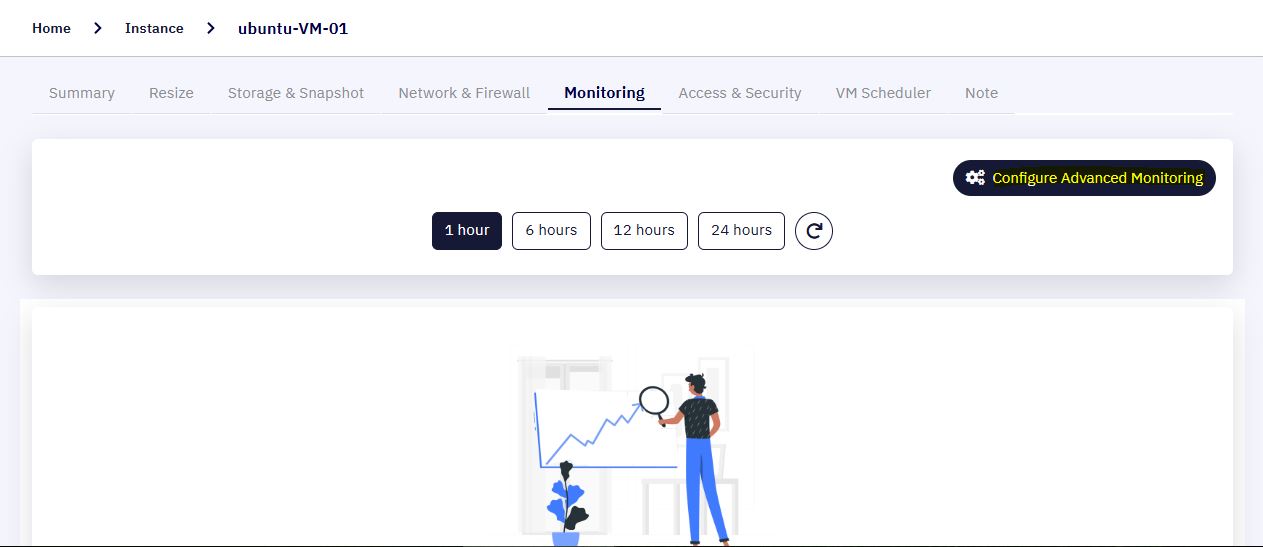
- Clicking the "Configure Advanced Monitoring" button will open a new tab in your browser.
-
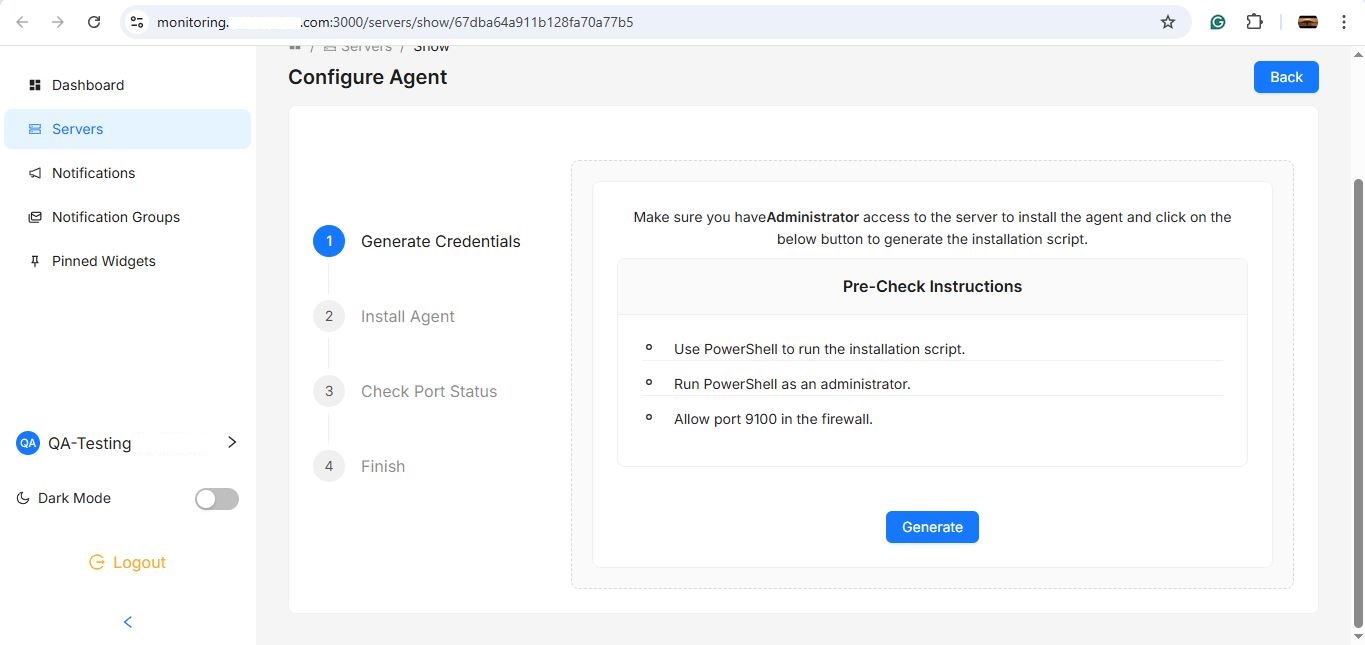
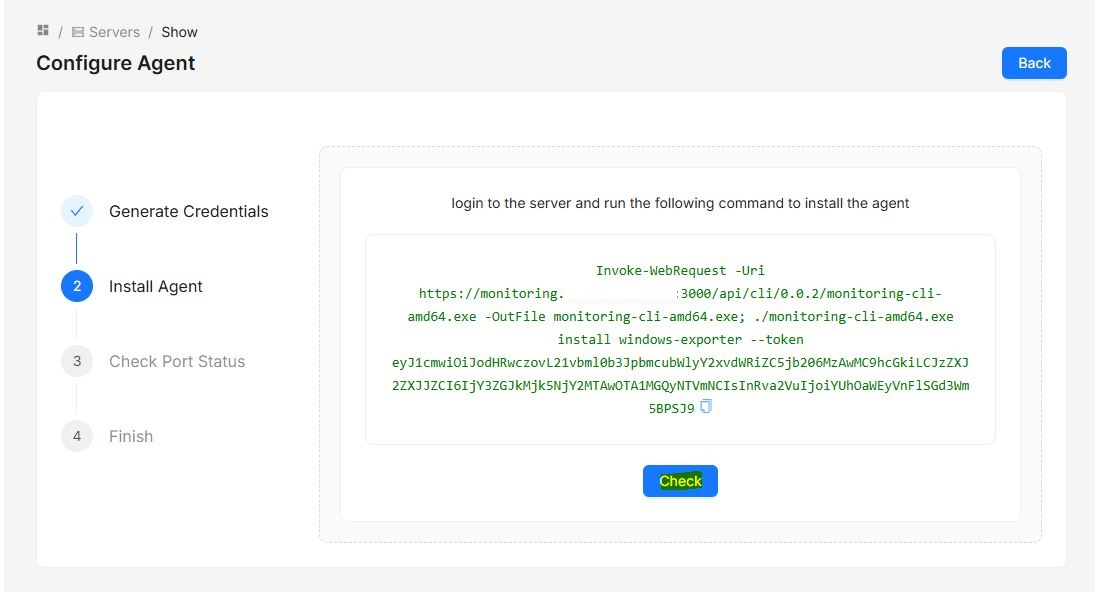
The activation process consists of three steps:
-
Installing the Agent
-
Checking Port Status
-
Finalizing Activation
-
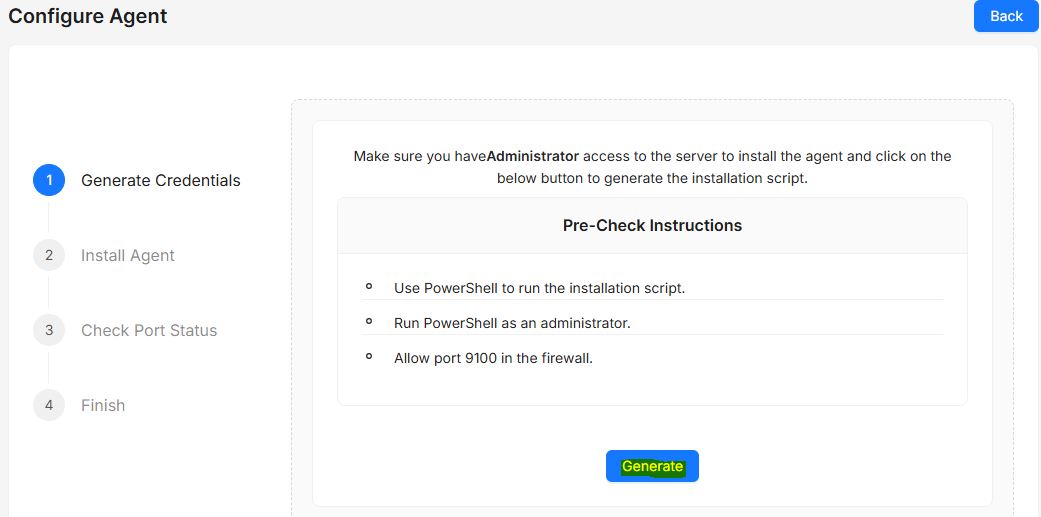
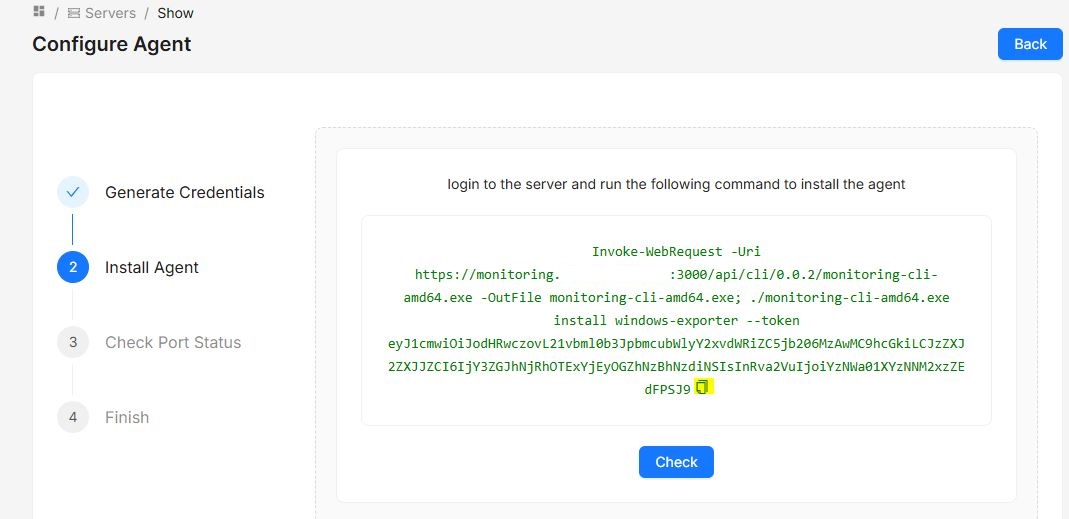
Begin by installing the monitoring agent inside the VM. Click the "Generate" button on the Configure Agent screen.
- Once the agent installation link is generated, click the "Copy" button to copy the link.
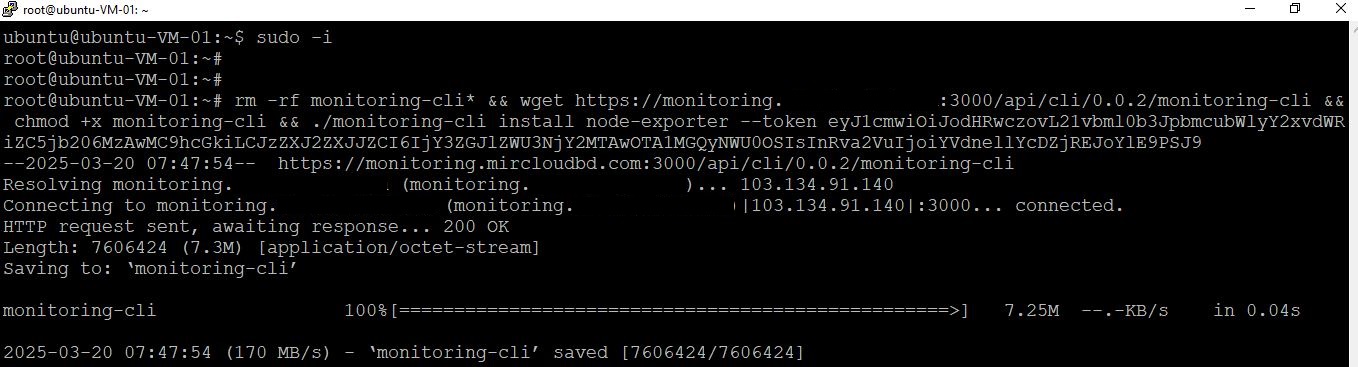
- Log in to the Linux VM, paste the copied link into the terminal, and ensure the command is executed with sudo privileges.

- The agent installation process will begin and may take a few minutes to complete.
- Once installed, the monitoring agent will be successfully activated on your VM.
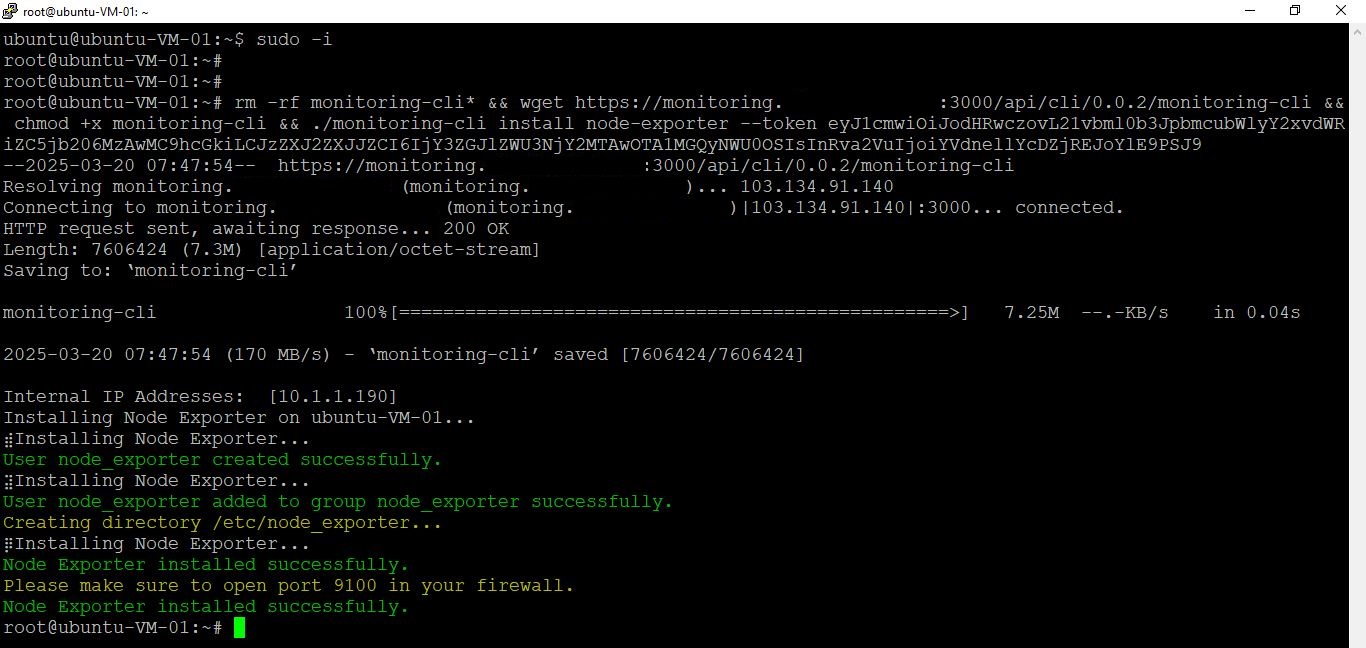
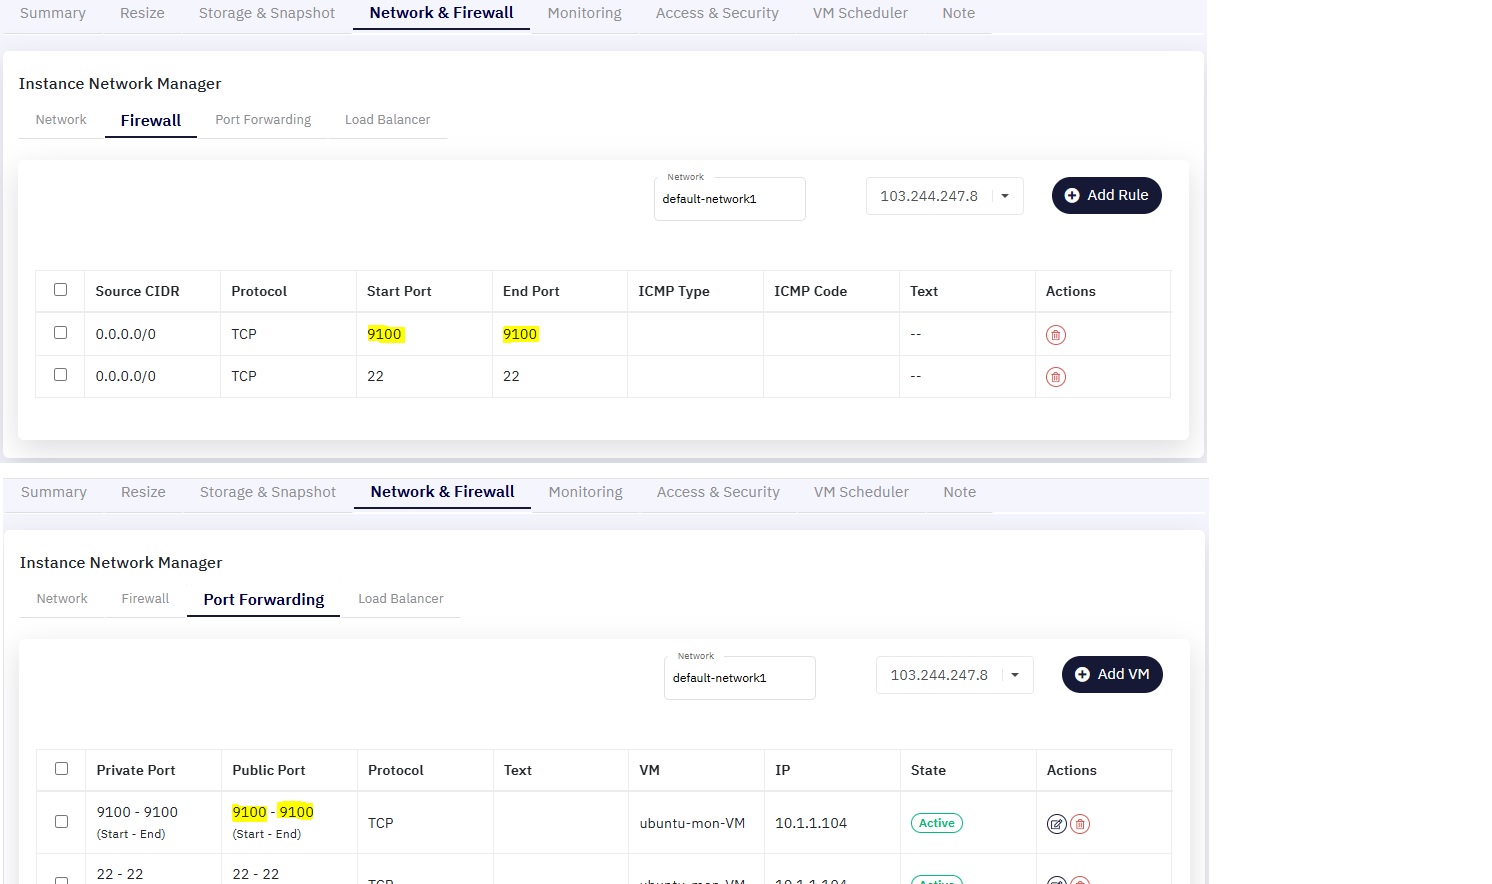
- Ensure that port 9100 is allowed in the firewall settings of your cloud portal and configure port forwarding to route traffic to the corresponding VM.
- After configuring the Linux VM, switch back to the Advanced Monitoring Portal and click the "Check" button to validate the agent installation.
- Upon successful validation, a confirmation message will be displayed, and the page will automatically redirect to the VM Advanced Monitoring Dashboard.