Creating a Bucket
The Object Storage module in the Cloud Management Portal allows users to store, manage, and organize files using buckets—logical containers for storing objects such as backups, media files, application data, and more. Each bucket can be configured for access control, visibility, and policy enforcement.
This guide walks you through the full process of creating, configuring, and managing buckets within your object storage account.
Accessing the Buckets Section
-
Log in to the Cloud Management Portal.
-
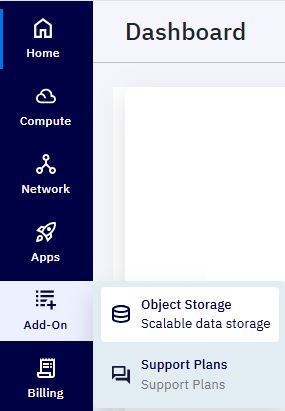
Navigate to Add-on > Object Storage in the left-hand menu.
-
You’ll be redirected to the Object Storage Dashboard.
-
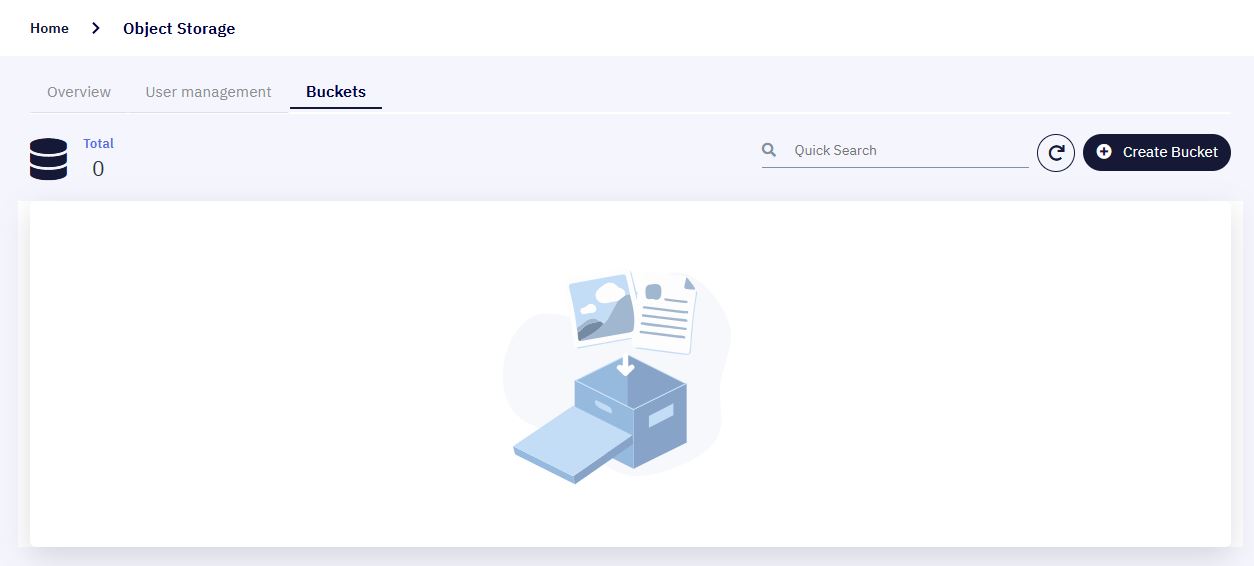
Click on the Buckets tab to view all existing buckets under your account.
Creating a New Bucket
1. Bucket Creation :
- Click the “Create Bucket” button.
- You’ll be redirected to the Create Bucket page.
2. Region and Zone :
-
Select the Region and Zone where the bucket should reside.
-
This determines the physical data center for storage and access latency.
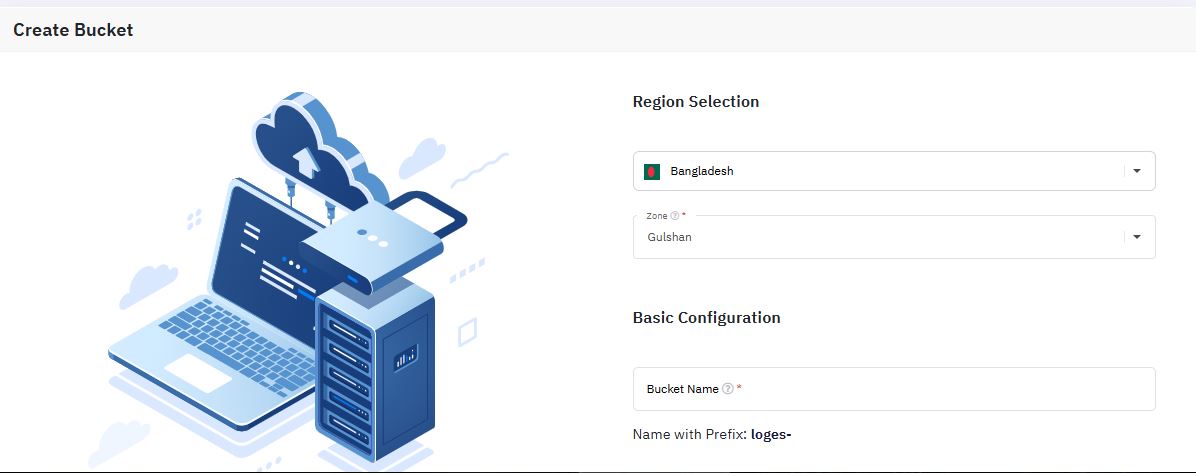
3. Bucket Name :
- Enter a unique bucket name under the Basic Information section.
Note: A prefix (defined during Object Storage activation) will be automatically added to the beginning of your bucket name to maintain uniqueness.
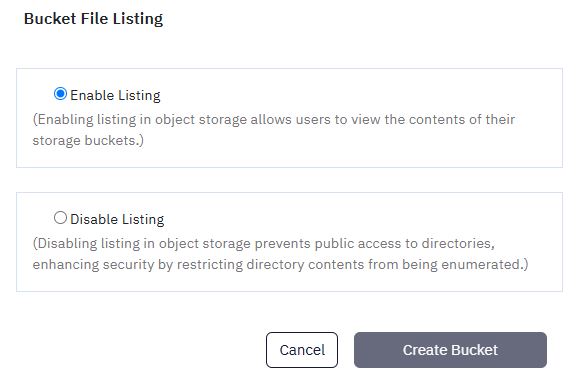
4. Bucket File Listing Option :
Choose how files within the bucket should be displayed when accessed via URL:
- Enable Listing – Files in the bucket will be listed openly in a directory-style view.
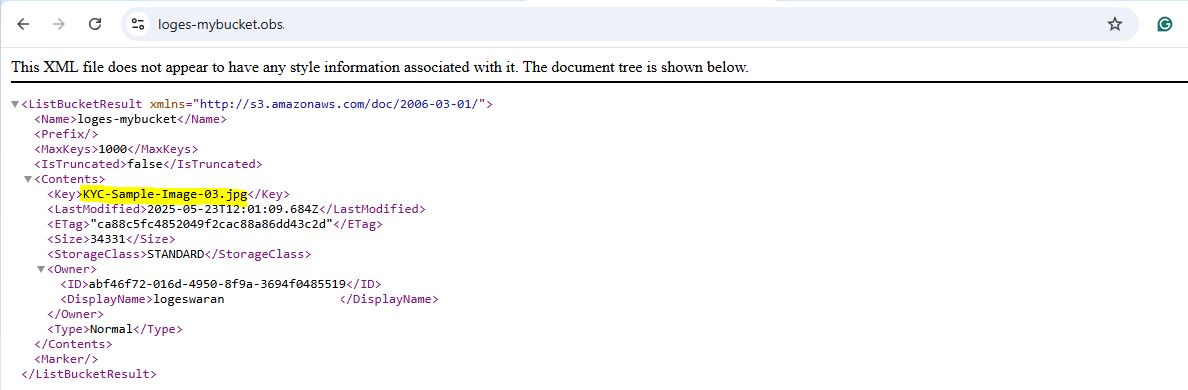
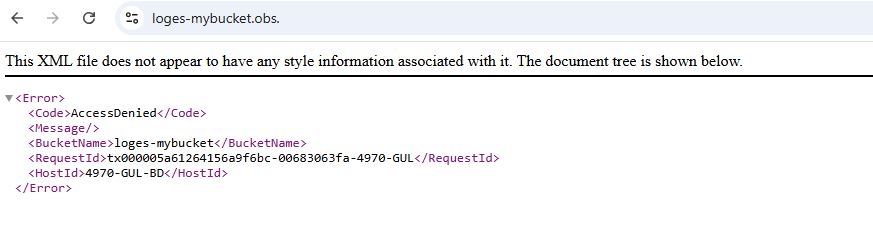
- Disable Listing – Attempting to browse the bucket URL will return an “Access Denied” message.
Best Practice: For public hosting scenarios (e.g., image hosting), use Enable Listing. For private or sensitive data, select Disable Listing.
5. Finalize :
- Click Create Bucket. Within a few seconds, the bucket will be created and displayed in the bucket list.
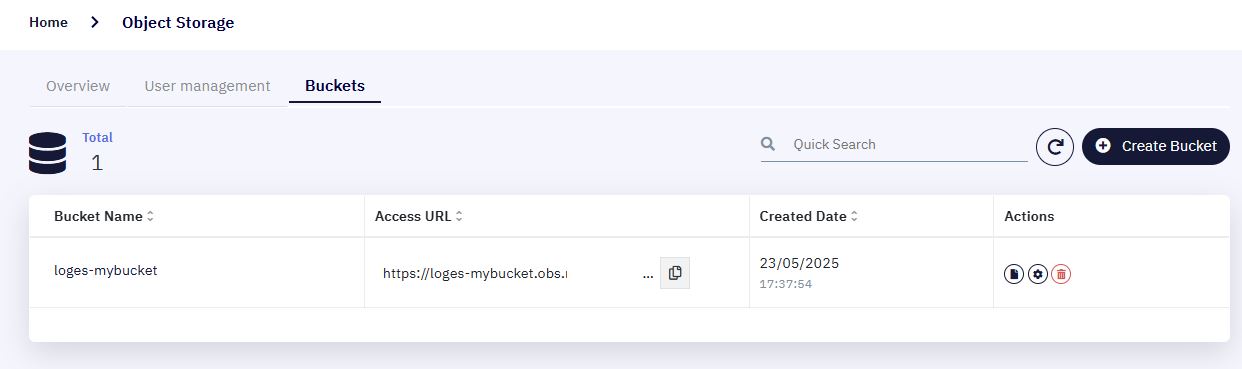
Bucket List Overview
- Once created, the new bucket will appear in the bucket list along with the following columns:
| Column | Description |
|---|---|
| Bucket Name | The name of your bucket (including prefix). |
| Access URL | The direct URL used to access or share files in the bucket. |
| Created Date | Timestamp when the bucket was created. |
| Actions | Options to manage the bucket: Show Files, Settings, and Delete. |
Managing Bucket Contents
Click on a bucket name to access its Bucket Dashboard, which includes three sections:
Files & Folders :
The Files & Folders tab within each bucket's dashboard provides a powerful and user-friendly interface for managing the objects (files and folders) stored in your Object Storage environment. This section serves as your central workspace to upload, organize, and access data stored in each bucket.
1. Upload New Files :
- Click on the Upload button to open a file selection window from your local machine.

-
You can upload single or multiple files in one action.
-
After file selection, you will be prompted to choose an access type:
-
Private – Files are accessible only through authenticated methods.
-
Public – Files can be accessed via a direct URL without login.
-
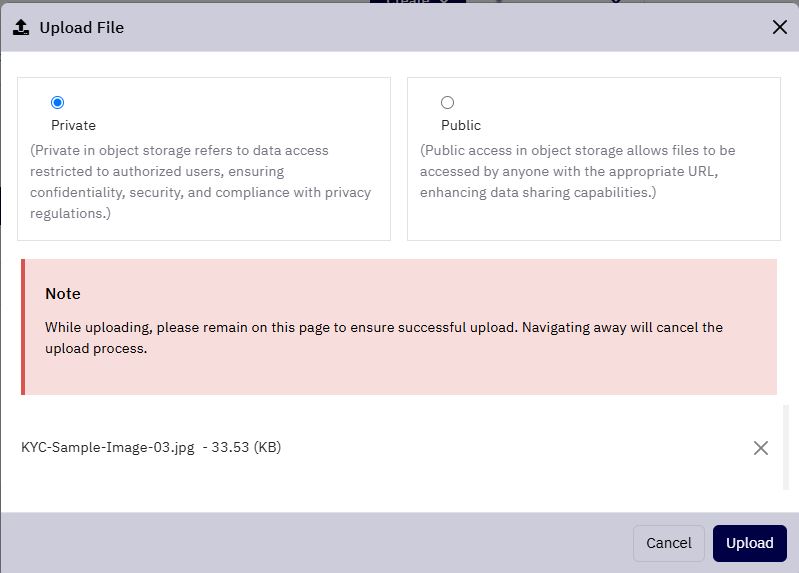
- The upload status will be shown in real-time, and upon successful upload, files will appear in the active bucket view.
Note: Best Practice: Use "Public" access only for files that are intended to be shared or externally accessed.

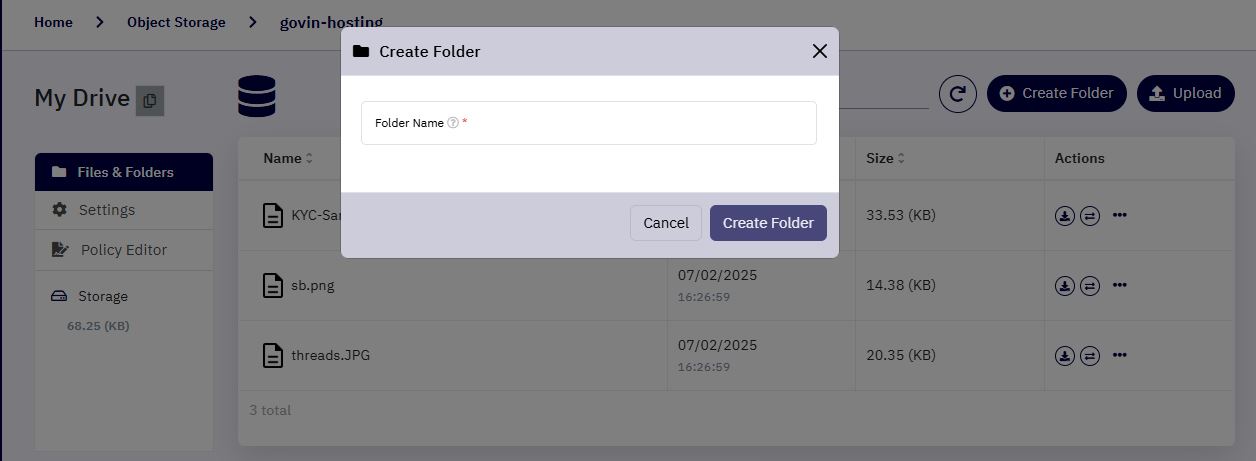
2. Create New Folders :
-
Click the Create Folder button to organize your files within the bucket.
-
A popup will appear prompting you to enter a folder name.
-
After confirmation, the folder is instantly created and will appear in the list/grid view.
-
You can then upload files directly into this folder for better categorization.
3. Switch Between Grid View and List View :
Use the View Toggle button (typically found at the top right of the file list) to change how content is displayed:
-
Grid View – Displays files and folders as large icons for visual clarity.
-
List View – Displays files in rows with detailed information such as size, type, and last modified date
4. Use the Search Bar :
-
Located above the file list, the Search Bar helps you quickly locate files or folders by name or keyword.
-
As you type, the view dynamically updates to show only matching items.
-
Supports partial matches and works in both list and grid view modes.
Settings
This tab allows you to manage configuration settings specific to the selected bucket, such as:
-
Bucket visibility
-
Default access behavior
Policy Editor
-
Create, edit, or apply bucket access policies.
-
Define rules for user access, IP restrictions, time-based permissions, and more.
-
Policies can be used to automate access control in enterprise use cases.