Deleting a Volume Snapshot
Volume snapshots are point-in-time backups of your root or data disks. While snapshots are essential for disaster recovery, routine maintenance, or system rollbacks, there may be times when you need to clean up unused or obsolete snapshots to optimize your storage usage and reduce associated costs.
This guide will walk you through the steps to safely delete a volume snapshot using the Cloud Management Portal.
Important Note
-
Make sure the snapshot you wish to delete is no longer required for recovery or rollback purposes.
-
This operation is irreversible. Once a snapshot is deleted, it cannot be recovered.
-
You should verify that no critical templates or volumes are dependent on the snapshot before proceeding.
1. Accessing the Volume Snapshot Section :
-
Log in to your Cloud Management Portal using your authorized credentials.
-
From the left navigation pane, go to:
Compute → Volume Snapshots
-
Here, you’ll find a list of all volume snapshots available under your account.
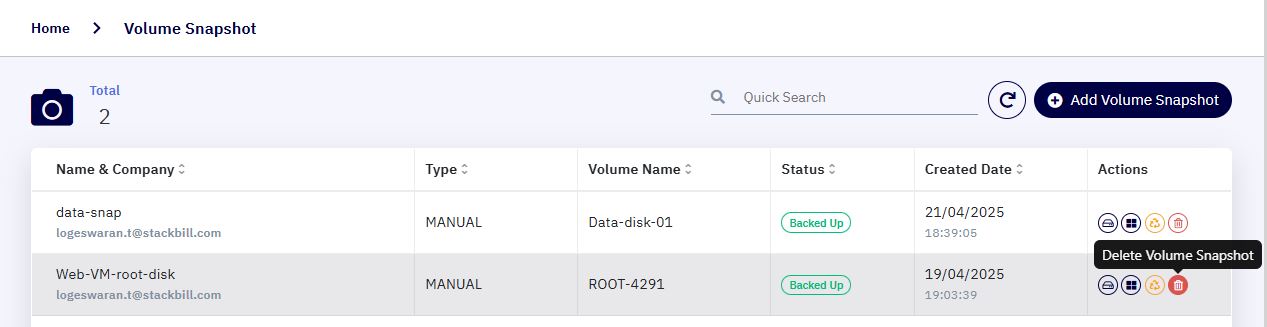
2. Identify the Snapshot :
-
Scroll through the list or use the search/filter functionality (if available) to locate the snapshot you want to delete.
-
Confirm that the selected snapshot is not required for current or future operations.
3. Initiate the Delete Action :
- Click the Delete icon located under the Actions column corresponding to the snapshot.
4. Confirm the Deletion :
A confirmation popup will appear with the message:
“Are you sure you want to delete?”
-
To proceed with the deletion, click OK.
-
To abort the operation, click Cancel.
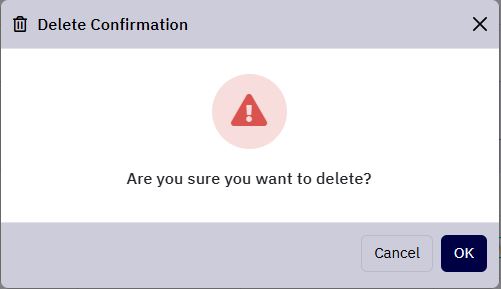
Important: This action is permanent. Once deleted, the snapshot cannot be recovered under any circumstances.
5. Completion :
-
After confirmation, the portal will initiate the deletion process.
-
Once successfully deleted, the snapshot will no longer appear in the Volume Snapshot list.