Create a Volume from a Volume Snapshot
Creating a volume from an existing snapshot allows you to quickly restore or replicate your storage environment without the need to start from scratch. This is especially helpful for backup, disaster recovery, or creating pre-configured environments.
This section will walk you through the steps to create a volume from a volume snapshot using your cloud management portal.
1. Accessing the Volume Snapshot Section :
-
Log in to your Cloud Management Portal using your authorized credentials.
-
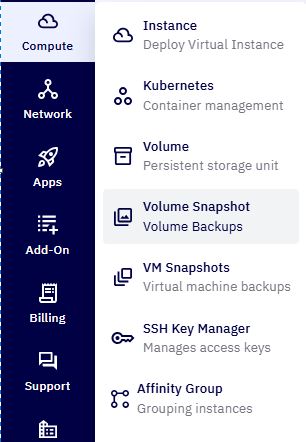
From the left navigation pane, go to:
Compute → Volume Snapshots
-
Here, you’ll find a list of all volume snapshots available under your account.
2. Initiate Volume Creation :
-
Locate the snapshot you want to use.
-
Click the Create Volume icon under the Actions column for that snapshot.

3. Configure the New Volume :
-
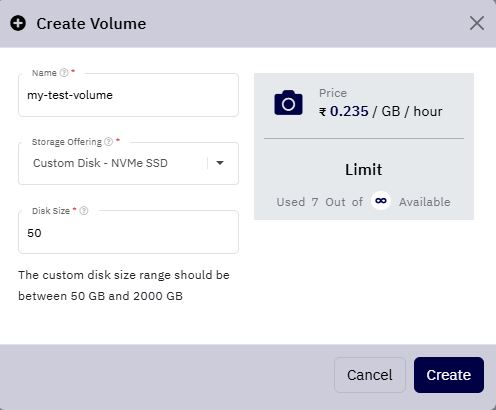
A popup window will appear prompting you to provide details for the new volume :
-
Volume Name : Enter a meaningful name for your new volume.
-
Storage Offering : Select a storage offering (e.g., Standard, High IOPS) from the drop-down list. These offerings are predefined configurations available within your cloud environment.
-
Price Info : The popup displays the per GB per month cost based on the selected offering.
-
Quota Info : View your remaining volume quota, including how many volumes you can still create under your account.
-
4. Review and Confirm :
-
Double-check the configuration and cost information.
-
When you're ready, click Create.
5. Volume Creation Time :
- The time to create the volume may vary depending on the size of the snapshot. Larger snapshots may take longer to provision.
6. After Creation :
Once the volume creation is complete:
-
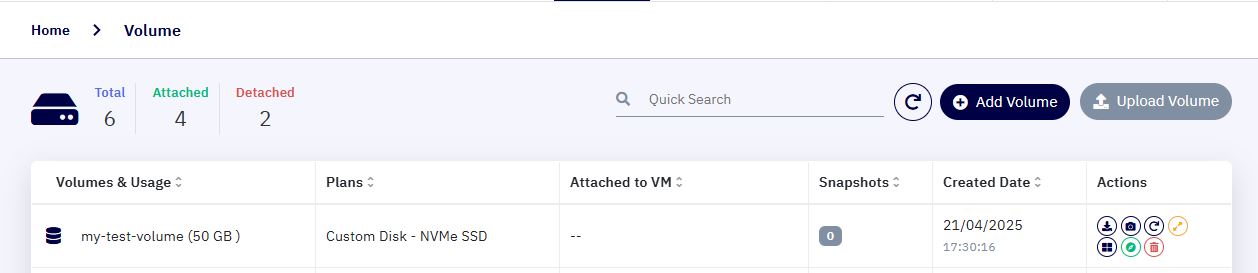
Navigate to Compute → Volumes.
-
You will find your newly created volume listed here.
-
This volume can now be attached to a virtual machine and used as a root or data disk.