Revert VM Snapshot
The Revert VM Snapshot feature allows you to roll back your virtual machine (VM) to a previous saved state. This is especially useful if your VM encounters errors after software updates, misconfigurations, or unexpected failures.
This section explains how to revert to a previously created VM snapshot using the Cloud Management Portal.
When to Use This Feature
You should consider reverting a VM snapshot when:
-
You want to undo recent changes or restore a known working state.
-
The VM has encountered issues after a system update or software installation.
-
You are testing configurations and need a clean rollback point.
Important:
Reverting a snapshot will overwrite the current state of the VM. Ensure any necessary data is backed up before proceeding.
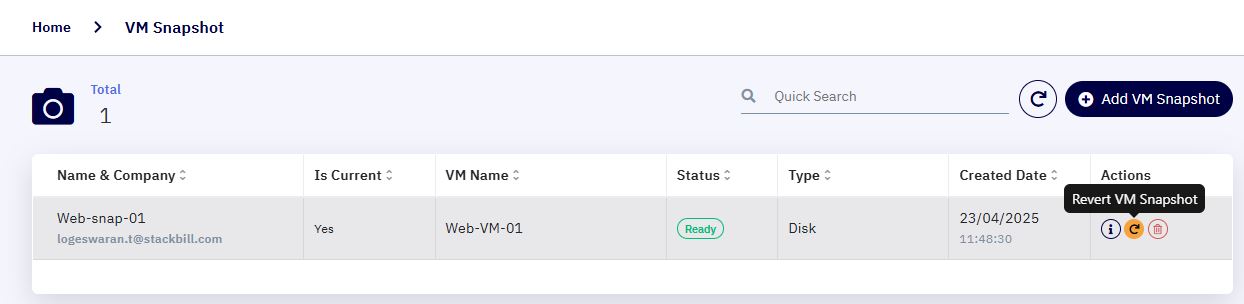
1. Accessing the VM Snapshots Section :
-
Log in to your Cloud Management Portal using your authorized credentials.
-
From the left navigation pane, go to:
Compute → VM Snapshots
-
Here, you’ll find a list of all VM snapshots available under your account.
2. Locate the Desired Snapshot :
-
Review the list and identify the VM snapshot you wish to revert.
-
Click the
Revert VM Snapshotbutton in the Actions column next to the selected snapshot.
3. Stop the Associated Virtual Machine :
Note:
Reverting is only allowed if the associated VM is in a stopped state.
- If the VM is still running, navigate to the Compute > Instances section and stop the corresponding VM before continuing.
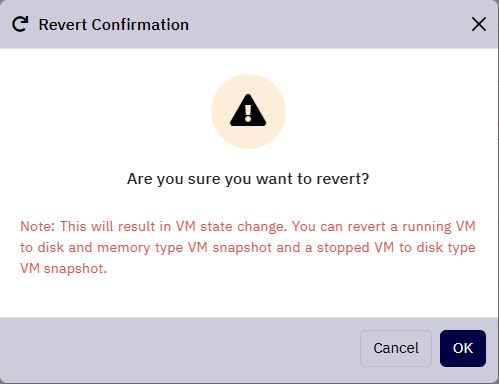
4. Confirm the Reversion :
-
A confirmation dialog will appear with the message:
“Are you sure you want to revert?” -
Choose one of the following:
-
OK – Proceed with the snapshot revert.
-
Cancel – Abort the process and keep the current VM state.
-
5. Revert Process Execution :
-
Once confirmed, the system will begin reverting the VM to the selected snapshot state.
-
The time taken may vary depending on the size and configuration of the VM.
6. Power On and Verify :
After the revert operation is successfully completed:
-
Navigate back to Compute > Instances.
-
Start the VM.
-
Log in to the instance and verify that the system reflects the state captured at the time of the snapshot.