Delete a VM Snapshot
A VM snapshot captures the state of a virtual machine (VM) at a specific point in time. While snapshots are useful for backup and restore operations, they consume storage and may accumulate over time. If a snapshot is no longer required, you can delete it to free up space. Please be aware that snapshot deletion is a permanent action and cannot be undone.
1. Accessing the VM Snapshots Section :
-
Log in to your Cloud Management Portal using your authorized credentials.
-
From the left navigation pane, go to:
Compute → VM Snapshots
-
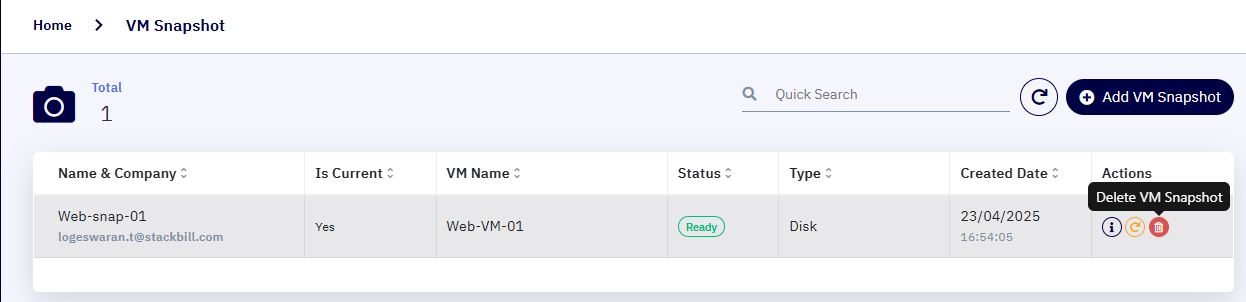
Here, you’ll find a list of all VM snapshots available under your account.
2. Identify the Snapshot :
- Browse through the list or use filters to locate the VM snapshot you wish to remove.
Important: Deleting a VM snapshot is an irreversible action. Once deleted, the snapshot cannot be recovered. Please ensure the snapshot is no longer required before proceeding.
3. Initiate the Deletion :
- Locate the snapshot and click on the **Delete ** icon in the Actions column.
4. Confirm the Deletion :
-
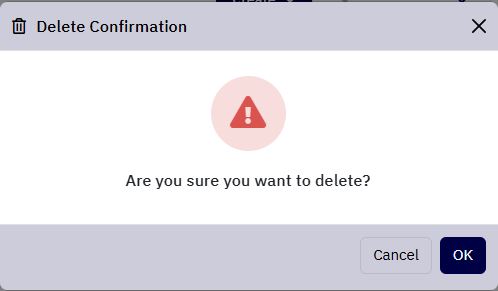
A confirmation dialog will appear with the message:
"Are you sure you want to delete this VM snapshot?" -
If you’re certain, click OK to proceed with the deletion.
-
If you wish to cancel the operation, click Cancel.
5. Snapshot Removal :
-
The system will begin deleting the snapshot. The process may take a few moments depending on the snapshot size.
-
Once completed, the snapshot will be removed from your account and will no longer be visible in the VM Snapshots list.