Accessing Linux Virtual Machines
Overview
This section provides detailed instructions on how to access a Linux Virtual Machine (VM) from both Windows and Linux environments using built-in and third-party tools.
Accessing Linux VM from a Windows Environment
1. Retrieve the Public IP Address :
-
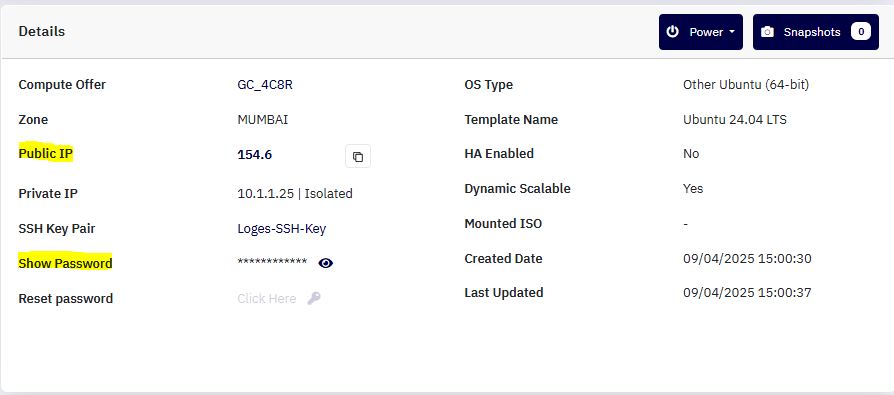
Navigate to the Instance Summary page in the Cloud Management Portal.
-
Copy the Public IP Address assigned to your Windows VM.
2. Install PuTTY (if not already installed)
If PuTTY is not available on your Windows system:
-
Visit the official download page:
https://www.chiark.greenend.org.uk/~sgtatham/putty/latest.html -
Download and install the latest version of PuTTY.
-
Once installed, locate the PuTTY icon on your desktop or in the Start menu.
3. Launch PuTTY
- Double-click the PuTTY icon to open the application.
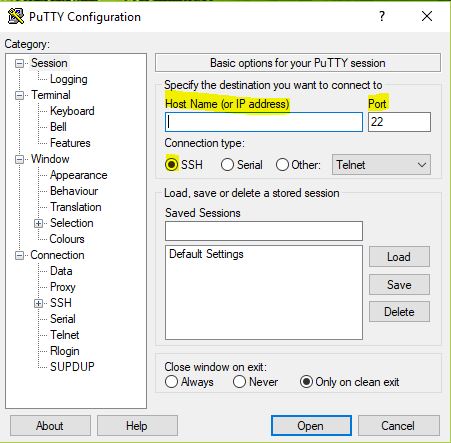
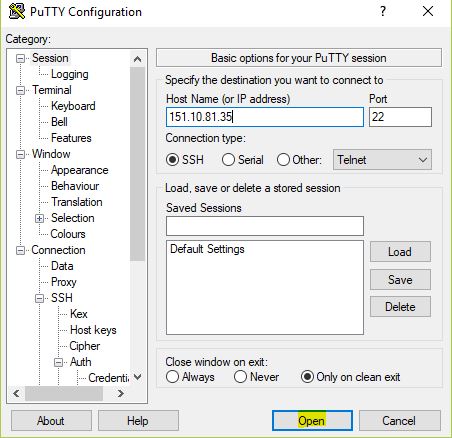
4. Configure the Connection
-
In the Host Name (or IP address) field, paste the Linux VM Public IP copied earlier.
-
Confirm the Port is set to
22(default SSH port). -
Ensure Connection Type is set to SSH.
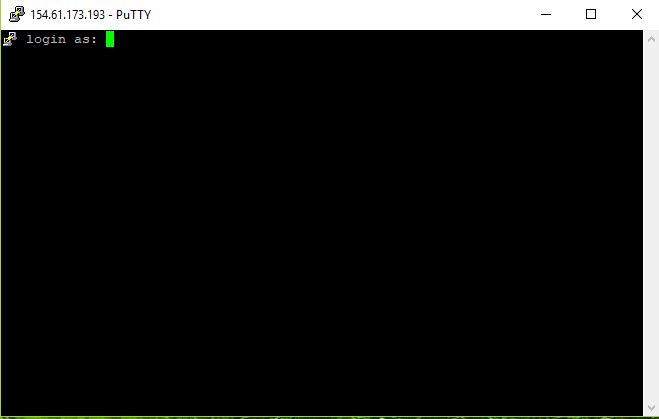
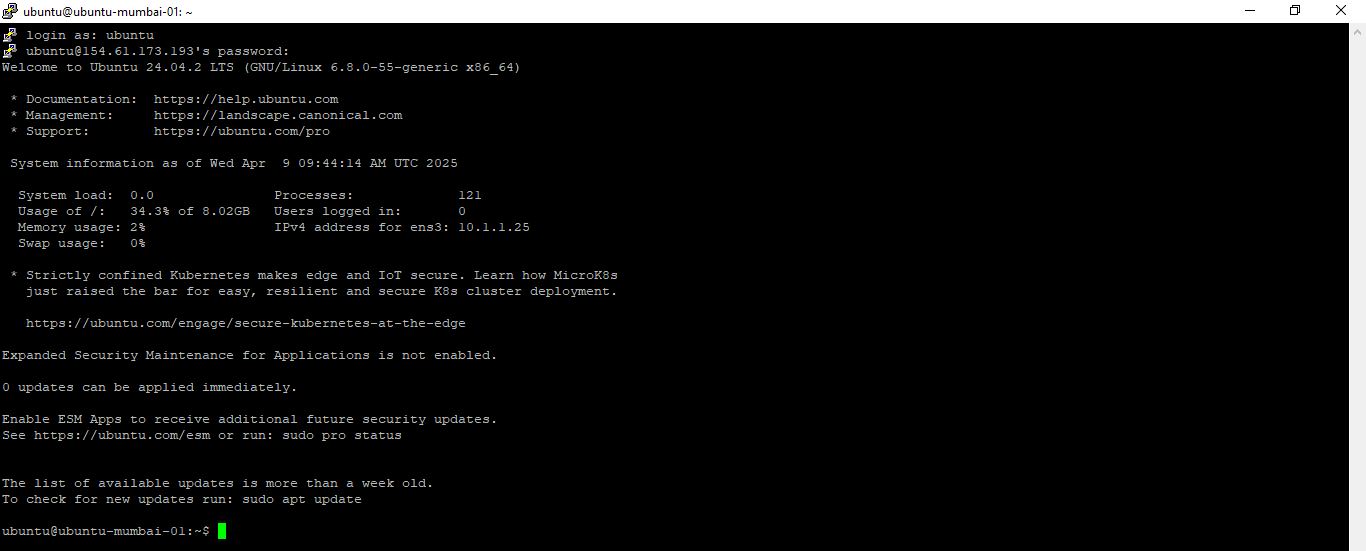
5. Connect to the VM
-
Click the Open button.
-
A new terminal window will appear prompting for login credentials.
6. Enter Login Credentials
- You will be prompted for a username and password:
-
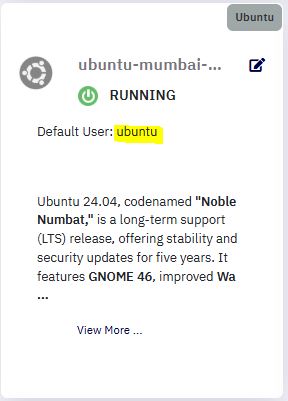
The default username can be found on the VM Summary page in the portal.
-
The VM password is available under the Details section of the same page.
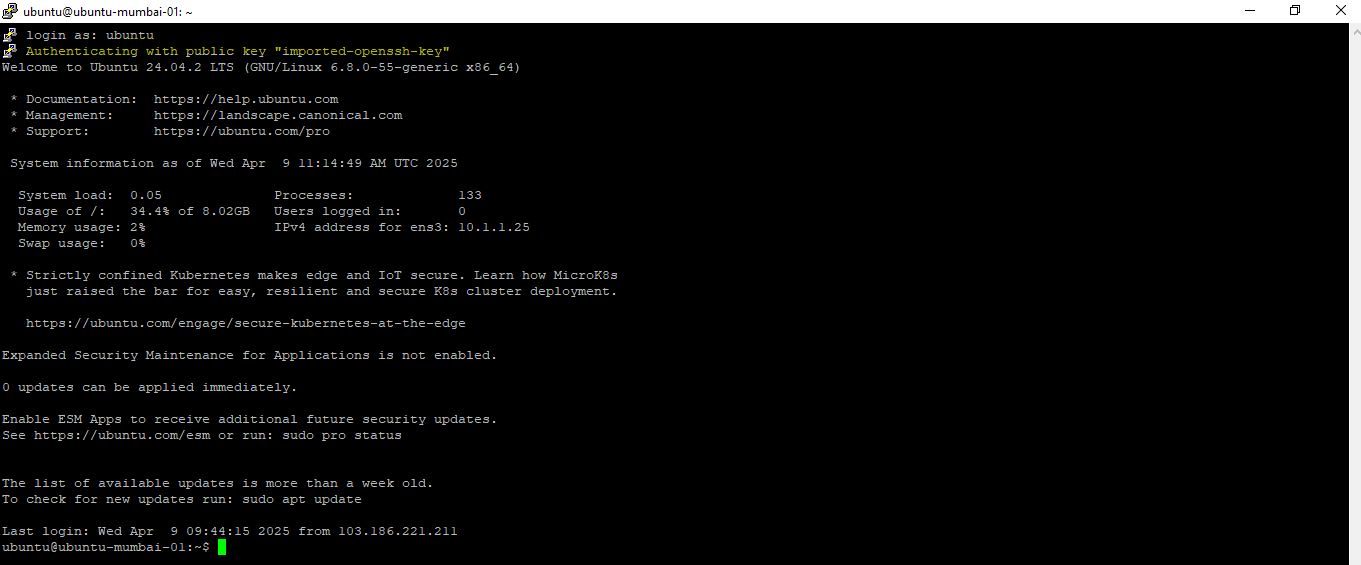
7. Successful Connection
Once valid credentials are entered, you will be logged into your Linux VM terminal session. You can now begin managing your virtual server through the command line.
Accessing Linux VM via SSH Key using PuTTY
The Cloud Management Portal offers secure access to your Linux Virtual Machines (VMs) using SSH key authentication — a safer alternative to traditional password-based login. This guide outlines how to generate, configure, and use an SSH key with PuTTY to access your VM.
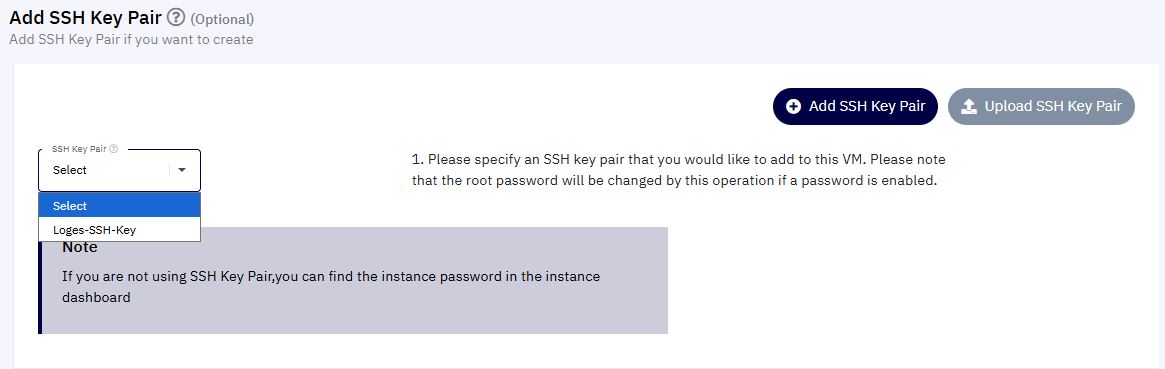
1. Assigning an SSH Key to a VM
- When creating a new VM, you can assign an SSH Key under the Add SSH Key Pair section.
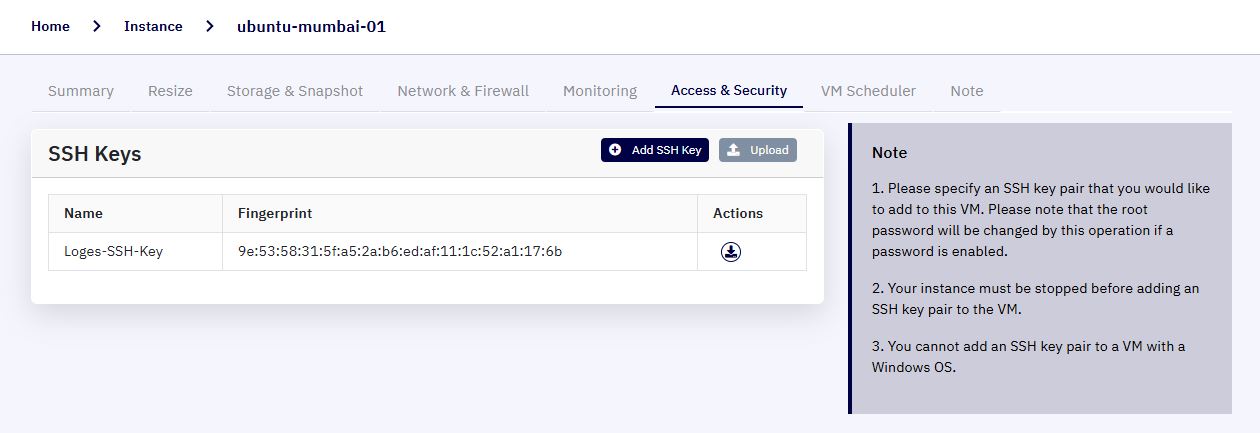
- For existing VMs, navigate to the Instance Summary > Access & Security tab and attach a new SSH key.
Tip: Make sure to download the SSH Key and store it securely. The file will be in
.PEMformat.
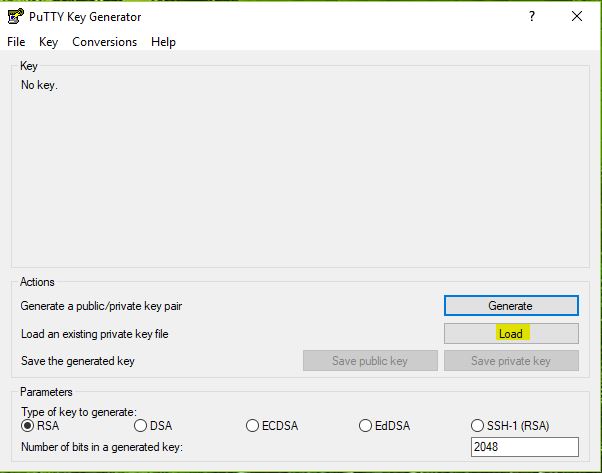
2. Convert PEM to PPK Using PuTTYgen
-
Download PuTTYgen from https://www.puttygen.com/download-putty
-
Launch PuTTYgen.
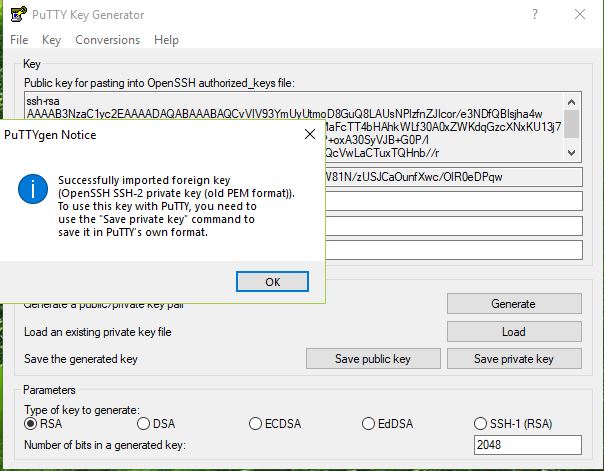
-
Click Load and select your
.PEMkey file.
- A confirmation will appear:
"Successfully imported foreign key (OpenSSH format)...". Click OK.
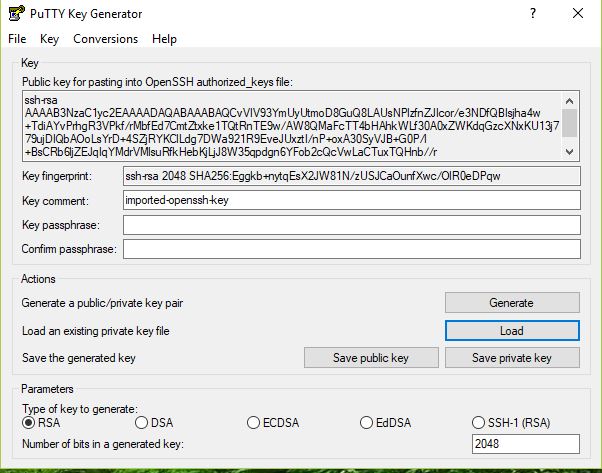
- Click Save private key to export as a
.PPKfile.
- You’ll be asked whether to save without a passphrase. Choose Yes to continue.
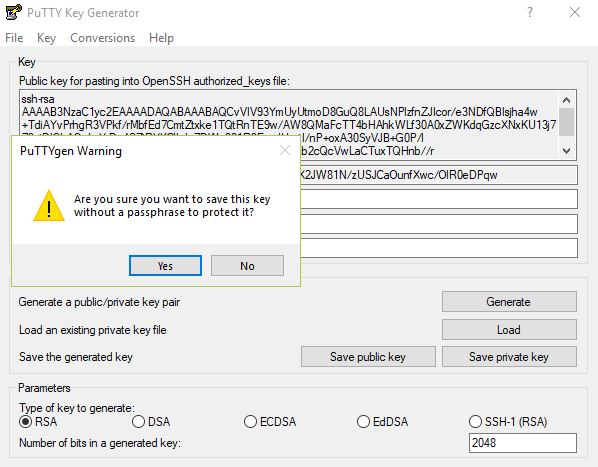
- Choose a filename and save the file to your local machine.
You now have a .PPK file ready to use with PuTTY.
3. Configure PuTTY to Use the SSH Key
-
Open PuTTY from your desktop
-
In the Host Name field, enter your VM’s Public IP.
-
Set Port to
22and ensure Connection Type is SSH. -
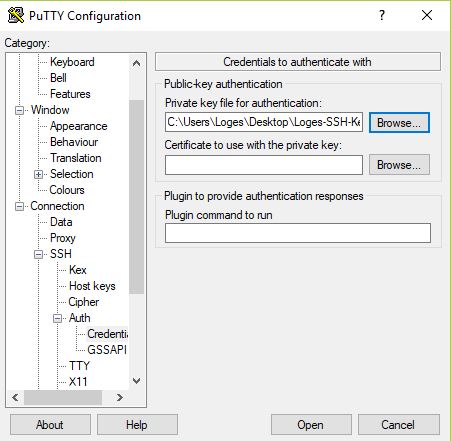
To set the PPK file, In the left-hand menu, go to:
Connection > SSH > Auth -
Click Browse under Private key file for authentication.
-
Select your newly created
.PPKfile.
4. Connect to Your VM
-
Return to the Session tab.
-
Review all settings (IP, Port, SSH Key).
-
Click Open button.
- If your SSH key is valid, you’ll be logged in directly without being prompted for a password.