Installing Stackbill
Installing Steps
In this chapter, we will walk you through the step-by-step installation of the stackbill application through GUI wizard.
- Open your web browser and enter the Load Balancer's public IP address.
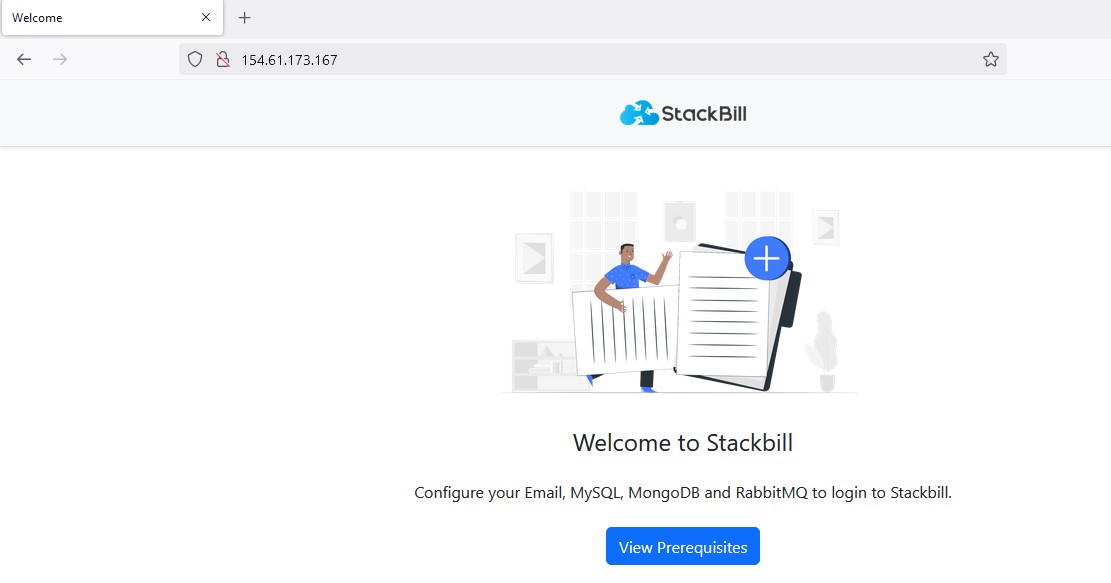
- On the Stackbill welcome page, locate and click the "View Prerequisites" button. This will initiate a validation process to check if the server meets the required hardware and software specifications for Stackbill deployment.
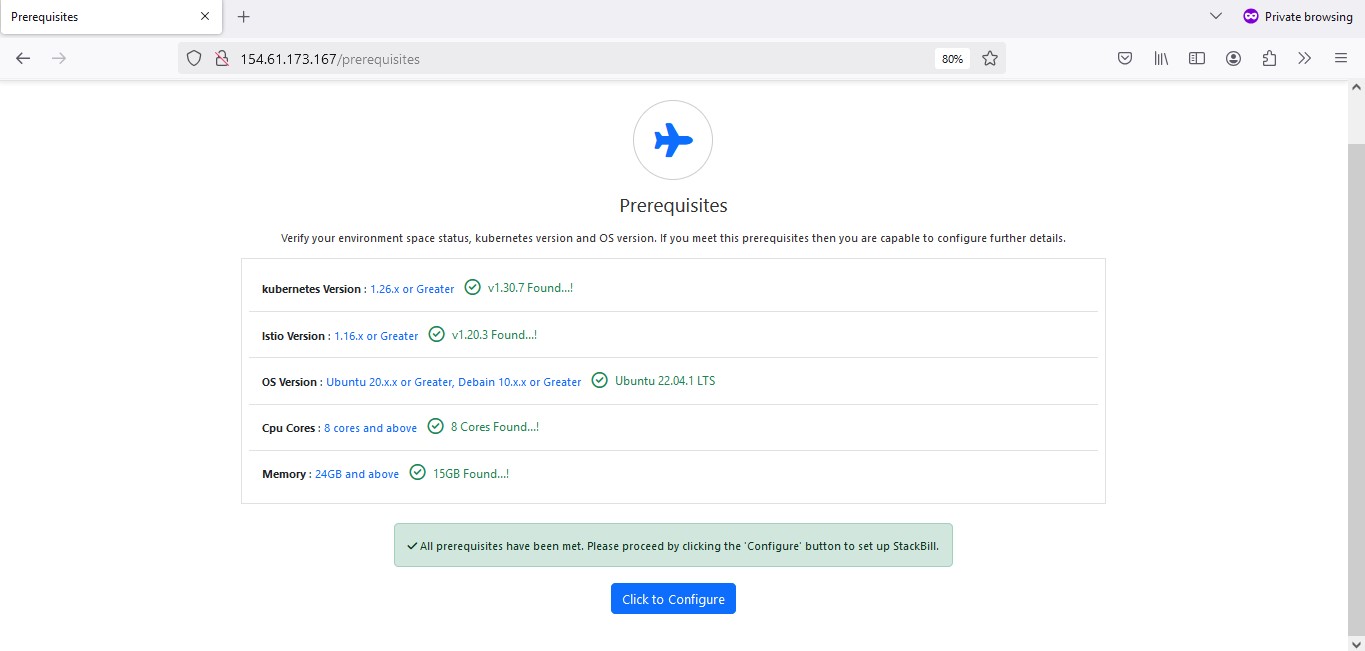
- The application automatically validates all necessary system requirements such as CPU, RAM, disk space, and network connectivity. Once all checks are confirmed as passed, proceed by clicking the "Click to Configure" button.
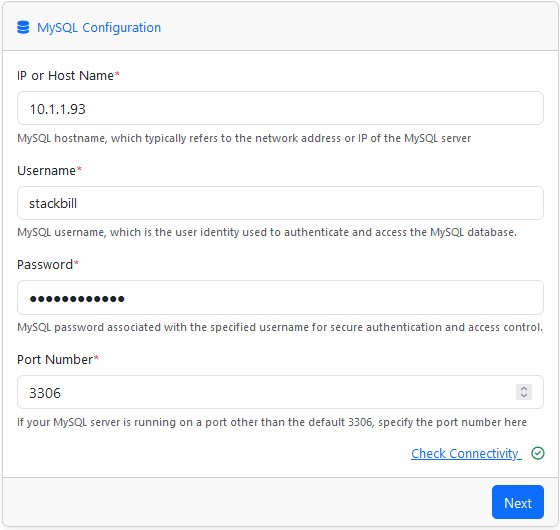
- Provide MYSQL information such as the MYSQL server's local IP address, username, and password, and then click the Check Connectivity button. Once communication is established, click the Next button.
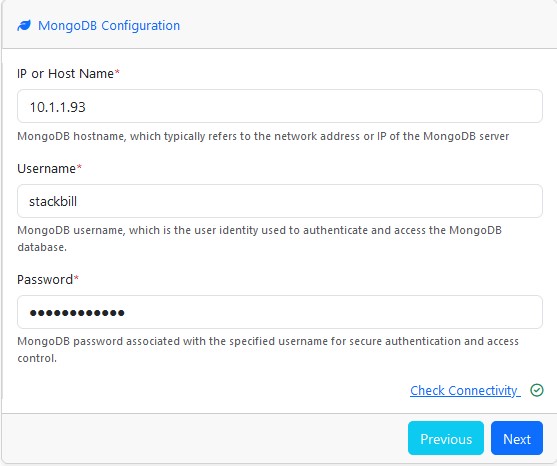
- Provide MONGODB information such as the MONGODB server's local IP address, username, and password, and then click the Check Connectivity button. Once communication is established, click the Next button.
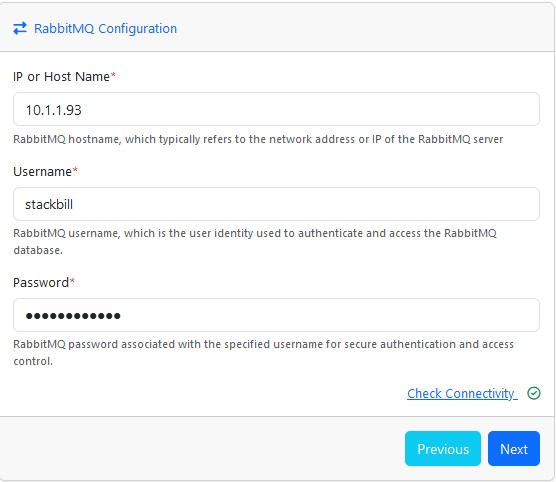
- Provide RabbitMQ information such as the RabbitMQ server's local IP address, username, and password, and then click the Check Connectivity button. Once communication is established, click the Next button.
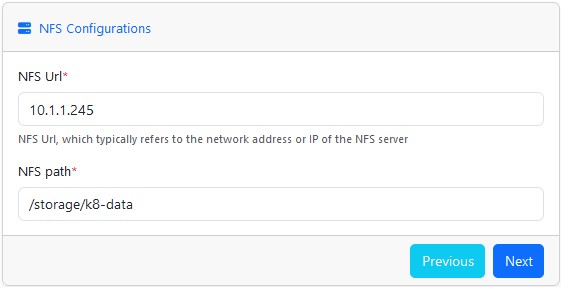
- Provide the NFS storage private IP and its default storage path, and select the Next button.
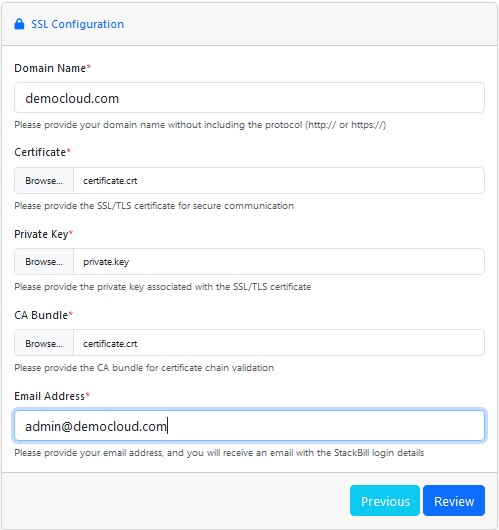
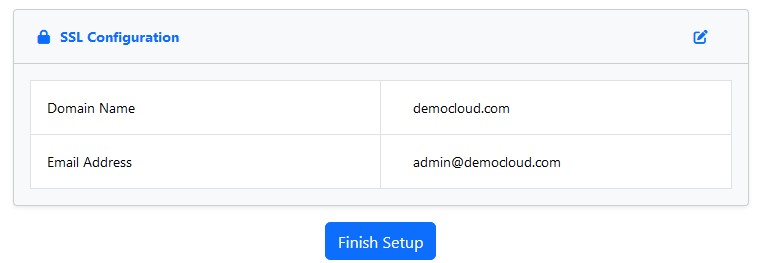
- Provide the domain name, domain certificate, private key, CA bundle, along with the email address, then click the Review button.
- Once you've reviewed all of the information, click finish setup to begin the stackbill installation.
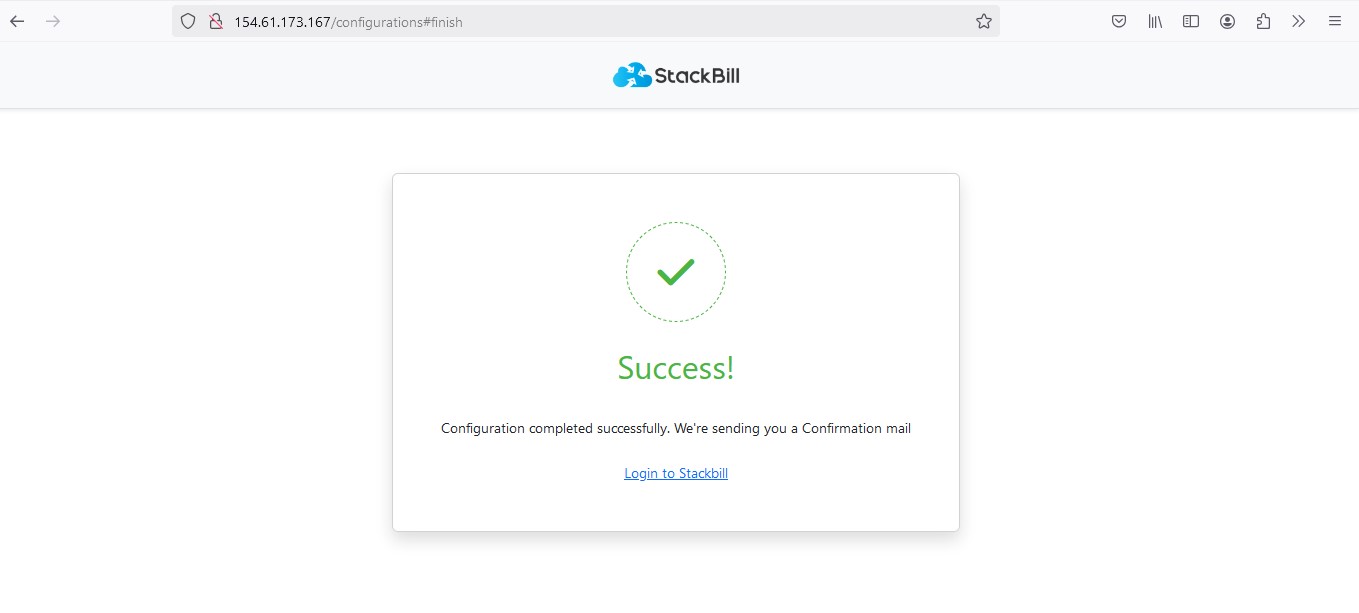
- Once the submitted information is validated, stackbill will begin deploying the application to the Kubernetes cluster.

- It will take several minutes to finish the stackbill installation. Once its completed, it shows “Configuration completed successfully”. Click on the Login to stackbill link to proceed further.
Post-Install Verification
Once Stackbill has been successfully installed, it is essential to validate the operational status of all related services and ensure the application is running smoothly.
Verifying application status
-
Ensure that all critical backend services, including MySQL, MongoDB, and RabbitMQ, are up and running.
-
Review the logs of each service to identify any errors that may have occurred during the Stackbill installation.
-
Address any errors or warnings as necessary.
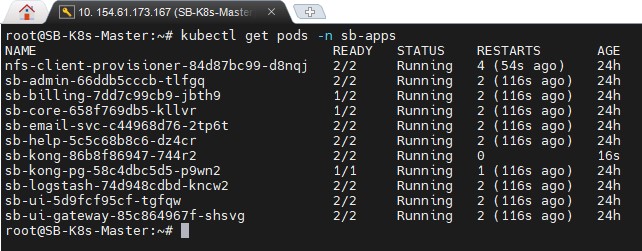
Verifying Application Pod status
-
The Stackbill application runs within a Kubernetes cluster in a dedicated namespace called sb-apps
-
To check the status of all pods within this namespace, execute the following command
kubectl get pods -n sb-apps